Match the Hatch Talk at the Reel Anglers Fly Shop

fft_logo

A Fly Fishing Traditions

and Reel Anglers 

Partnership Event


Fly Fishing Traditions – Match the Hatch Class

Blue Wing Olive & Pale Morning Dun Mayflies

April 2nd – 10:00 to 1:00

I have been working with Tom Page of the Reel Anglers Fly Shop for years and have come to an agreement for me to help the shop with it’s classes, workshops and other educational opportunities.  Doing “Tailgate Talks” on Saturday mornings about once a month will be part of the new program. So without further ado.

Come on down to the Reel Anglers Fly Shop for a “Tailgate Talk” about the Blue Wing Olive Mayflies and the Pale Morning Dun Mayflies. These two bugs are ones that you need to be familiar with as they are sought after by our local trout. You will learn how to identify the bugs, their biology, and their life cycle. You will discover what portions of the river they are found. We will discuss the hatch progressions and what techniques to use to find the fish during these progressions. Last but not least, we will match the hatch with recommendations of flies to use, nymphs, floating nymphs, cripples, emergers, duns and spinners. We will share how to build a fly box to be ready for these two important mayflies.

Best of all it is free!!!! Drop by the Reel Anglers Fly Shop and sign up so we can plan ahead. The spots are limited. So don’t miss out!

You can email me at clayhash.fft@gmail.com to let us know you’re coming.

Or you can stop by the Reel Anglers Fly Shop and talk to Tom.

The Reel Anglers Fly Shop address is;

760 South Auburn Street, Grass Valley, CA

530-477 -5397

Drift Boat Repair Project

I’ve been helping a new fishing buddy, Mark Ruef, repair his drift boat. It is an older Clackacraft that he picked up for about $1200, including a trailer that is in good working condition. A pretty good deal I thought until I took a good look at it. When I asked Mark how much he’d paid for it I said, “Do you think you might be better selling this and getting a better boat?”

The interior of the boat had been repaired with a big patch of fiberglass and epoxy. The previous owner didn’t prep the surface correctly and the fiberglass had detached and water and grime had gotten underneath it. The interior sides and bottom had been painted by what looked like a 2 year old. Again, no prep and the paint was peeling in a lot of spots. The rower’s seat and storage boxes were also re-painted and the paint was flaking off. So all the painted areas had to be prepped for new paint. The floor area had to be stripped down to the original bottom and re-done. A lot of work to say the least.

Mark dropped the boat off at my shop and we started working on it on weekends and evenings when he had the time. It was just roll up your sleeves and start sanding and grinding the surfaces to get back to solid surfaces.

The Bottom.

  • To prep the bottom we used a 4″ angle grinder with segmented sandpaper, I always referred to these disks as floppy disks. We used 60 grit disks and ground away all the bad fiberglass and epoxy.
  • Once all the loose material was ground down we had to get the entire surface sanded to accept new fiberglass and then paint. I decided to run a 6″ wide strip of bi-axial fiberglass tape at the junction of the bottom to the sides the interior chine. The bi-axial tape is saturated with epoxy and then put in place and smoothed out with a squeegee and a brush.
  • There were two metal brackets for the rower’s footrest had to be reattached with layers of bi-axial tape and then additional fiberglass cloth, all saturated and applied with epoxy.
  • Once the fiberglass had hardened the epoxy and glass had to be sanded with 60 grit sandpaper had prep in for the finish bottom paint.
  • We used a truck bed liner called “Durabak 18” for the bottom. This product has small pieces of hard rubber, mixed into it to give the finished product a non-slip surface. The bottom took two coats applied in different directions with a special roller provided by Durabak. The bottom is a dark green color.

The Interior Sides

  • The sides, front deck and rear deck needed resurfacing, mainly from a bad paint job. This means bad prep and sloppy painting by the previous owner. There were a few spots with exposed fiberglass that needed to be reinforced with fiberglass and epoxy.
  • The first step was sanding with an orbital sander using 80 grit discs. This went pretty quickly.
  • We vacuumed all the surfaces and wiped them down with acetone to etch and get the fine dust off.
  • We masked off the line where the sides met the bottom along with any other parts that were not going to be painted.
  • The color that was selected was an off-white. We used “Raptor” bed liner which is a urethane paint. It has a hardener that is mixed into it along with a paint tint. The paint is an automotive paint. The ratio is 4 parts Urethane base, 1 part hardener, and 1/8 part paint.
  • We elected to roll the material on with a 3/8″ nap roller. This ended up being the perfect choice for the boat. The material can be sprayed.
  • The “Raptor” bedliner took one solid coat and then a light second coat to cover.
  • This turned out perfect, and I do mean perfect!

Misc. Parts

Rower's Seat

  • The casting brace, rowers seat and the front seat needed to be re-painted. We elected to paint these parts with an urethane auto paint. We matched the original green of the casting brace.
  • The rowers seat had badly flaking paint so after a failed attempt to sand and paint it we had to use paint stripper to get down to the original base layer. Once stripped it was sanded with 160 grit paper and then painted.
  • We used a “Pre-Val” paint gun which is essentially a rattle can sprayer. It has a glass jar to hold the paint and an spray unit that screws on top of the jar. It delivers paint in a sort of mist that you apply very slowly. it worked great. The “Pre-Val” unit runs about $14 and extra spray heads run $6 each. We used 2 extra spray heads.

The boat has turned about as good as could be expected by two amateurs, probably in some ways better than new. But I guess that’s a biased opinion after all the hard work

Spey Casting Practice On the Grass

For those getting started with spey casting and really for just about everyone for that matter, it is a very good idea to practice spey casting on the grass or turf. Why?

Casting on the grass is convenient. Most everyone has grass nearby. It may be your lawn, a park or a nearby school. For most people the grass in closer that a river. The more often you practice the quicker you will become an accomplished spey caster. Is it better than practicing on the water? In some ways yes.


First of all you must have a “Grass Leader” to practice on the grass or turf. (See Below). The “Grass Leader” grabs the grass and will give you “Line Stick”. Without the “Line Stick” you will not have an “Anchor”. Does it grab like water? No, but it is good enough for practicing. A grass leader is tied up using 9-10 inch pieces of monofilament tippet material that is about .025″ – .030″ in diameter. When tied up using blood knots you will have knots about every 5 inches. This grabs the grass.


Another great thing about casting on grass is that you can stop your cast at any time mid cast to check line positioning. Rod path and subsequent line positioning are the keys to making a spey cast. Is my anchor in the right place? Is the “D-loop lined up correctly (180 degree rule)? Concentrate on;

  •  The correct rod path for the various spey casts. 
  • Work on smooth application of power. 
  • Quiet your top hand and come to a firm stop on the forward cast. 
  • Be aware of the use of the bottom hand it’s what starts the forward cast.

Grass is less distracting, you are not fishing! You are casting! . Pay attention to the details and get it right.

The “On Shoulder” Casts that you should practice are ;


  • Switch Cast
  • Single Spey
  • Double Spey
  • Circle cast
  • Snap T


The “Off Shoulder” or “Cack-Handed” casts you should practice are;

  • Reverse Single Spey
  • Reverse Double Spey
  • Reverse Circle Cast
  • Reverse Snap T

Practice may not make perfect, but it certainly makes you better.

Constructing a Grass Leader

blood_knot


To make a grass leader you will need some .025 to 0.30 tippet material or “Maxima”.

  • Cut 9-10 inch pieces of the mono-filament material. You will need about 20 – 24 – 9″ -10″ long pieces
  • Tie the 9-10 inch pieces together using blood knots. You will get real good at tying them! You only need 3 turns on each side tag of the blood knot when you are tying them.
  • Cut the tags to approximately 1/2″ to 5/8″ long. This will grab the grass barbules.
  • The grass leader wants to be approximately 10’to 12′ long.
  • Cut one last piece of mono-filament about 18″ long and tie it to one end of the grass leader. This will be what will attach to the integrated fly line or shooting head.

Blood Knot

Grass Leader

Believe me, you will get very good at tying “Blood Knots” when you are finished tying up a grass leader. It will take about 20 or more separate knots.

 A tip is to buy a blood knot tyer tool. It’s sort of cheating but whatever works!


Fishing in Drought Conditions

On the Lower Yuba River as well as many Northern California rivers, we have been dealing with drought conditions for most of the summer and into this fall. The rivers are running low and gin clear. The trout are obviously nervous during full sunlight hours and have often moved to aerated sections of the river or deeper holding water in runs, slots and pools. I’m stating this from observation and from fishing the river this season.

Here are a few conclusions from this summer

Fish the Riffles – During the summer months I have had better luck fishing deeper riffles, 2 to 4 feet deep, where there are boulders or larger rocks to create soft holding spots. When fished carefully and thoroughly I have sometimes been rewarded after being blanked in runs and areas where the water is low, bright and clear. When the sun is up higher, fishing the areas of the river where the sunlight shines to the bottom was often unsuccessful. The trout just are not feeling comfortable or safe.

Fish the Drop Offs – Fish the drop-offs where the riffles end and the runs begin. These areas have safe and aerated water for the trout. If there are bugs hatching in the riffles the trout may be right up tight to the base of the riffles. The trout often slide back to where the run below the base of the riffle settles down. Concentrate on the water that is still aerated and is moving at about fast walking speed to regular walking speed. If you can clearly see the bottom structure of the river the fish can or have already seen you and are long gone. Keeping your distance from the targeted water and fishing with as much stealth as possible is required.

Fish the Slots and Deep Runs – From a boat, use deep indicator methods with deep sets, 9 – 12 feet from the shot to the indicator, and fish the deeper slots and runs. Make long casts and extend drifts. Tend your drifts. Move stealthily. When fishing from a boat, don’t anchor or anchor as silently as you can. Use the most quiet oar strokes as possible. Fish and clear the water alongside you and then extend and feed drifts downstream. Fish the foam lines. Fish the slow walking to the slow crawling water. Let your drifts swing to the inside before stripping back and re- setting. Fish slowly. Take breaks. Rest the water.

If you are fishing deep slots where the current is flowing in a straight line downstream, strip off the indicator add some shot and depth charge your flies and tight-line them through. Add shot or feed line to reach the bottom if possible.

Fish the Shaded Water – From a boat, fish the shaded water on the southerly side of the river with searching dries and dropper rigs. Extend your leaders and use the lightest tippet material possible. Use downstream presentations and use reach casts to deliver your flies before the fly line. Work your flies downstream and keep them in the shade. If there are bugs, match the hatch with a dry / imitative nymph dropper or use a double dry /cripple / emerger dropper.

Fish Soft Hackles – Fish Soft Hackles and small streamers, 2′ or less, down and across in the softer runs and tailouts. This is where trout spey rods excel. If you don’t have one just use your dry rod.

Fish at Dusk

One of the things that I noticed all summer was that as the sun dropped to the ridge lines and the light got low, fish were often coming up everywhere in the softer runs and tailouts. In more normal water years this event may start 45 minutes earlier. The fishing was often fast and furious and continued after you could not see where your fly was. You’d feel grabs but were not quick enough to make a clean set. My solution which had a fair amount of success was to use a double dry or a dry cripple rig. I would use something, really anything, that I could see and keep track off. I sometimes used a golden stone with a white poly wing or a smaller than normal Fat Albert. I would trail a “Yuba Pinkie”, parachute, about 12″ to 14″ behind it. Another good trailer was a Harrop’s CDC Biot Emerger. I would scan and watch the water around the indicator fly and if I saw anything, splash, flash, bulge I’d lift the rod tip. Often I would be connected to a trout. I would fish short drifts, 10′ to 15′, and then try a different lane. Cover it well and move quietly downstream to the next spot.

Here are a few observations from so far this fall.

Find the Salmon or the Salmon Spawning Areas

In the Fall the trout in the Lower Yuba are almost always somewhere around where the salmon are. If you find salmon you will find trout and sometimes steelhead. The best fishing for trout amongst or behind salmon is at first light. This means to be successful you need to be on the river on the spot with a headlamp waiting for the sun to come up. Really! When the sun come up and hits the water the prime fish slide downstream to sanctuary water where they feel safe. Smaller trout often move up and grab eggs now that mom and dad have split. Overcast or rainy days can extend the early morning fishing time.

I fished the “Opener” on the Lower Yuba River this week and I had an interesting experience that reinforced the importance of fishing at first light. I hit the river about 30 minutes after first light. I found a spot on the river where there was a small pod of salmon on some spawning beds, probably 10 to 15, They were in the rollers in a shallow riffle. There was a tall ridge to the east of where I was. This kept the run in the shade for about an hour longer than most other areas of the river. I started fishing the run about 50 feet below the salmon. I concentrated on the base of the riffle where it dropped off to about 2 feet and then fished the run downstream from there. This run started about 2 feet deep and then slowly went to 6 feet deep and then tailed up slowly. The fish were podded up in this run and the fishing was what I would call pretty darned good. As I fished I watched the sun start creeping from the other side of the river towards where I was fishing. I continued to hook up and when the sunlight reached me it was if someone turned the light switch off. Done! Not another take. Moral of the story, fish at first light!

Hope this helps your fishing!

Clay

Tale of Two Days

The Lower Yuba river above the Parks Bar Bridge opened up on December 1st after being closed for 3 months. The river above the bridge is closed to protect spawning Chinook Salmon. The “Opener” is a much anticipated event that most local fishers have blocked out on their calendars, called in sick or just plain played hooky from whatever they should be doing. In other words there are a typically a lot of anglers on the river.

This is a tale of two days, the “Opener” and the “Day After”. It’s about a bunch of fish to the net on the “Opener” versus “A Few” on the next day. I’m not much of a fish counter so let’s leave the counting to that.

Here’s how the opening day went.

I made it down to the river early with my good fishing buddy “Frank Rinella”. We’ve fished the “Opener” for many years, it’s sort of a ritual. Something we both look forward to. We hit the river at about 7:30 and took a survey of the river where we launched the boat. There was a drift boat with two wading anglers in a different run a fair distance above where we were. There were two anglers fishing the tailout of the run we were in. I noticed 2 more anglers hiking upstream. We really had one choice, get it the boat and fish the run right in front of us. This run is known for the spawning beds for salmon just upstream at the head of the run. This run goes from the drop off at the base of the riffle upstream to a nice run that is about 5 feet at the deepest and then tails out. It is about two football fields long. We had about 200 yards to fish for ourselves. Pretty darn lucky.

We had to rig up and get to fishing before the crowd closed in on us. Frank set up a nymphing rig with a Troutbead and a San Juan Worm and started fishing. I had to put my rod and reel together and get set up. Franks was into fish immediately. It took me 10 minutes to get rigged as I kept getting distracted netting his fish. As far as my rigging up I really had a couple of things I could do, but there were salmon beds upstream and a few salmon in the riffles splashing around. So the choice was obvious to me. My Egg Rig!

I tied up a three fly rig. I started with a 9 foot 3x tapered leader, extended with 3x Fluorocarbon tippet to a painted Troutbead, natural color. I tied another 18″ piece of 3x Fluorocarbon and tied on a black rubberleg stonefly, I then added another piece of 4x fluorocarbon and added a size 18 Flatulator, (BWO). When all tied up the flies are about 14″ to 16″ apart. I then placed two decent sized split shot at the first tippet knot above the Troutbead. This is sort of my standard rig for fishing the runs below most any spawning beds. The egg goes closest to the leader, followed by by an attractor and then a imitative mayfly on the point. I mostly fish this rig without an indicator and just stay tight to the flies. I often add an indicator to the rig but I typically start out “Tight-Lining”.

Once I got rigged up Frank took a break and watched me fish. I had similar luck.

We fished this run and found a bunch of willing fish. They slashed at the Troutbeads at will. Quite a pod of fish. They averaged about 12″ to 13″. 3 out of 4 took the beads, I caught 2 on the Stonefly, Frank caught a couple on the San Juan Worm. Not one on the mayfly. The fishing was fast until the sun rose over the ridge and shined on the river. It slowed down almost immediately. Not that it stopped, it slowed down. We fished this run and headed downstream in the boat. The rest of the day turned into a fish here and a fish there and then shuting down at about 2:00.

The summary for the “Opener” was great, a bunch of fish to the net, mostly in the first 2 hours,  mostly about 13″ (the largest about 15″-16″, mostly on Troutbeads. Fishermen all over the place and hard to find open water.

So on to Day Two. Frank and I decided to come back the next morning and fish until about noon. Basically start at the same spot and get there about a half hour earlier. We expected the crowd to thin out considerably and not be as crowded as the “Opener”. We got there as planned, rigged up pretty much exactly as the day before. No one on the river. We had the river to ourselves, at least early on. We started with high hopes, we fished the same run as the day before, we got our clocks cleaned. Not a bump. This was after changing rigs, flies, techniques the works. We could not buy a fish. (actually 1). We took our lumps and headed down stream. The count for the half day was three. Three is easy an easy number to keep track of. A Bunch is hard.

So, the tale of two days, A bunch to a couple. I guess that’s fishing, it’s also about sore lips and  fishing pressure!

Updated Fly Fishing Traditions Website

After about 2 years of wanting to update the Fly Fishing Traditions website I finally hooked up with Linda and Mike of Sundial Design which is located in Redding, California. They designed a website for my friend and mentor, Mike Hibbard. I saw that Linda and Mike designed his website and did what I think was one hell of a job. I met with Linda and we were on the way to a new and improved Fly Fishing Traditions.

Is it much different? I would say it is a new and updated look more than anything. You can now view the website on any devise and it will look just right. The format is pretty much the same. The Bug Pages and the Hatch Chart haven’t changed much, just simpler and easier to navigate.

The main difference is that the Fly Fishing Traditions Blog will up front and center on the Home Page. It’s where it should be because it’s what I enjoy doing the most. Writing articles about my fly fishing experiences and journeys. The old Blog that was ru through Blogger will now be an archive of past Blog posts.

Another big change is that the recommended fly patterns have been updated in the “Hatch Chart”, “Bugs Section” and in the “Master Fly Pattern List”. There are new fly recommendations and all the fly patterns listed are now in a “PDF” format and most include tying recipes. If you see something you like, you can print it out and tie some of them up. It should inspire you to get set up with your tying and fill your fly boxes up. Figure out what bug you are trying to imitate, decide what stage, select a pattern and start tying.

Last but not least, I’ve focused on the educational classes, workshops, clinics and guiding that I am offering to those that want to take their fly fishing skills to a new level. I have a new item on the navigation bar, “Workshops” which will give you detailed information on the classes, workshops and schools that I now offer to you as an individual or to groups from fly fishing clubs here in Northern California.

Take a look at the new and updated Fly Fishing traditions and let me know what you think.

Clay

Airflo Rage Compact Review

I met with Jason Lozano, the Airflo rep, a while back and he said that the new Rage Compact is really taking off.  I was a little confused as the new Rage Compact is considered a Skagit head so what’s the difference between the Rage and the standard Skagit Compact? I did some research at Deneki.com and came up with some information to share. Let me try to explain it.

The designers at Airflo had already come up with four basic head designs. Three which have been around awhile and the Skagit Switch which is relatively new.

  1. The good old Skagit Compact was designed for for sink-tip fishing, like T-8, T-11, and T-14 sink tips.
  2. The Scandi Compact was designed for for finesse dry line work, and light tips, primarily the ones that are part floating and part sink tip.
  3. The Tactical Steelhead for those that appreciate a longer casting stroke and want the versitility of a multi-tip line.
  4. And the new Skagit Switch, which is designed as a sink-tip line for switch rods and shorter Spey rods. I’ll explain this new line in another post.

However, the Airflo line designers felt there was a void in the line-up.

The Rage Compact Was Conceived

Airflo came up with the idea of the Rage Compact. Their thoughts on the Rage were that they needed an additional and different design for floating line presentations. The Scandi heads, which covers finesse dry line work, are great for line speed and tight loops. However, Scandi heads have their faults.First, they suck in the wind. The long, delicate front taper which gives Scandi’s their finesse-like feel, crumbles in even a modest breeze. The other problem with Scandi heads is they struggle to turn-over skating flies and large wet flies. There just isn’t enough mass in the front of the line to give the caster sufficient turn-over. Another shortcoming is that most anglers struggle when they switch from their Skagit to their Scandi. I know I do. The Skagit versus the Scandi lines cast so dramatically different.

Tom Larimer with the blessings of Tim Rajeff, the US distributer of Airflo and over-all casting guru designed the new Rage Compact. Tom Larimer with the help of the Rajeff design team came up with a Spey line built for surface and near-surface presentations that cast like a Skagit but still had the finesse of a Scandi. The new Airflo Rage Compact is the perfect floating line to compliment your good old Skagit Compact. This is purported to be the best floating spey line Airflo has ever come up with.

Lining Your Rod  With a Rage Compact

To determine the correct weight to choose and as a general rule of thumb, line your rod 30 grains lighter than your Skagit Compact. If you like a faster-livelier feel to your floating head, go 60 grains lighter. Like all of Airflo’s Spey heads, the lines comes in 30 grain increments and are available in 360 grains to 600 grains.

Rigging Your Rod with a Rage Compact

As far as rigging, they recommend using a 10′ Airflo Poly Leader with 2′ to 4′ of tippet. It is also recommended to fish an intermediate leader with skating flies.If you fish shallower rivers in the West, the Rage will easily handle a sinking Poly Leader and an un-weighted fly. It’s a great line on rivers where a full blown sink-tip is overkill. It isn’t recommended for casting big weighted flies, but it’ will cast un-weighted flies or tube flies a mile.

Try the Rage for Switch Rods!

The Rage also casts great on a switch stick.Line it exactly the same as your Skagit Switch. Just for reference, most #7 weight switch rods are taking a 450 grain head. On a #6 weight, a 390 grain head.

Airflo’s New Loop Labels

Loop
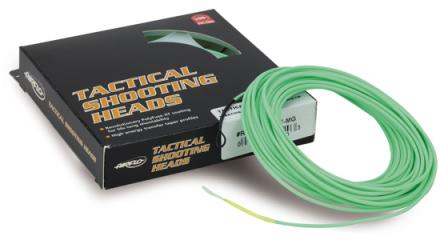
A new feature on all Airflo Spey lines that the labeling of line type/size is on the front loop, plus the old color coded system.

Now you have an easy way of identifying your Spey lines!


In Summary a Quote from Airflo’s Tim Larimer

I think Tom Larimer sums it up by saying, “If you love the feel of casting Skagit heads and want a floating line that cuts through the wind, turns over with total ease and doesn’t take a PHD. in casting to make it huck, give the new “Rage” a try. I guarantee it will elevate your floating line casting and fishing”.

The Airflo Skagit Switch Line Review

Whoever came up with the idea of Switch Rods was had his head on straight. Someone came up with the idea to build a rod that can do everything from Spey casting to overhead casting. It would be the perfect rod for small and medium sized rivers. For those of us that have purchased one we’ve had a heck of a time figuring out what to line them with. I’ve about tried them all. The rod builders sold the rods but didn’t really have the lines to match them with. How many of you have been throwing a Rio Indicator line two or threes line weights over. Get the picture. I checked out Larimer Outfitters’ website and got the story as to how the Airflo Skagit Switch line came about.

The Airflow Skagit Switch Story ( from http://www.larimeroutfitters.com )

Tom Larimer, who is on the Airflo design team, approached Tim Rajeff, (the US distributor for Airflo fly lines) with the problem we were all having with other switch lines on the market. Switch rods are designed more like a traditional single hand rod taper, meaning that they are fast in the butt section and flex progressively through the tip giving the caster the ability to overhead cast them. However, a Spey rod taper is typically slower in the butt section and faster through the tip section. This allows the caster to form the D-Loop and change the direction of the cast without the rod wanting to unload too quickly. The load is sustained through the whole casting cycle until the cast goes outbound. It’s the reason why Spey casting feels so good!

Because switch rods want to unload so quickly, Airflo wanted to find a way to slow them down giving the caster the same sensation they get from their traditional Spey rod. Until now, there hasn’t been a fly line that sustained the load on the faster tapers of most switch rods. This is why it’s been difficult (and not fun) to perform double Speys and snap-T casts with the lines currently on the market. For those of you that have tried switch rods with what’s been available, you’ve probably noticed “touch and go casts” like single Speys and snake rolls work all right. However, if you want to jack a snap-T with a big sink-tip and a heavy fly it isn’t very fun.

The Result the Airflo Skagit Switch Line

After a lot of thought and a couple of prototypes, Airflo came up with the solution to the switch rod  lining problem.

  • The new Airflo Skagit Switch line has a huge rear diameter and two-foot rear taper. This helps sustain the load on the rod giving the caster that sweet feeling of Spey casting we all have been waiting for.
  • The front taper is a big 7’ wedge that turns over your biggest tips and heaviest flies.
  • This line was built to make switch rods not only fun to cast, but to make them legitimate fishing tools.
  • The heads go from 540 grains down to 360 grains in 30 grain increments.
  • Although Airflo built this line for anglers chasing steelhead and salmon, the smaller sizes are perfect for trout and smallmouth anglers looking to swing streamers on switch rods.
  • All of the heads are marked on the loop sleeve telling you what the line is and the grain weight.
  • As a general rule of thumb, go 30 grains lighter than what you normally fish in a Skagit Compact.

According to Tom Larimer “If you’re a fan of the Airflo Skagit Compact, you will love this line!”