Fishing a Drop-Off with an Upstream Presentation

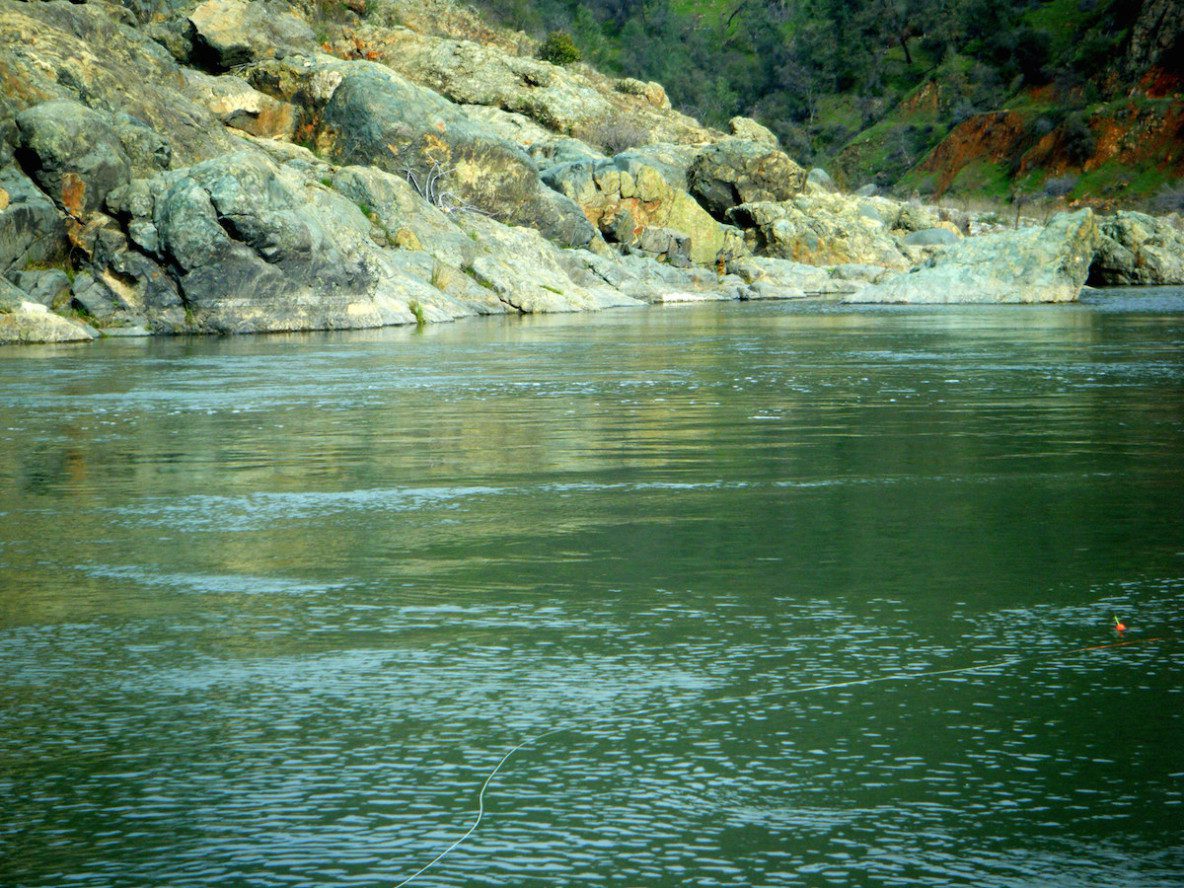
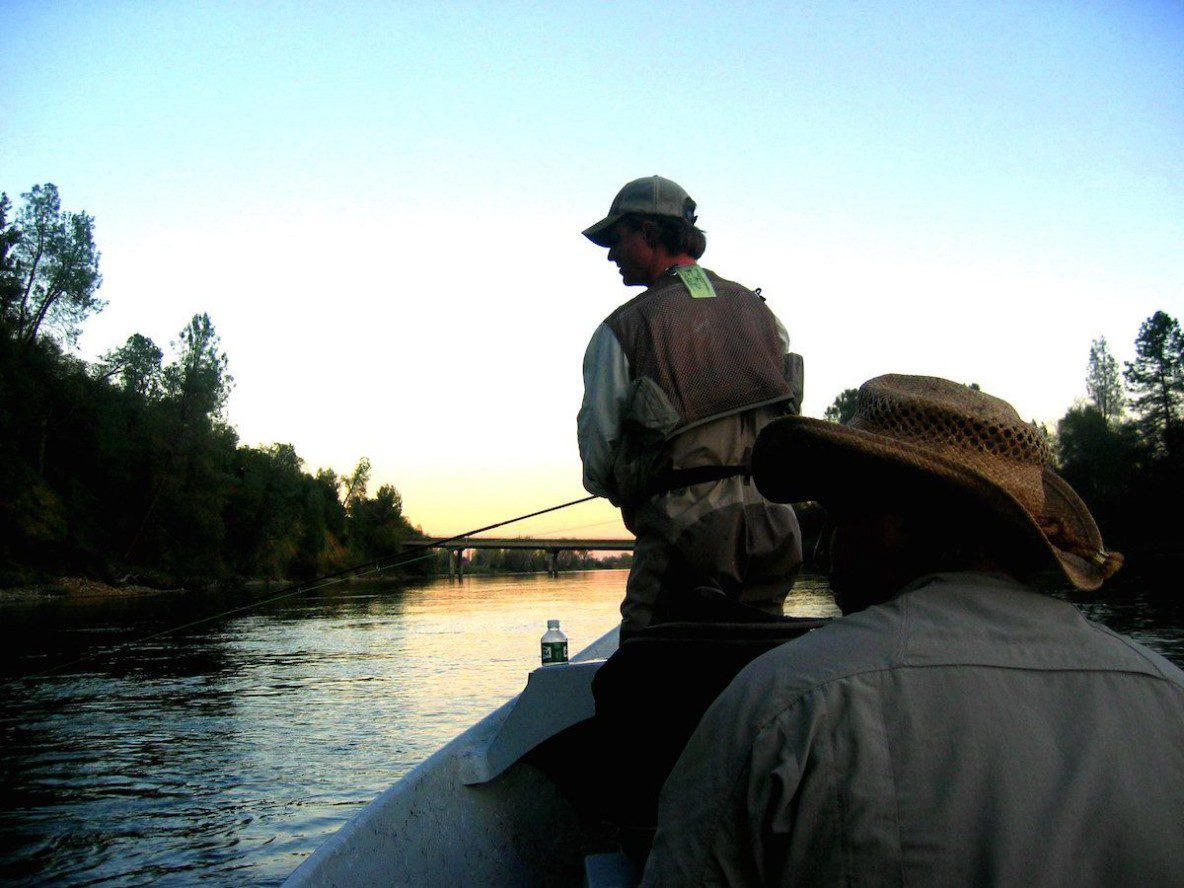
When wading on the Lower Yuba and nymphing you will sometimes encounter drop offs at the base of the riffles with a run directly below it. This is another very effective presentation technique, when you have a riffle that transitions into a run right at the base of the riffle. This method also works well when the depth of the water you are standing in is deeper and it is hard to wade very deep. This is very effective when mayflies are coming off in the riffles.

Next time you’re out fishing try this nymphing method;

This is another very effective presentation technique for fishing the base of a riffle.
(1) Rigg with a standard Indicator Nymphing Set-up

(2) Start from a position ankle deep and work your way deeper after using the “Shotgun” technique of covering the water closest to you.

So this is how it works

(1) Place a quartering upstream cast so that it lands 6 to 8 feet above the drop off, it’s important not to mend at this point as the flies are getting deep in a controlled manner. If you throw a big mend popping the indicator upstream, the flies they will rocket down and get hung up in the rocks.

(2) After the flies hit raise the rod tip and (high Stick) the indicator with as much line off the water as possible without drawing the indicator back towards shore. They need to be able to continue a straight line path downstream.

(3) Lead the indicator downstream towards your position. If there is a take and the indicator dips, set downstream.

(4) Once the flies are slightly downstream of your position, place a big mend behind the indicator without stopping its downstream progression and follow with your rod tip, lowering it as the rigg moves downstream.

(5) Continue mending and feeding as far downstream as is practical and manageable.

(6) If the indicator, stops, moves upstream, or goes down set to the bank downstream, again not upstream over your head.

Try this method, you’ll like it!

Nymphing a Run or Riffle Corner

Runs and Riffle Corners

On the Lower Yuba River you will find many runs that are prime targets for holding fish. These are portions of the river that flow with an even depth from 4 to 8 feet deep.
You will also encounter riffle corners at the base of a riffle. This is a v-shaped slot that if you’re looking up stream you will see the soft spot right at the top of the vee. This spot and the soft water downstream of it are one of the prime spots for fish to hold and feed as the nymphs get pushed down the riffles and into these soft side waters. This is especially true if there have been hatches in the days prior.

The first rule when fishing a run or a riffle corner is not to step into the water, before you have “cleared it”. You must fish the runs and riffle corners from the bank or you’ll likely be stepping on fish. You what to use the “Borger Shotgun Method” and thoroughly cover the water before you step into it.

So, let’s go through how to do it

(1) First off you want to envision lines running parallel to the current running downstream about 1 to 1 1/2 foot apart.

(2) These are the lines you’ll be running your flies and indicator through.

(3) Set your indicator to roughly 1 1/4 times the depth of the water you’ll be fishing and make sure you have enough shot on. More than you think.

(4) Feed out line directly below you the distance that you want to cast upstream.

(5) Once the line is out, point your rod tip at the indicator downstream.

(6) Set up your footing so you are facing partially upstream.

(7) With a smooth deliberate motion, pick the line up and follow through upstream and point your thumb at the target area.

(8) The flies, shot and indicator hit the water up stream and your ready to start fishing.

(9) Raise your rod tip as the indicator and flies start downstream (High Stick) keeping most of the line off the water.

(10) As the indicator floats downstream, and then floats just past you position, mend the line upstream of the indicator and then lower the rod tip as they move downstream.

(11) Once they are at the end of the drift let the indicator and flies swing directly below you and then do it all over again but place your cast 1 to 1 1/2 feet further out (on the next line).

You repeat this until you’ve reached all the water in front of you where you think might hold fish. Once you’ve fishing 15 feet or so out from the bank you can carefully and stealth fully start wading in to enable placing your casts further out. Most of the water close to you can be fished with a fixed amount of line. As you fish further out you will need to keep mending, possibly stack mending and using good line management techniques to keep your rigg dead drifting correctly.

Summary

This is the basic nymphing technique that you can employ wherever you roam. Once you add mending skills and line handling skills you will have all the basics down and you will have then be a successful nympher!

Nymphing Riggs for the Lower Yuba River

One thing I think most fishermen are guilty of, is not changing their tactics and rigging enough, based upon the changing characteristics and water types of the river we are fishing. I know I am.

I have fished the Lower Yuba River for many years and quite a bit in the last couple of years or so, mainly from a drift boat. When fishing above the Parks Bar Bridge I wade fish more than below the bridge. I’ve been thinking lately about the structure of the river and the character of the runs and how that should effect the way I rigg and present my flies. I’ve broken the river into four water types. The different structures and water types requires changing tactics as you move from type to type. I think we all have a tendency to rigg up a certain way and just stick with it. We may change our rigg slightly or the way we present our flies but we probably don’t change enough or effectively.

I’m mainly discussing tactics used from a moving drift boat which is what I do most of the time, although many of the tactics are similar to what I’d use when wade fishing.

I have broken the Lower Yuba River into 4 structure/water types. They are;

  1. Runs
  2. Tailouts
  3. Deep slots and Pools
  4. Shallow Runs and Redd Areas

These are typical water types that can be found on most western rivers. The point here is how should I best rigg to fish these different water types on specifically the Lower Yuba River?

Water Type #1 – Runs

I classify runs as water that flows at a fairly consistent velocity and has a consistent depth. The depth can be from 4 to 10 feet deep. The key here is that these sections of the river have relatively consistent depth and relatively consistent speed. Ideally from walking to fast walking speed. For these runs the choice is either set up with (a) indicator, or set up for (b) “Tight Line Nymphing.”

Rigging Indicators for Runs – For runs you can rigg up with an indicator and about 6’ to 9’ of tippet from the indicator to the shot depending on the depth of the run. I usually rigg up with a tapered 2x x 10’ leader. I prefer to use the tapered leader so I can adjust depth easily. On runs I prefer a “Thingamabobber”, large size, white color. Being there is a fairly consistent water speed, I’m know pretty well where my flies are running. I can use variations of this indicator set-up to fish the whole Lower Yuba River.

Presentation Using Indicators for Runs – I believe that the Yuba requires stealth with your presentation and set ups for your drift. I usually try to be at least 2 rod lengths (18 to 20 feet) from the boat and sometimes even further than that, closer to 3 rod lengths. (28 to 30 feet). I personally use a 6 weight 9’6″ Sage XP or Z-Axis and it does just fine. Keep mending as required to keep the indicator moving in a straight line downstream. Keep your rod tip pointed at the indicator and mend to keep a fairly straight line to the indicator. Set at any movement of the indicator.

Tight Line Nymphing Rigg for Runs – The rigging for tight line nymphing is the same for indicator but without the indicator. It also requires more weight. Add shot until you can tick the bottom. Keep the flies running in line with your fly line if possible or even better leading the way. If you are managing your line properly and keeping in contact with your flies you will feel the take.

I use a Rio Nymph Line with an orange tip section. When the flies are settling into position and when you are mending watch this section at the tip/ If it moves suddenly or stops, Set. You will probably not feel the takes as the flies are moving down in the water column. or when you are stacking or feeding line.

Fly Rigging for Indicator or Tight Line Nymphing of Runs – I’ll run three flies under the indicator, each spaced from 12″ to 18″. The deeper the run the larger the spacing. I use 3x flurocarbon from the shot to the 1st fly (largest fly), 4x flurocarbon from the 1st to the 2nd fly ( 2nd largest fly) and 5x flurocarbon from the 2nd to the third fly (smallest fly).

Water Type #2 – Tight Line Nymphing the Tailouts

An effective way to fish tailouts is also using tight line nymphing methods or swinging soft hackles and nymphs through the tailout.

Tailouts – I’ll classify tailouts as the shallowing of the river as in flows to the lower end of a run or pool before it transitions to a riffle.

Rigging for Tight Line Nymphing at Tailouts – The rigging for fishing the tailouts is the same as for indicator fishing, except the indicator is removed. This is one reason I really like the “thingamabobber” as it is easy to remove and put back on. You will also have to strip some weight off so the flies don’t hang up.

Another good idea is to have a 5wt rod strung up and ready to go. Rigg it up for dries with a 1o ft. 4x or 5x leader. I like to rigg with a 4x leader and extend it to 5x or even 6x if necessary.

Fly Rigging For Tight Line Nymphing at Tailouts – I’ll run two or three flies when fishing the tailouts, each spaced about 12″. I use 3x fluorocarbon from the shot to the 1st fly (largest fly), 4x fluorocarbon from the 1st to the 2nd fly ( 2nd largest fly) and 5x fluorocarbon from the 2nd to the third fly (smallest fly).

If a decide to swing a streamer I’ll sometimes shorten my leader and run a single fly. Using tungsten putty in stead of shot will get your streamer down and keep from hanging up in the rocks as much. I’ll uually rigg wih 3x fluorocarbon in this instance.

Presentation from a Moving Boat Using Tight Line Methods – If you are drifting through a tailout you cast your flies at a right angle or slightly in front of the boat and point your rod tip at the flies and lead then through the tailout. You want the flies to be tumbling downstream and not swinging when fishing from a moving boat. Be careful not to get too much of a downstream belly on the line or the flies will race through the tailout. Re-cast if the flies are running too fast and spot a new likely holding area.

Presentation from an Anchored Boat Using Tight Line Methods – If you have anchored the boat, cast your flies quartering downstream and mend your line as required to slow down the drift and the swing of the flies. Extend your cast and divide the river into grids and cover the likely holding water. You can also try adding a twitching action with the rod tip as the flies start to swing. Let the flies dangle, “hang down” and strip back up before you pick up to re-cast. Fish sometimes will hit it on the “hang down” or when you start to strip.

Fishing a Dry Rod – If there are fish up in the water column and rising this if a perfect time to throw dries, emergers and swing soft hackles. This is the time to use the 5 weight rod strung up in reserve. Rigg it up as you would to throw dries and either throw dries or emergers to rising fish or swing soft hackles. This can be some of the most fun fishing on the river.

If I see a pod of fish rising I like to target a single fish and present a cast about 15’ to 20’ above the fish and to the seam about 2’ to 3’ beyond the targeted fish. I feed and dead drift the flies downstream, clamp off the line and swing an emerger with a soft hackle trailing behind in front of the fish. Leave a loose coil of line in your line hand and if the fish takes let this slip from your fingers and just raise the rod tip. Setting hard will break you off almost every time.

Other Tactics for fishing the tailouts from a Boat – Another way to fish the tailouts from a drift boat went fishing with a tight line set-up goes like this. As you slowly drift towards the tailout, cast your rigg quartering downstream towards the main current seam. The boat should be positioned to the inside of the faster water. You can feed line out and create a great amount of stealth keeping a good distance between the boat and the flies. As the boat floats downstream and then approaches the tailout the rower oars to stop the boat from moving downstream and ferries slowly across the tailout from the main current across to the inside slower water. Soft, quite oars strokes are a must to keep from putting down the fish stationed in a tailout. In effect the rower is swinging the flies all the way across the tailout. After working the water across row back upstream, ferry back into the main current and then do it again. This time go a little further downstream into the tailout. You can repeat this many times and change flies and hopefully keep from putting fish down.

Water Type #3 – Deep Slots, Back Eddys and Holes

On the Lower Yuba as you move from water type to water type you will encounter some really deep slots, back eddies and holes (often referred to as salmon holes). You can fish these areas with a deep indicator setup or a tight line nymphing setup. I have heard many accounts that the biggest fish taken on the Lower Yuba are caught from the Deep Slots, Back Eddies, and Holes. These areas are sanctuary water for the largest fish in the river.

Rigging for Deep Indicator Nymphing the Deep Areas – This is where using a “Boles” indicator can payoff. The best way to rigg for fishing the deep Areas with an indicator is to tie the “Boles directly to your line about 24” from the tip of your fly line. Then tie straight tippet material to the “Boles” with a clinch knot, usually 3x mono. Even smaller 4x is better if you think you can get away with it. It you are targeting the biggest fish in the river 3x seem right. Using straight tippet material allows the tippet to cut down through the water column better than a tapered leader. For these deep areas I usually run about 9’ to 10’ of 3x tippet to the shot.

You can also continue using the same tapered leader and the “thingamabobber” if you don’t want to re-rigg by raising it al the way up your leader and adding additional tippet.

I am really targeting fish suspended in the water column with this depth, as I will typically not be able to get close to the bottom. These areas are much deeper. You can run 12 or 14 feet of tippet to your split shot if you can figure out how to cast it. If I want to go deeper than 10’ I think it is better to switch to using the tight line method.

Presentation for Deep Indicator Nymphing the Deep Areas – This is where the post on the “Boles” really helps you out and will help you determine if you have put on enough shot. In these deep holes you want the post on the “Boles” to stay relatively vertical. Of course there is sometimes a lot of current pushing everything around. Fish the inside seams, stay out of the main current tongue. Keep your rod tip pointed at the indicator and keep as straight a line to the indicator as possible. Set at the smallest movement, down, upstream or even a hesitation by snapping your wrist and lifting your rod tip. Keep your hands in the box at your chest. Don’t reach above your head on the set.

Rigging for Tight Line Nymphing the Deep Areas – If the idea is to get down to the bottom the tight line method is the best way to go. The rigging for tight line nymping the deep areas is the same as for standard indicator fishing, except the indicator is removed. You will have to put on a lot of weight. Some of the local guides use lead shot, “Water Gremlin” in this situation.

Presentation for Tight Line Nymphing the Deep Areas – In most of these deep areas there is a heavy tongue of water and the key is to fish the inside seams where the current isn’t pushing your fly line all over the place. You want to fish the seams where you can maintain a relatively straight line to your shot and flies. Look for seams that allow you indicator to move downstream at “walking speed”. Cast your flies quartering upstream into the seam and stack mend or feed line to get the flies down deep, I mean really deep. If you can contact the bottom from time to time all the better. Keep adding shot to make sure you are getting down. If you are hanging up take some off. Let the rigg drift through and hold on. The takes can be hammered.

Water Type #4 – Shallow Runs and Redd Areas

On the Lower Yuba there are long shallow runs and shallow riffles where tight line nymphing works well. This also holds true for areas where there are “buckets” or “rollers” from recent or past salmon redds.

Shallow Runs and Salmon Redds – This water type is classified as having a consistent depth and speed, with depths from 3 feet to 18″. There are shallow and deep Redd areas through out the course of the Lower Yuba River. The depth is variable in these areas as they roll up and down. The depths of the redds can go from 6″ to 3 feet deep in the “rollers”. There are some redd areas that go from 4 feet to 6 feet deep. They are all fishable with the tight line method. As a note these deeper redd areas can also be fished successfully with the indicator method.

Rigging for Tight Line Nymphing the Shallow Runs and Redd Areas – You can rigg up just like the standard Indicator rig but do not put the indicator. You need to put on just enough weight to enable the flies to tumble along the bottom.

Presentations for Tight Line Nymphing the Shallow Runs and Redd Areas

1. Fishing The Redds with Salmon Present – When drifting down the river and running through the redd areas there are times when there are salmon present and spawning and times when they are not. When fishing the redds when the salmon are present you need to cast BEHIND THE SALMON. The trout and steelhead that you are targeting are the ones stationed BEHIND THE SALMON. Casting into the redds where salmon are present will only end up foul hooking the salmon. When fishing the redds cast behind the salmon, set up your drift rolling the flies along, and then pick them up as soon as you see the drift coming into more salmon. Re-cast behind the next pod of salmon and so on down the run.

2. Fishing the Redds when Salmon are not Present – When fishing the redds when salmon are not present, cast your flies in on the top or slightly upstream of the redds or buckets and let the flies tumble into the bottom of the redd. This is where the steelhead and trout will be. Roll the flies through and pick back up and re-cast to the top of the next bucket, etc. If the rower can slow down the speed of the downstream progress of the boat attempt to make repeated presentations to the same redd or bucket.

Presentations for fishing the Shallow Runs – You can use the same rigg for fishing the shallow runs. Present your casts at a right angle to the boat and mend to keep your line straight to the flies and even better have the flies run in front of the line keeping contact and feeling the shot tick the bottom. The rower should back row at the correct speed to allow the flies to lead through the run.

It is OK to have a slight dowmstream belly on the fly line, just not two much, 2 to 3 feet at the most. Add or take off shot as required. Keep your flies running at least 2 rod lengths to the end of your fly line for stealth. Keep in contact with your flies and strip in line as required. Hold on as the takes will be sudden and can be hard. Set downstream and keep your rod tip parallel with the water. Strip set as you move your rod tip downstream. Good Luck!

If you are stationed at the rear position of the boat you can cast slightly behind the boat and keep the line straight to the boat by stripping to keep it tight. If the flies start to “troll” pick them up and straight line cast the back further downstream. I first used this method on the Klamath River under the tuteledge of Craig Neilson. It worked and it was a gas!

Summary

I hope some of these thoughts prove helpful to you on your next drift down the river.

Note:

A very good book to read about Nymphing is; Active Nymphing – Aggresive Strategies for Casting, Rigging and Moving Nymphs, written by “Rich Osthoff”
Fishing a Drop-Off with a Downstream Presentation

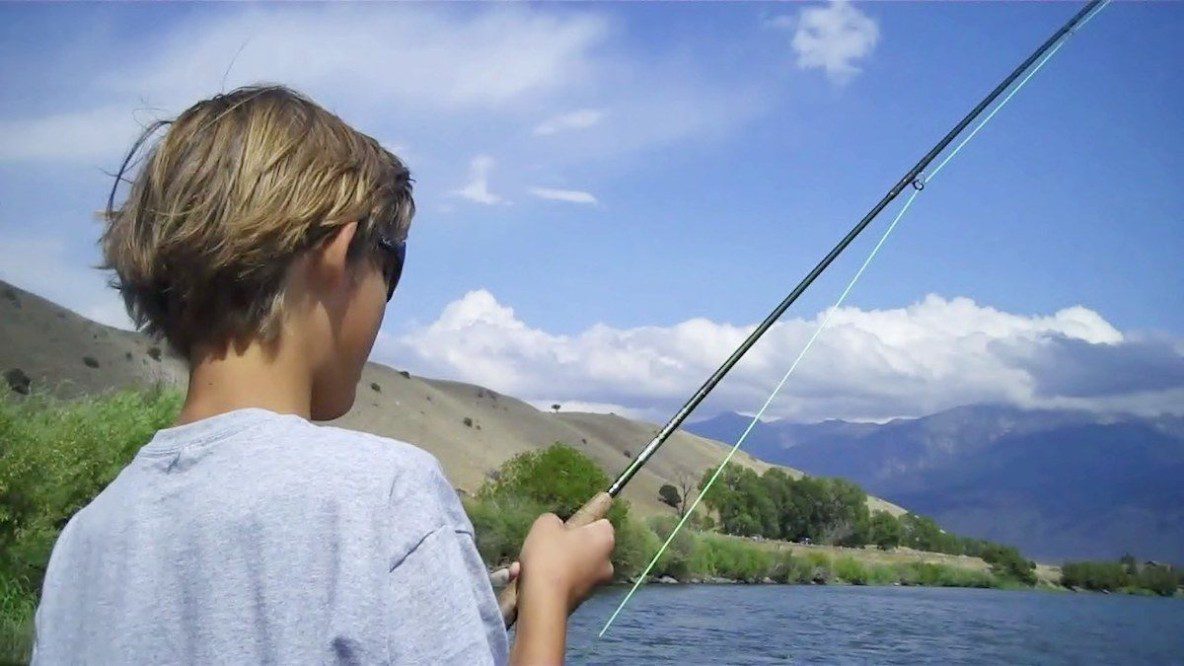
When wading on the Lower Yuba and for that matter any freestone river in the Western United States, you will sometimes encounter drop offs at the base of the riffles. When nymphing this method works when you find yourself fishing the drop-off from the inside and you are standing in relatively shallow water.

Next time you’re out fishing try this;

Rigging

(1) Rigg up with a large thingamabobber at about 1 1/4 times the depth of the water in the the run directly below the dropoff.

(2) Use enough weight to get the flies down but not hanging up constantly.

(3) Place yourself in a position that is about 15 feet or so above the dropoff.

(4) This method is for fishing the dropoff with a downstream presentation and you will be in direct contact with your flies for most of the drift.

(5) If a fish takes, your indicator will shoot away from you and then you will feel the take.

A variation of this method can be effective when caddis and mayflies are hatching out of the riffles.

So Here’s How to Do It.

(1) Place your cast above the dropoff about 6 to 8 feet above the dropoff, targeting the dropoff spot that is the closest to your position.

(2) The cast needs to be a straight line cast and the flies, shot, and indicator should land in a straight line.

(3) When the flies land they will drop and tumble down the face of the drop off if you have enough shot on. If you are not hanging up from time to time you need to add more shot.

(4) Follow the indicator with your rod tip down the drop and once they have floated about 7 or eight feet throw a big upstream mend directly above the indicator and feed down a ways into the run.

(5) Pick up and re-cast to the next line 1 to 1 1/2 feet further out.

(6) Continue to work the water out as far as is reasonable.

(7) When using this technique 1/2 to 2/3 of the drift will be tight lined and the remainder will be dead drifted. That is the goal.

Try this method and you’ll have success!

FFT Techniques: Nymphing a Run or a Riffle Corner

I’m doing a series of articles talking about useful techniques for fishing the Lower Yuba River and really for anywhere your fishing passions take you. This one is about nymphing a run or a riffle corner.

On the Lower Yuba River you will find many runs that are prime targets for holding fish. These are portions of the river that flow with an even depth from 4 to 8 feet deep. You will also encounter riffle corners at the base of a riffle. This is a v-shaped slot that if you’re looking up stream you will see the soft spot right at the top of the vee. This spot and the soft water downstream of it are one of the prime spots for fish to hold and feed as the nymphs get pushed down the riffles and into these soft side waters. This is especially true if there have been hatches in the days prior.

The first rule when fishing a run or a riffle corner is not to step into the water, before you have “cleared it”. You must fish the runs and riffle corners from the bank or you’ll likely be stepping on fish. You what to use the “Borger Shotgun Method” and thoroughly cover the water before you step into it.

So, let’s go through how to do it

(1) First off you want to envision lines running parallel to the current running downstream about 1 to 1 1/2 foot apart.

(2) These are the lines you’ll be running your flies and indicator through.

(3) Set your indicator to roughly 1 1/4 times the depth of the water you’ll be fishing and make sure you have enough shot on. More than you think.

(4) Feed out line directly below you the distance that you want to cast upstream.

(5) Once the line is out, point your rod tip at the indicator downstream.

(6) Set up your footing so you are facing partially upstream.

(7) With a smooth deliberate motion, pick the line up and follow through upstream and point your thumb at the target area.

(8) The flies, shot and indicator hit the water up stream and your ready to start fishing.

(9) Raise your rod tip as the indicator and flies start downstream (High Stick) keeping most of the line off the water.

(10) As the indicator floats downstream, and then floats just past you position, mend the line upstream of the indicator and then lower the rod tip as they move downstream.

(11) Once they are at the end of the drift let the indicator and flies swing directly below you and then do it all over again but place your cast 1 to 1 1/2 feet further out (on the next line).

You repeat this until you’ve reached all the water in front of you where you think might hold fish. Once you’ve fishing 15 feet or so out from the bank you can carefully and stealth fully start wading in to enable placing your casts further out. Most of the water close to you can be fished with a fixed amount of line. As you fish further out you will need to keep mending, possibly stack mending and using good line management techniques to keep your rigg dead drifting correctly.

Summary

This is the basic nymphing technique that you can employ wherever you roam. Once you add mending skills and line handling skills you will have all the basics down and you will have then be a successful nympher!

Nymphing Techniques: On the Lower Yuba River – The Riffles

I’m getting ready to help out with a Gold Country Fly Fishers’ club techniques clinic on the Lower Yuba River. Being it’s February, we’ll be focusing mainly on nymphing techniques and with nymphing it all starts with an indicator a big plunk of lead and mending.

With that said, the techniques you employ depend on the water type, depth and speed of the current. So let’s attempt to break it down a little bit. Let’s start by looking at one of the different water types you will encounter when walking and wading the Lower Yuba River and start with riffles.

Riffles

You will find riffles, which are the bug factories of the river, spaced at intervals as you move up and down the river. The riffles are almost always directly below tailouts from the runs above them. The water in the riffles are usually the places where the current speed is the greatest. In general the midst of the riffles are not the most productive or desirable places for fish to hold or to present your flies. The edges and pockets are the exception to this, especially when steelhead are moving through or the resident rainbows are staged in the holding spots when caddis, mayfly, or stonefly hatches are happening or the bugs of are participating in their daily downstream seasonal drift.

So let’s look at the three main components of the riffles that are of importance to the fly fisher. (1) The edges and pockets at the main body of the riffle. (2) the drop off at the base of the riffle, and (3) What I consider the most important section of the riffle where the riffle transitions from the riffle to the run below.

Nymphing the Body of the Riffle

If you are going to fish the body of the riffles, it is best to focus on the edges and out of the main flow of the current tongue. I have found that the best thing to do is to focus your attention to visible boulders that create soft spots behind them, or to the shallower edges where the current is much slower. You will be able to spot the hard seam between the faster and slower edge currents. The areas to focus on are the areas inside this seam not on the seam.

I like to think in terms of searching when I nymph the riffles. I like start at the head of the riffle and move downstream, presenting my flies quartering downstream with a tight line, even with the indicator on, and place casts so the flies will swing into the pockets behind the boulders and into any slots or trenches. This is essentially tight line nymphing and you are in contact with your flies the whole time. If a trout hits the flies, bang, you know it. If there is not strike I let the flies swing directly below me, still expecting a take. If not, I pick up and fire another cast to the next likely spot. This is run and gun fishing and you can cover a riffle pretty quickly.

I typically move the indicator up high and am fishing by feel and not really even paying much attention to the indicator. Why do I even have an indicator on? Mainly because I’m running and gunning the riffle and will be using the indicator as soon as I get to the bottom of the riffle at the base of the riffle where it transitions to a run. I could take it off but I don’t.

This is fun run and gun fishing and you’ll be surprised how many fish can be picked off as you are moving downstream. I’m typically working my way downstream to fish the transition area, which I believe is the prime spot of a riffle.

Nymphing a Riffle Corner

On the Lower Yuba River you may find a riffle corner at the base of a riffle. This is a v-shaped slot that if you’re looking up stream you will see the soft spot right at the top of the vee. This spot and the soft water downstream of it are one of the prime spots for fish to hold and feed as the nymphs get pushed down the riffles and into these soft side waters. This is especially true if there have been hatches in the days prior.

The first rule when fishing a riffle corner is not to step into the water, period. You must fish this riffle corner from the bank or you’ll likely be stepping on fish. You what to use the “Shotgun” method and thoroughly cover the water before you step into it.

So, let’s go through how to do it.

(1) First off you want to envision lines running parallel to the current running downstream about 1 to 1 1/2 foot apart.

(2) These are the lines you’ll be running your flies and indicator through.

(3) Set your indicator to roughly 1 1/4 times the depth of the water you’ll be fishing and make sure you have enough shot on. More than you think.

(4) Feed out line directly below you the distance that you want to cast upstream.

(5) Once the line is out, point your rod tip at the indicator downstream.

(6) Set up your footing so you are facing partially upstream.

(7) With a smooth deliberate motion, pick the line up and follow through upstream and point your thumb at the target area.

(8) The flies, shot and indicator hit the water up stream and your ready to start fishing.

(9) Raise your rod tip as the indicator and flies start downstream (High Stick) keeping most of the line off the water.

(10) As the indicator floats downstream, and then floats just past you position, mend the line upstream of the indicator and then lower the rod tip as they move downstream.

(11) Once they are at the end of the drift let the indicator and flies swing directly below you and then do it all over again but place your cast 1 to 1 1/2 feet further out (on the next line).

You repeat this until you’ve reached all the water in front of you where you think might hold fish. Once you’ve fishing 15 feet or so out from the bank you can carefully and stealth fully start wading in to enable placing your casts further out. Most of the water close to you can be fished with a fixed amount of line. As you fish further out you will need to keep mending, possibly stack mending and using good line management techniques to keep your rigg dead drifting correctly.

Nymphing the Dropoffs at the Base of a Riffle with an Across and Downstream Presentation

My favorite spot to fish the Lower Yuba is at the base of a riffle, when the caddis are hatching from the riffles above. They can also be extremely productive when the Skwalas are in the drift or the various mayflies that live in the riffles. The thing to remember is that the Lower Yuba River trout are essentially lazy, you will not find them holding in the dropoffs unless there is a reason for them to do so. This means food must be present or they will drop down into the runs below and just let the food be delivered down to them. If there is a hatch coming out of the riffles this is where I want to be. In knee deep water slightly upstream from the drop offs. This is how I like to do it.

I first rigg up with a large thingamabobber at about 1 1/4 times the depth of the water in the the run directly below the dropoff. I use enough weight to get the flies down but not hanging up constantly. I want to place myself in a position that I’m about 15 feet or so above the dropoff. This method is for fishing the dropoff with a down stream presentation and you will be in direct contact with your flies for most of the drift. If a fish takes, your indicator will shoot away from you and then you will feel the take. So here we go.

(1) Place your cast above the dropoff about 6 to 8 feet above the dropoff, targeting the dropoff spot that is the closest to your position.

(2) The cast needs to be a straight line cast and the flies, shot, and indicator should land in a straight line.

(3) When the flies land they will drop and tumble down the face of the drop off if you have enough shot on. If you are not hanging up from time to time you need to add more shot.

(4) Follow the indicator with your rod tip down the drop and once they have floated about 7 or eight feet throw a big upstream mend directly above the indicator and feed down a ways into the run.

(5) Pick up and re-cast to the next line 1 to 1 1/2 feet further out.

(6) Continue to work the water out as far as is reasonable.

(7) When using this technique 1/2 to 2/3 of the drift will be tight lined and the remainder will be deaddrifted. That is the goal.

This technique can also be used with a dry dropper combination or with soft hackles and be very effective.

Nymphing the Base of a Riffle with an Upstream Presentation

Another very effective presentation technique for fishing the base of a riffle is to take a position just below the drop off and present your flies, shot and indicator up stream and across, also using the “shotgun” method. You will be working the water from the inside out in drift lines. You must also be careful not to wade right in and on top of holding fish.

This technique will require mending and line handling to be effective. The idea is to place your casts upstream about 6 to 8 feet above the base of the riffle, high stick the indicator as in comes down stream to your position, Place a big mend behind the indicator and then follow or feed downstream below your position. Follow the drift with your rod tip and if the indicator moves set in the direction to the bank below you, not upstream. So this is how it works.

(1) Place a quartering upstream cast so that it lands 6 to 8 feet above the drop off, it’s important not to mend at this point as the flies are getting deep in a controlled manner. If you throw a big mend popping the indicator upstream, the flies they will rocket down and get hung up in the rocks.

(2) After the flies hit raise the rod tip and (high Stick) the indicator with as much line off the water as possible without drawing the indicator back towards shore. They need to be able to continue a straight line path downstream.

(3) Lead the indicator downstream towards your position. If there is a take and the indicator dips, set downstream.

(4) Once the flies are slightly downstream of your position, place a big mend behind the indicator without stopping its downstream progression and follow with your rod tip, lowering it as the rigg moves downstream.

(5) Continue mending and feeding as far downstream as is practical and manageable.

(6) If the indicator, stops, moves upstream, or goes down set to the bank downstream, again not upstream over your head.

Summary

So, there’s four techniques that you can add to your arsenal the next time you’re on the river. I hope it improves your success rate.

Techniques: Watch & Observe

I woke up excited to be heading down to the Lower Yuba with my fishing buddies Frank Rinella and Blake Larsen. I’ve been out of town for the Christmas holidays and was ready for a fun day, come what may. The day was clear and fairly warm in Grass Valley. We met in town and grabbed a cup of coffee, talked about the bugs of the Yuba and made our plans for the day. We were looking forward to perhaps a nice PMD hatch coming off? We were a little surprised as we drove down to the river and there was a low overcast at the river. Well I guess it just changed to a BWO hatch.

Our plan was to use my drift boat to cross the river above the launch and hike upstream to fish the runs and flats upstream of our put-in.We had parked one vehicle downstream and would float down in the afternoon and fish the lower area from the boat. We started to hike upstream to spread out and fish the runs there. On the way up I had forgot my camera and hiked back to the boat to get it. On the hike back upstream I hiked along the water’s edge and watched the flats and tailouts to see what was happening.

As I was hiking upstream I reflected on an article that was written by Dave Hughes, either in one of his books or a magazine article where he stated that it’s always a good idea to wait to rigg up until you get where you are planning to fish. When you get to the area sit down for a moment and check out whats going on. That would work well for me because I had not tied anything up yet and I was packing my Sage Z-axis 6 weight switch rod and my Sage XP 5 weight. I could easily rigg up for dries and emergers or go down to fish the bottom.

The key thing from his article that I reflected on was to Watch and Observe, then rigg up and start fishing.

Some questions

There are certain questions that you should ask yourself before you jump in and start fishing.

  1. Are there any fish rising?
  2. Are there any bugs on the water or in the air?
  3. What kind of bugs are they?
  4. What are the water conditions? Clear, off-color, high, or low?
  5. How bright is the sun?
  6. If fish are rising, what are their rise form telling me. Are they taking duns or emergers?
  7. Are swallows feeding? Are they taking the bugs at the water level or higher in the air?

These are all things that you can think about and digest in a few minutes. The thing I thought about next is that I should do some collecting. I remembered that I used to carry a white lid from a jar that was about 4″ diameter, a small aqurium net and some tweezers. How come I stopped doing that? I’ve made a mental note to do that next time I’m out. Start a “new routine” so to speak. Or I guess I should say an “old routine.”

The Answers

I really should be able to answer questions like;

  1. What bugs are most abundant?
  2. How big are they?
  3. What color are they?
  4. Which ones are mature and look ready to emerge?
  5. How do they move in the water?

Size Matters

Once you start collecting samples the real fun begins. Now you don’t have to depend on what all the guys are saying or what they have on the board at the flyshop. Do they really know anyway? It’s pretty easy to say use a Olive Hogan’s S&M nymph for a Blue Wing Olive. But what size are the real bugs? Maybe an Olive Hogan’s Military May in a size twenty would be a better choice. The Military May ties are more slender than the S&M’s. They always say that you need to Match the Hatch! How many times have we heard that. The next time we’re out, while we’re observing the natural insects in that white jar lid of water, we need to put some of our fly patterns in the tray next to them. Match them up. Get your fishing buddies to help out. Do the observation as a team. Discuss bugs. Discuss tactics. Identify the bugs. It’s also a lot of fun

According to Dave Hughes’ buddy, Rick Hafele, an entomologist, his experience is that 90% of the time people rigg up with fly patterns that are two or three time larger than the real thing. This is especially true for nymph patterns. While this may make it easier to tie your fly on to your tippet, it does not make it easier for you to catch fish with them.

Size is actually one of the most important aspects of your fly patterns.

In fact Rick Hafele states that he believes size is more important than color or even shape, though shape also affects size. For example, a fat fly pattern, even when it is the right length, will appear too large when it is imitating a small slender swimming mayfly. Hence the example of the S&M (fatter) versus the Military May (more slender). Fish tend to concentrate on what’s most abundant and available. Pick a fly pattern that matches the size of what you observed as most abundant.

Presentation

Now I need to take all that I have just observed and think about how and where the trout are feeding on the bugs. Now is the time to rigg up and start fishing. Oh yeah. How should I present the flies I’ve chosen? This brings up another bunch of questions.

  1. What patterns might be effective?
  2. What part of the water column should I target?
  3. Should I be fishing dries or emergers on the surface or should I try my subsurface options
  4. Should I use my nymph rod or my dry rod?
  5. How should I rigg up to be most effective
  6. What type of lines should I use?
  7. If nymphing, how deep?
  8. Dead drifted under indicator, tight lined or swinging?

Summary

These are all things best contemplated before you rigg up the first time. How many times have you decided how you are going to rigg up and what flies you are going to fish before you even get to the river. Probably a lot. Take your time. Take a breather. Watch and Observe and then go out and get in the river and present your flies properly.

Fishing From a Drift Boat – Water Load Casting a Deep Nymphing Rigg

When nymphing from a drift boat you are typically casting multiple flies with shot. On the Lower Yuba River which often has good water clarity you also need to add the element of stealth. This means that you often need to be able to cast your nymphing rigg at least 2 rod lengths and more from the boat. This may seem daunting to some. By using a water loading casting technique you will be able to improve your ability to achieve these distances with less tangling when casting shot and multiple flies. We were fishing one day and my son Zack looked at me with a huge smile and a tangled mess of tippet and flies and said, “Look dad, I’ve got a bigger rat’s nest then grandpa.” Using a water load cast can help this from happening.

First I’ll describe an indicator rigg setup that has been successful for me on the Lower Yuba River, the Lower Sacramento River, the Klamath River and many rivers in Montana when side drifting from a drift boat or raft.

Indicator Setup

Thingamabobber_packagingIt seems like the indicator that I mostly reach for these days is the thingamabobber. It just does the trick easily.


Boles_IndicatorWhen I want to really know where my flies are drifting under my indicator I’ll go to the “Boles Float Right”.
(a) For most side drifting from a boat I will typically rigg up with an indicator and about 6’ to 9’ of tippet from the indicator to the shot depending on the depth of the run.

(b) I usually rigg up with a tapered 2x x 10’ leader. I prefer to use the tapered leader so I can adjust depth easily.

(c) On the Lower Yuba River and the Lower Sacramento River we have been using a “Thingamabobber”, large size, white color. On drop offs and areas that have changing current speed and depth I prefer a “Boles” indicator in blue or green. The flag on the “Boles” allows you to see where your flies are underneath your indicator and will tell you to;

(1) Either raise or lower the indicator
(2) Mend to speed up or slow down the drift, or
(3) Add or take off shot.

Usually I will choose one or the other and stick with it throughout the day.

Fly Rigging

I’ll run three flies under the indicator, each spaced from 12″ to 18″. The deeper the run the larger the spacing. I use 3x fluorocarbon from the shot to the 1st fly, 4x fluorocarbon from the 1st to the 2nd fly and either 4x or 5x fluorocarbon from the 2nd to the third fly depending on the size of the fly.

Presentation

I believe that the Yuba requires stealth with your presentation and the set-ups for your drift. I usually try to cast my indicator into the desired seam with the length of the cast to be at least 2 rod lengths (18 to 20 feet) from the boat and a lot of times even further than that, closer to 3 rod lengths. (2o to 30 feet). I use a 6 weight 9’6″ Sage XP or Z-Axis and it does just fine. Keep mending as required to keep the indicator moving in a straight line downstream.

Water Load Casting Technique

Water Load Casting – When fishing from a drift boat there is typically little concern for getting caught up when backcasting. This does not mean you shouldn’t “look” first. The best technique for delivering the indicator, shot and flies and if there are not obstructions for your backcast is to water load your back cast prior to your forward cast.

Back Cast – To set up your backcast. You need to think of the mantra (1) lift (2) look (3) launch. By repeating this mantra you are reminding yourself to;

(1) Lift – Strip your indicator and flies towards the boat and lift the flies out of the water column until you see them up on the surface and then in one fluid motion;

(2) Look Take a quick look at the back side to see there are no obstructions behind you.

(3) Launch Lift the indicator and flies out of the water and start you backcast aiming your rod tip over your shoulder.

The cast should be overhead not side arm (parallel to the water). Think of your rod tip as a paint brush and you are painting the ceiling with it. This is another mantra that come in handy (Paint the Ceiling). Continue with your rod tip and point to landing spot on the backcast. Let the indicator and flies come to rest on the water on the backcast.

Forward Cast – Before your flies sink behind you repeat the mantra;

(1) Lift – Lift the flies back off the water before they sink to water load the forward cast;

(2) Look – Where you want your flies and indicator to land which will be the seam that you want to fish;

(3) Launch – Start your forward cast over your head just to the side of vertical

Remember to (Paint the Ceiling) with your rod tip on the forward cast over your head or just to the side of vertical.

Deliver the flies and drop your rod tip, make a mend for a dead drift and you’re fishin’.

Summary

Done! Whew. Not as hard as it may sound.

Using this technique will keep your flies from dropping and forming a tailing loop and will eliminate constant tangles with indicator and flies.

Nuts & Bolts: Controlling the Drift of Your Indicator When Fishing from a Drift Boat

One of the most important things to master when you are nymphing from a drift boat is to be able to cast your rigg to the correct seam and them manage the indicator and flies to dead drift correctly.

Mending

1. When side drifting from a drift boat under indicator the idea is to set up a drag free drift.

2. Once the indicator lands, Stack mend the tip of your fly line directly behind the indicator.

3. It is best to try to have about 2 ft. of fly line above the indicator which will help slow down the drift of the indicator.

4. The water at the surface always flows faster than the water where the flies are drifting.

Control During the Drift

1. Point your rod tip at the indicator and mend almost constantly to keep the line fairly straight to the indicator.

2. You can actually mend and place small wiggles in the line between the rod tip and the indicator.

3. If your line is flowing faster than the indicator make small upstream mends without moving the indicator.

4. If the line is flowing slower than the indicator make small downstream mends without moving the indicator.

5. If the whole rigg is just not floating right, start over and reset with another backcast, a water load forward delivery and you’re right back at it.

Summary

Learning good line manipulation techniques will have your line throbbing more often.

The Swamp Thing

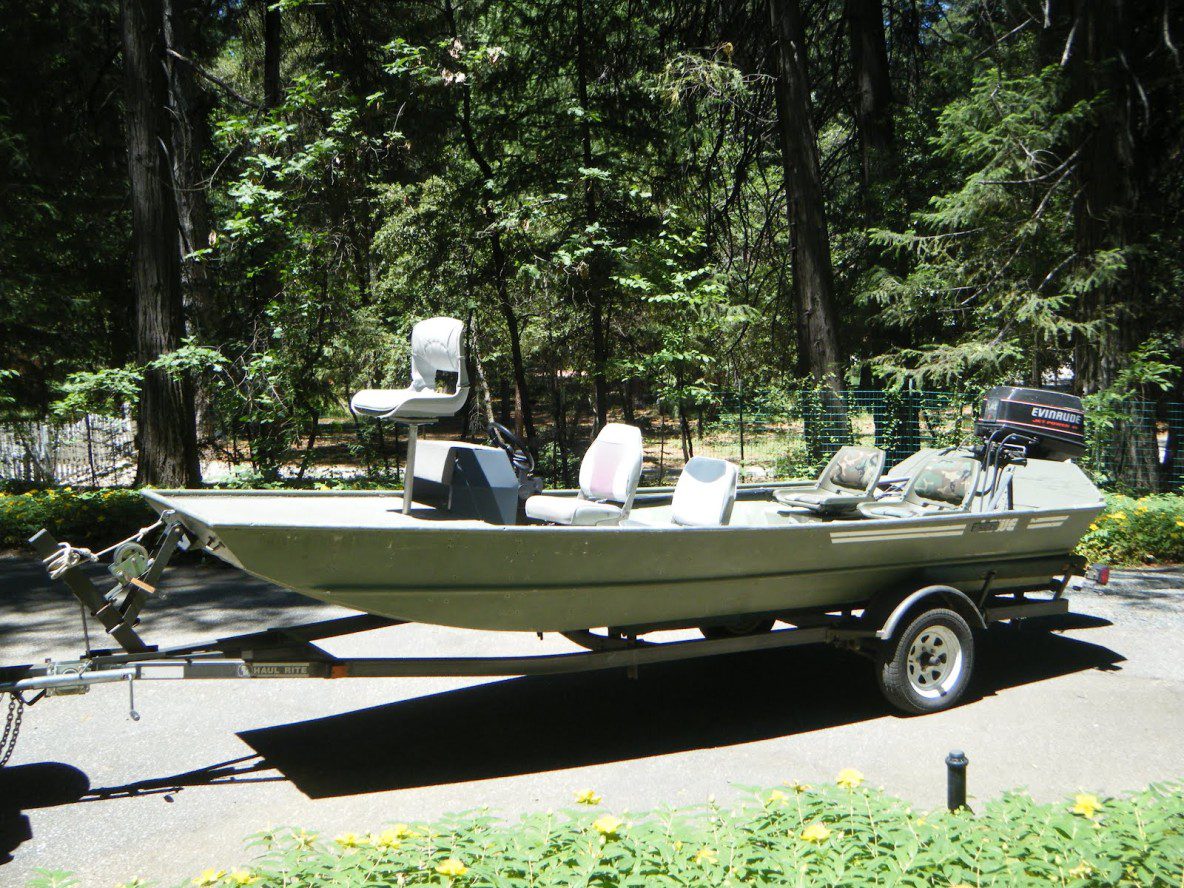
This is the new addition to the Fly Fishing Traditions fleet, “The Swamp Thing”. It traveled all the way from Donighan, Michigan to make its home here in Northern California. As you probably have heard I’m selling my 13′ 4″ Boston Whaler Sport to make room for it. The whaler is in the shop right now getting the chines re-worked and a new coat of epoxy marine paint on the entire bottom. I’m also stripping out all the Philipine Mahogany wood work and refinishing it. When I’m done it will be almost completely restored. I decided to do it right!

The Swamp Thing is a 16′ 1982 Lowe Roughneck. It’s been around the block, the paints pretty tarnished but I rubbed it out and it looks a lot better. I’ve ordered some factory “Lowe” paint and I’ll give it a new coat later this summer, but you know how that goes.

the-swamp-thing-02The controls are in the right front position and it has 3 other seats.

It’s got a live well, not that I’ll be using it, a carpeted platform at the bow with a receptor for the post and seat.

The main section is carpeted.


the-swamp-thing-03Here’s a shot of the storage under the bow and the carpeted deck.

The seat mounts in the bracket.


the-swamp-thing-04Here’s a shot of the captain’s seat with the controls.

The motor also has a power tilt function that is on the shifter.

There is also controls on the motor itself. It works!


the-swamp-thing-05The best thing about this boat, other that the fact it is a jet sled, is that it’s got an Envirude factory Jet Pump. The motor is a V-4 which is known for its dependability. It’s a 90 horsepower that delivers 65 hp through the jet pump. The motor is a 1993 that has very little hours on it. My marine mechanic, Steve Cyr, from Float Your Boats believes it has less that 40 hours on it.

I didn’t hardly sleep last night anticpating meeting Steve to fire the motor up. He had me pull the plugs, squirt WD40 in each cylinder (it’s a 4 cylinder) and let it sit for at least 2 hours. Then I cranked it over without the plugs in it to spit out the WD40. I put the plugs back in and headed to Scotts Flat Lake this morning to meet him.

When we got there he pulled the plugs again and cranked it one more time, to make sure I’d got enough of the WD40 out. He then squirted some starting fluid in each cylinder and we put the plugs back in. I attached the gas line and we crossed our fingers. It popped immediately which was from the starting fluid. I tried it again and hit the electric choke and it started after a couple of bumps. Steve kept pumping the gas line to ensure all the air was out of the line and when it warmed up it just purred. Steve pushed me off and I moved outside of the 5 mph zone and opened it up. It jumped up on plane and it flew. Fast that is. This surprised me a bit. It seemed as fast as my whaler. I took a few turns to see how it handled and it just slides through the turns. That’s a jet pump.

So I guess this boat buying experience is one with a happy ending. Buying an ebay boat by relying on pictures and asking question is and was nerve racking. Especially when it was in Missouri. I had it hauled here by uship. All in all it was just a leap of faith. Looks like this time it payed off.