My Fly Boxes: Box #2 – Soft Hackles & More Nymphs

Fly Box #2 – Soft Hackles and Micro Nymphs

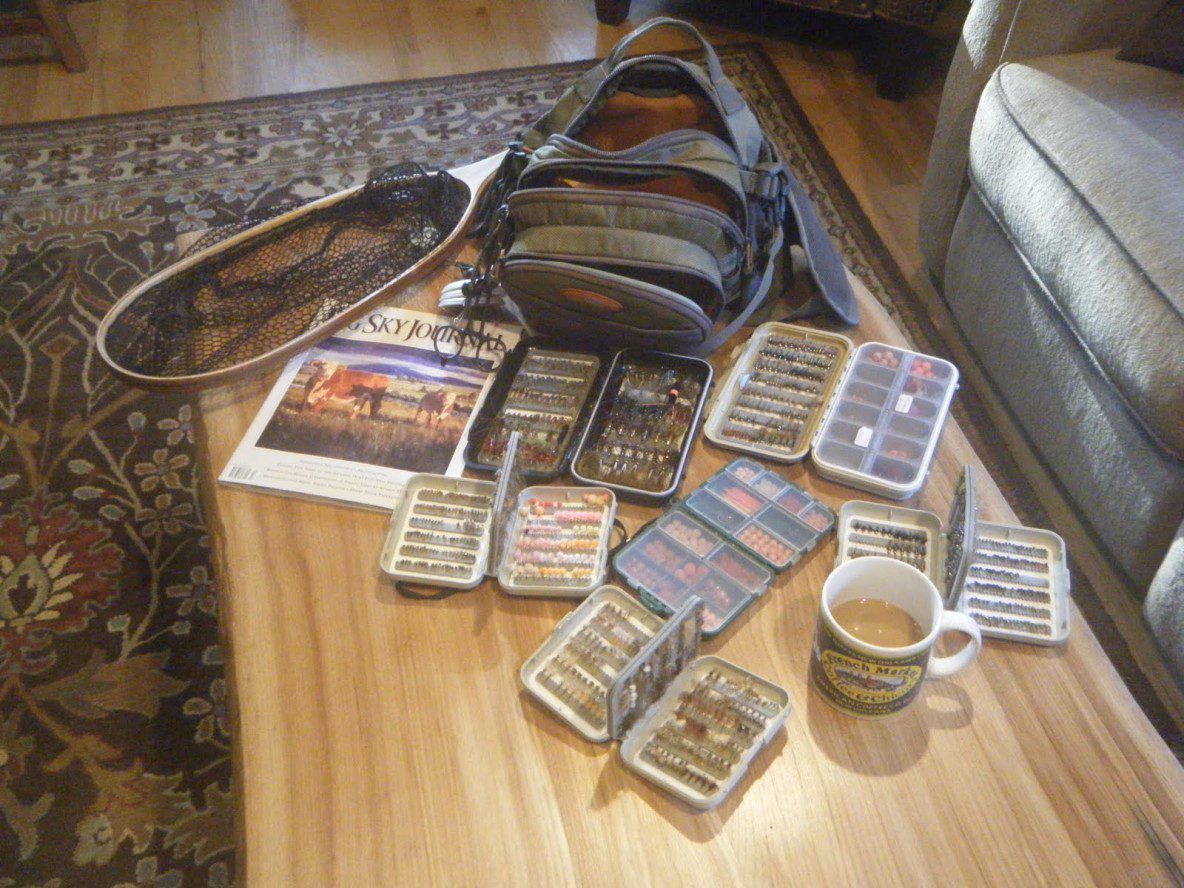
My fly box number 2 is another C&F box with the “flip leaf” in the middle. This is my other “go to” box. My box # 1 and #2 are always in reach, whether I’m in my boat or hiking and wading with my “Fish Pond Guide Pack” This box is labeled “Soft Hackles and Micro Nymphs”. This box is the evolution of my 1st box. This is the kid in the candy store box where you have to have that fly that the guides recommend or the new pattern by Hogan Brown. I just added a box rather than tear apart my 1st box. So this has me typically pulling out both boxes and looking to both of them to decide how I want to rigg up or make changes.

Leaf #1 – Small Nymphs

2009_1124Flybox20009On the 1st main leaf I’ve got more nymphs. These are mainly 18’s. There are about about 110 nymphs on this leaf. Let’s look at the flies stashed here.

  • Hogan’s S&M Nymphs, Olive, Brown
  • Serendipitys – Red
  • Sloan’s Mighty May in Black, Olive
  • Sloan’s Mighty Mite
  • Glass bead nymph – black, 18’s, 20’s
  • Mercers Poxyback May – Olive


Leaf #2 – Prince Nymphs/Misc. Nymphs

2009_1124Flybox20005On the opposite main leaf I’ve got prince nymphs. There are so many different prince nymphs out there that can be productive, thus this leaf. There are about 70 flies on this leaf.

  • Prince Nymphs
  • King Princes
  • Queen Princes
  • Amber Wing Princes
  • Prince of Darkness
  • Hogan’s Spring Time Caddis 14’s and 18’s
  • A big hole, What the heck was in that spot?


Flip Leaf #1 – PT’s and Hogan’s

2009_1124Flybox20006Looks like I’ve got to replace some of Hogan’s patterns on this leaf. There is about 60 flies on this leaf. I’ve got to fill this one up.

  • Hogan’s Red Headed Stepchild, 16’s & 18’s
  • Hogan’s S&M Nymphs, 16’s
  • Flashback Pheasant Tails – 16’s
  • Quasimoto PT’s – 16’s
  • Hogan’s Yuba Pupa- Only 2 left
  • Hogan’s Swing Caddis – Only 1 left
  • Some Olive Caddis nymph/soft hackles


Flip Leaf #2 – Soft Hackles

2009_1124Flybox20008On this leaf I’ve got soft hackles, most of which I’ve tied. There are about 100 flies on this leaf.

  • Partridge and Yellow
  • Floss Red Yuba Soft Hackles
  • Partridge & Peacock Soft Hackles, great for the Mother’s Day Caddis
  • Pheasant Tail Soft Hackles
  • Hare’s Ear Soft hackles – March Brown
  • Soft Hackles I’ve got in Montana that have a copper wire body and a flash back. Sort of a Soft hackle PT. I wish I new the name of this one.
  • Misc. Soft Hackles & Wets

I also wish I knew how to take better resolution pictures of the boxes, but you get an idea how they are organized. I’ll have to have my friend and fishing buddy Blake help me with this.

So let’s see I’ve got about 340 flies in this box. 340 time $1.50 each equals $510 plus $40 bucks for the box. So I’ve got about $550 bucks invested in this box.

I would suggest that you check out the following websites and check out their fly selections;

http://www.theflyshop.com/ – A great source for flies to use in Northern CA.

http://www.idylwilde.com/ – Signature Tiers, Hogan Brown, Bob Quigley, Ken Morrish, Tim Fox. I use a lot of their flies

Of Course, Nevada City Anglers carries a lot of the flies, You can check them out at these websites. If Tony doesn’t have what you want you can probably have him order them for you.

Til’ next time, Have a wonderful Thanksgiving – Clay
The Fat Albert or the Chernobyl Juicy Bug

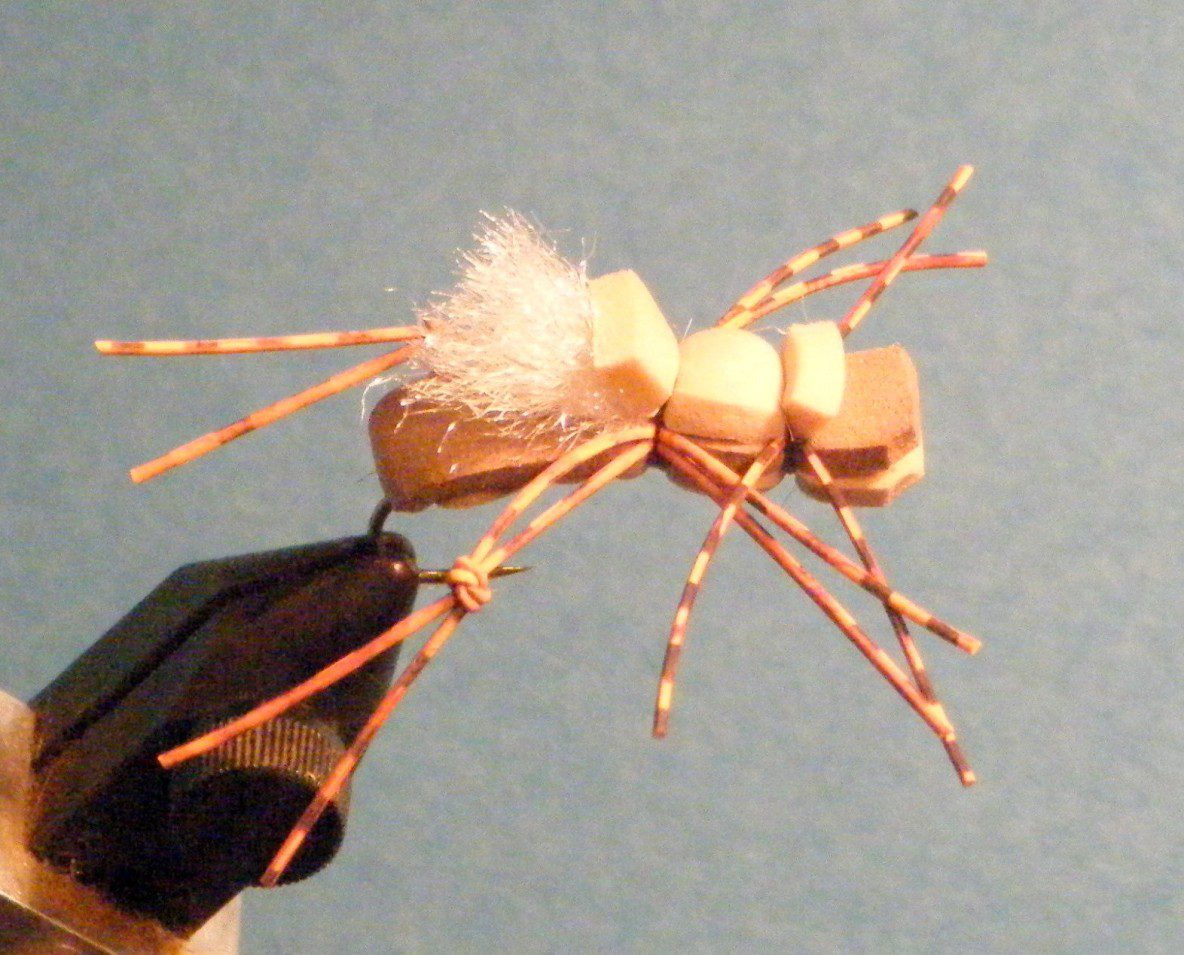
My fishing brain trust, me and my fishing buddies, have been playing around with some dry fly attractors on the Lower Yuba and have been enamored with a Fat Albert type fly. This pattern is also called a Chernobyl Juicy Bug by Umpqua.

Many of the Fat Albert ties are wider and more robust looking. While the Juicy Bug tie is longer and the profile is thinner. You can play around and see what profile the trout in the rivers and streams you are fishing work best. You can play around with the leg colors too.

Fat Albert Recipe

  • Hook – Tiemco 5262 – A 2X-long dry fly hook. The long shank makes it useful for imitating hoppers.
  • Thread – 140 Denier Black Thread or 140 Denier Brown
  • Body: 1/8 Foam, Tan and Brown
  • Indicator: White Post Material
  • Legs: Round Rubber Leg

Tying Instructions for the Fat Albert

Sounds Simple Right? Well let’s Tie one up and we’ll see.


  • The Fat Albert or the Chernobyl Juicy BugStep #1 – Start the thread right behind the eye and make a thread base at least partially down the bend of the hook. Return the thread to within a few eye lengths back from the hook eye.
  • The Fat Albert or the Chernobyl Juicy BugStep #2 – Cut a strip of brown foam that is about as wide as the gap of the hook. This strip should be at least four inches long. Tie the brown foam strip to the hook up near the eye and wrap back over it to the bend.

    Step #3 – Continue past the bend a bit to anchor the foam down onto the curve of the hook. Wrap forward again with the thread to the front of the hook.

  • The Fat Albert or the Chernobyl Juicy BugStep #4 – Cut a strip of tan foam that is about as wide as the gap of the hook like you did for the brown foam.

    Step #5 Tie this tan strip in as you did with the brown foam, at the front of the hook on top of where you tied in the brown foam.Wrap back over the tan strip to the bend. Try to bind the foam down tightly as you wrap.

  • The Fat Albert or the Chernobyl Juicy BugStep # 6 – Spend as much time as is necessary to cover all the foam on the shank with a nice smooth layer of thread as shown here. Be patient and get the foam completely covered with thread.

    Step #7 -Bring the thread to about even with the hook barb and let it hang there in preparation for the next step.

  • The Fat Albert or the Chernobyl Juicy BugStep #8 – Pull the tan foam forward and bind it down with two tight wraps of thread at a point about even with the hook barb(or between the barb and the point).
  • The Fat Albert or the Chernobyl Juicy BugStep #9 – Lift the foam again and move the thread forward an equal distance. Lay the foam down again and bind down the second segment. Repeat the above process one more time to create three segments that extend just past the halfway point on the shank.

    Note – For the Juicy Bug use a longer 3x hook and make 4 segments.

  • The Fat Albert or the Chernobyl Juicy BugStep #10 – Pull the brown foam strip over the top of the tan foam segments and bind it down in the last tan foam section.
  • The Fat Albert or the Chernobyl Juicy BugStep #11 – Cut a clump of clear crinkle synthetic post materials of choice. Bind it down in that same segment section at the center of its length. You want to use a material that compresses well and will create very little bulk. Less is better.
  • The Fat Albert or the Chernobyl Juicy BugStep #12 – Take another tan foam strip (as wide as the hook gap) and tie it down in that same segment (by now you have realized to go easy on the number of wraps for each of these material tie downs…the cumulative effect is plenty to hold everything down but you don t want to make too many turns on any one material to keep the bulk to a minimum)
  • The Fat Albert or the Chernobyl Juicy BugStep #13 – Cut the synthetic post material down to a short little puff.
  • The Fat Albert or the Chernobyl Juicy BugStep #14 – Now for the fun stuff. Take a length of rubber leg material, fold it in half and tie an overhand knot so the two strands knotted together form a doubled up leg with a knot. Lay the leg alongside the far side of the hook with the knot at the legs right at the end of the foam body.The rear legs are tied in the same spot as the foam pulled forward earlier.

    Step #15 – Tie up another double leg with a knot and tie on the side closest to you. Again, the knot the legs right at the end of the foam body.

  • The Fat Albert or the Chernobyl Juicy BugStep #16 – Lift all three sheets of foam up and out of the way while you work the thread up to just behind the hook eye.

    Step #17 – Lay the first tan foam strip down and bind it in place just behind the eye with a couple tight turns of thread.

    Step #18 – Bind the brown foam down on top of the tan foam.

    Step #19 – Bind the other tan strip down on top of the brown foam. Try to keep all the strips on top of each other.

  • The Fat Albert or the Chernobyl Juicy BugStep # 20 – Clip the front end of all three foam strips just beyond the hook eye.

    Step #21 – Tie in a single (un-knotted) strand of rubber leg along the near side of the hook in that front joint.

    Step #22 – Tie another strand of rubber leg in along the far side of the hook as well.

    Step #23 – Tie another strand of rubber leg in along the far side of the hook as well.

The Finished Product

The finished Fat Albert should look something like this.


  • The Fat Albert or the Chernobyl Juicy Bug

    Quartering View

  • The Fat Albert or the Chernobyl Juicy Bug

    Bottom View

  • The Fat Albert or the Chernobyl Juicy Bug

    Top View

Opening Day above the Bridge

The long awaited opening of the Lower Yuba finally arrived on December 1st. I was especially excited because of the amount of salmon that have been in the system this year. It’s been a banner year with more salmon in the lower river than we’ve seen in about 4 years. About 4 weeks ago the researchers that work for Fish and Wildlife stated that there were about 8500 salmon counted at the fish ladders at Daguerre Point Dam. They predicted that the final numbers would tally over 11,000. For the Yuba that’s good news. The numbers of salmon spawning above the bridge were supposed to be much more than the previous years. All the reason to be excited to check the river out.

I hooked up with my old friend, Blake Larsen, who I have spent many days fishing with over the years, just not so much in the last year or so. We didn’t really miss a beat. Just like old times. The thing I like about Blake is that it’s always about getting out and enjoying the day no matter what ends up being in store. No fish, some fish or lots of fish it really doesn’t matter. We’re kindred spirits in that way. It doesn’t mean we don’t work hard to make it happen or give up on it it’s just not a numbers thing. It sort of like skunked, a few, a number or pretty darn good is our reference system.

One thing led to another and by the time Blake and I hooked up, did our shuttle and got rigged it was almost noon. So not the ideal time to start, but for the most part everyone else that got there at daybreak was about done. We basically had the river to ourselves. This was great!

Our strategy was to concentrate on the sanctuary water, which was anything that had enough depth for the fish to feel safe. We rigged up two rods, one a 6 weight with a deep indicator setup and a 6 weight Switch rod.

The indicator setup was rigged with a 9′ – 3x tapered leader, a Thingamabobber, at about 7 feet from the shot, 18″ of 3x fluorocarbon to a “Troutbead” and then another 18″ of 4x fluorocarbon to a modified Pheasant Tail that I’ve come up with. The Troutbeads were painted with Peach nail polish. I added one more section of 4x fluorocarbon to a size 18 midge pupa. We used this rig whenever the water was more than 5 feet deep. It worked as I’d hoped.

For all the shallower areas, the areas 4 foot deep or less we switched up to a tightlining rig.The switch rod was rigged with an Airflo integrated Speydicator line. I added a MOW tip. The MOW tip was a Light, 5 foot float with a 5 foot T-8 sink section. I added a short 5 for leader and then added 18″ of 3x fluorocarbon to a Troutbead and then another 18″ of 4x fluorocarbon to nymph. This rig also performed well.

The key is to keep changing up as the characteristics change. The deep indicator is funky in shallower water, The tighlining rig is not ideal in the real deep water. (Note: This is not true if you change the deep tighlining rig to one with a long leader without the MOW tip and use lots of weight).

opening-day-above-the-bridge-02As far as the river conditions, the river was running about 830 cfs, crystal clear with not a cloud in the sky. Light shirt and shorts type of weather. This doesn’t bode well for midday fishing in shallow water I can tell you that, especially with full sun. The river has changed up a bit, a few more drop-offs and ledges, some areas shallowed up a bit, others more channelized. There are lots of buckets and rollers from all the salmon spawning. Way more than I’ve seen in years. Lots of good habitat.


opening-day-above-the-bridge-03As far as bugs, about all I saw was midges and lots of them in the flats and tailouts, I think I saw one PMD, not that I looked very hard as there were so few. We need some drizzle or rain to see if the Blue Wing Olives are around. What I was confident in is that the fish would eat eggs.

There’s just been too many salmon in the system and the trout are just conditioned to eat them.

So how’d we do, let’s just say we had a great day.

Fishing The Yellowstone – Mayors Landing to Pig Pen

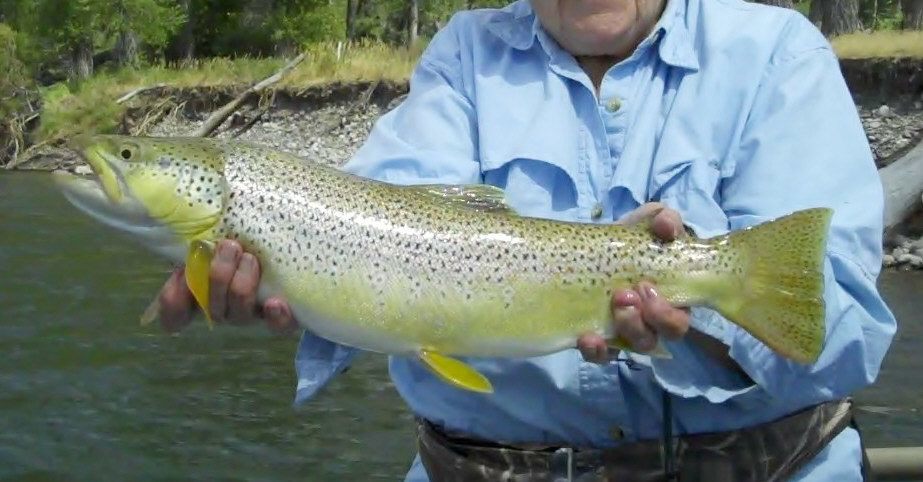
A trophy Yellowstone Brown taken on the Mayors Landing to Pig Pen Float

The Waters Below Livingston

When selecting a section of the Yellowstone river to fish, and if you’re thinking trophy trout heading to the river below Livingston is a good bet. The river below Livingston holds less trout per mile but makes it up in poundage. In early summer after the runoff you’ll be casting streamers to the bank or above and below mid stream boulders, convergent flows where side channels and the main river come together. You’ll dead drift streamers with nymph droppers along rip-rap banks and in big pools. Hoppers will come into play later on.

You will find Brown Trout, Rainbows, an occasional cutthroat and not so many whitefish on the water below Livingston.

The Yellowstone below the town of Livingstone takes on the characteristics if a major river. It is big, wide and can be somewhat brawling in the early summer. The river itself is characterized by, long runs with good bank water, riffles and tailouts, deep pools, huge eddies, and many braided side channels. There are some major wave rides, some big drops over in-stream boulders the size of a house, (although you can easily avoid them). I felt very comfortable in my Fishcraft raft, but would have been extremely uncomfortable in my low side Hyde drift boat. This section of the river is mainly class I and class II water if you scout the river properly. Class III in a couple of areas if you don’t and make a mistake.

I am speaking from the experience of running about 12 miles of river from Mayors Landing in Livingston town to a take out called “Pig Farm”. I was told it was named after an old farm that raised pigs at the site of the takeout and also that the run above the take out holds some of the largest trout in the river, earning the title “Pig Farm”. I like the second story.

Fishing Techniques

I fished this section with my Mom and Dad when the river was running about 5500 cfs. and the visibility was about 5 to 6 ft. It was a bright day and you could clearly see the bottom in the 4 to 5 foot runs and the tailouts. We concentrated on the sanctuary water and holding areas. There are a banks that have rip-rapped banks to stabilize the banks. These banks have been stacked with angular boulders and are steep and deep. There are holding areas all along these banks. This creates a brown trout hotel. We had great success firing our flies to all the pockets all these banks. A fish would dart out of it’s lie and slam a streamer and then when hooked dart back into the rocks. We hooked but then lost quite a few really large fish using this technique. We also landed quite a few.

Rigging

We rigged up similar to the way we rigged for the “Bird Float” with streamers with droppers. We beefed up our tippet expecting larger fish.

Leader – 7 1/2 foot 2x tapered leader
Indicator – Large Thing-a-ma-bobber
Shot – 1 or 2 AB’s 3 to 7 feet below the indicator.
1st Fly – 10 ” of 3x fluorocarbon Streamer patterns, McCunes Sculpin, Rubber Legs with Marabou tail, Whitefish Minnow
2nd Fly – 20″ of 4x fluorocarbon, beadhead PT’s, beadhead yellow stones, beadhead lightning bugs, caddis nymphs/emergers

Techniques

I rigged up for bigger fish and we concentrated on techniques that would give us a chance to hook larger fish. We would alternate between streamer techniques and dead drifting techniques.

By rigging with a streamer and a trailing nymph we could fish using streamer techniques or dead drift the streamer/dropper in the runs and pools. We used streamer and dead drift indicator nymphing at the same time.

The deeper bank water with holding lies out of the current was targeted as we floated down the river. We would cast to these spots and actively strip the streamer out into the current, pick up and cast again to the next good looking spot. These are the money spots.

The alternative technique was to fire a cast into likely looking holding water at the bank, strip it out and if there was no takers, throe an upstream stack mend and dead drift the rigg along the bank 2 to 4 feet off the bank.

Both techniques were productive.

Mayors Landing to Pig Pen Photos

Fishcraft RaftThis is a photo of my “Fishcraft” raft. It is the perfect boat for exploring new rivers and is safe in almost any Class I to Class III water.


Mayors Landing Bank WaterThe river gets big below Livingston and the banks are lined with willows and cottonwoods.


Bluffs on the Mayors Landing FloatAs you float below Livingston you will come to these bluffs with great pools and undercuts at the base.

These offer great holding water and is where deep indicator nymphing is productive.


Geri's Bow Mayors Landing FloatMy Mom with a nice rainbow caught dead drifting along the rocky banks.


Geri's BrownieMy mom, Geri, with a trophy, fish of a lifetime for most people, caught on a beadhead Lighting Bug which was trailing a McCunes Sculpin. We had been fishing the bank water and I was scouting the water ahead when I saw a side channel converging back to the main channel. There was a spit of gravel bank running to a point and where the waters converged it created a long vee with glassy slow current, The water was about 4 to 6 feet deep. I said to my mom who was in the front of the boat, “Hey, Mom, cast into that slack water on river left into that vee, that the type of water where fish like to hang out”. She turned and put here rigg in and the next thing I knew I saw this huge fish come busting out of the water. My eyes about popped out of my head. As she kept tension on the fish I rowed back to the river right and found some slower water to attempt to land it. With a keystone cop atmosphere and the boat continuing downstream we managed somehow to coax the fish into the net. Geri’s smile tells the rest.

Summary

So if your in the Bozeman/Livingston area and decide to give the Yellowstone a try, don’t forget that there are options other than fishing the waters of Paradise Valley. Maybe do like we did and fish different sections of the river from below Gardner, in Paradise Valley, but don’t forget below Livingston.

Luk Lake

I made it out with the Gold Country Fly Fishers to a club outing to Clear Creek Sports Club which is affiliated with the Rolling Hills Casino just outside of Corning. Luk Lake is a 65 acre +/- lake where in the spring you can catch bass, sunfish and rainbow trout. It is a pay for play lake that can be booked through The Fly Shop in Redding. The lake’s varied shoreline is lined with vegetation and flanked by Central Valley habitat. Its low-elevation location keeps the lake waters (and outside air temperatures) moderate and comfortable throughout the winter and spring, providing ideal habitat for rainbow trout until the water temperatures grow too warm in the summertime.

We were there for two days with the first day raining pretty hard and the wind blowing. We hung around hoping for the front to pass by and a few brave souls eventually attempted to fish the lake at about 1:30 or so. The rain had let up but the wind was howling. Not the best conditions for fishing but it was better than hanging out and looking through the windows. The lake has a varied shoreline with some large willows and cottonwoods and if you could just kick your pontoon boat to the lee side of them it wasn’t too bad. The lake has a varied depth from about 4 to 5 feet in some areas to a deeper section that runs about 15 to 18 feet. This is where the rainbows hang out. I started out with an intermediate line with a Jay Fairs Olive Wiggletail but didn’t have any luck. I was fishing in about 6 to 8 feet among the weed beds not willing to brave the full brunt of the wind. The wind started to calm down and I decided to kick out into the deeper section of the lake and switched to a type 3 full sink line with a black and turquoise bugger. I hooked into a nice rainbow once I figured out how to manage the wind. I fished in earnest from about 2:30 to 5:30 and picked up about 5 rainbows and one sunfish. The rainbows all went from about 19 inches to about 21 inches and were healthy and fat. They also had a lot of spunk and fought hard.

The plan was to head over to the Rolling Hills Casino for dinner at 6:30 or so. I gathered up my gear and called it a day. At about 7:00 the clouds cleared and the sun started poking through and the wind completely died. I thought maybe I should cancel dinner and get back out there rather than spend time with the guys. It was a tough choice but I decided to hang with the boys and give the fish a rest. There’s always tomorrow. The weather was supposed to be improving.

luk-lake-02I woke up early the next morning and made it out to the lake by about 6:30. There was a light breeze and it looked to be a really nice day. I was there by myself and could see fish working midges in the deeper area of the lake.

I used the oars on my pontoon boat and rowed across the lake to the deeper section of the lake. The fish were tailing going after midges with just their dorsal fin and tails coming out of the water. No heads.

I was rigged up with my full sink line and the same bugger that I was using the day before and I’d cast it in front of a tailing fish and start stripping. I picked up a number of fish doing this.


luk-lake-03I had a great time with all the GCFF members and caught my fair share of fat and sassy rainbows.

I am looking forward to spending more time in my pontoon boat exploring other Northern California Stillwaters.

I’ll keep you posted!

Fishing The Yellowstone

Whenever we make it out to Bozeman, Montana, I make a point to call Nathan Gaffey, a guide who works for The Rivers Edge. Zack and Nathan hit it off really well and a good time is had by all. This will be the third year in a row we’ve made it out with him.

The Yellowstone River is still running high at this time which is abnormal. The flows up around Emigrant are about 5500 cfs and lower on the river at Livingstone they are about 6300 cfs. Big! Clarity is about 3 to 4 feet. The river is just now getting into shape. Nathan recommended that we float from Livingstone down to “The Pig Farm” which is below where the Sheilds River comes in. This float is about 12 miles.We would avoid the crowds and mostly the whitefish that everyone was catching upstream around “The Bird Float”. Nathan boated over 30 whitefish and one trout the day before up around Emigrant. When floating the Yellowstone when it is this high you need to be careful and on top of your rowing game. The eddies are just huge and nasty. Some of them look like they could just suck your boat down to the bottom. We were up for it!

The rigging method for the day was with a Thing-a-ma-bobber about 4 feet above a single lead shot, a pretty small one, Nathan tied on a new rubberlegs pattern which is similar to the one’s we’ve all been using except marabou has been substituted for the rubberlegs at the tail. He stated that the green ones have been working. We used assorted beadhead nymphs tied approximately 2 feet off the hook bend as a trailer. During the day we tried other patterns as well including a matuka styled fly that imitated a juvenile whitefish, various beadhead softhackles, (blue, orange-ish red), and pheasant tails.

The fishing methodology was primarily fishing to the bank and searching out water that was slow enough to fish, eddy corners, insides of the riffles and the banks on the slower side of the river. With the river flowing at 6300 cfs or better there is a lot of river that is just not fishable yet.

One of the odd things was that most of the fish hooked or netted were rainbows, which is unusual for the water below Livingstone which is know for its brown trout. I’ve been thinking about that in retrospect and I think that the water is just running too high and fast to get the flies in front of the noses of the browns. Rainbows are know for there quick striking and I think that the bows were just more aggressive than the browns with the water flowing so fast. I believe that using more weight to get down would have resulted in more browns. It would have also resulted in a bunch off lost flies. It’s sort of a risk vs. reward thing. Who knows it was just odd.

fishing-the-yellowstone-02This Brown took the rubberlegs just as I said to Nathan, ” I think the browns will be in the soft pockets behinds the rocks”.

Boom, fish on. I had cast to a small eddy pocket 2 feet by 4 feet long behind a bush and wham the fish shot after it. with the flows as high as they were it was hard to hit these types of spots.


fishing-the-yellowstone-03Zack managed to hook and bring to the net this 14″ cutthroat.

It’s pretty unusual to find cutthroats below Livingstone.

A surprise and treat for Zack.


fishing-the-yellowstone-04This was the average sized rainbows of the day.

They were feisty and almost everyone hooked would go airborne a number of times.

They were vigorous fighters and a challenge to land in the high flows.


fishing-the-yellowstone-05You can sort of see the clarity of the water in this shot of landing a rainbow.

It was sort of a milky green, good for stealth but just a bit too high and fast.


fishing-the-yellowstone-06The train running down the tracks over the bridge sort of brings you back to an older time where the train was the main means of transportation in the west.

I had a great day exploring new water with Zack and Nathan, caught a decent number of hot fish and enjoyed the Montana country side. Another day to enliven the memory banks.

Another Tradition to revisit – Clay

The Kingfisher’s First Float

Well, after 7 months of dedicated work, countless hours of sanding and layers of epoxy and marine spar varnish, I was able to find out if my new handmade drift boat floats. It did, and it did so better than I had dreamed of. Let me explain. I had a few concerns prior to launching the “Barca de Trucha”, (Trout Boat). Little nagging questions.

First, the boat is 17 feet long from the bow to the stern. This is about 18″ longer than my Hyde Low-Profile. It is also wider by about 6 inches, I was concerned that it would be a little to big for the Lower Yuba. An air craft carrier in a small bay so to speak. It isn’t. It floats like a leaf, lighter and more responsive than my Hyde. Being so, makes it feel smaller, I always referred to my Hyde as a sports car. Nimble and quick to the response of the oars. The “Barca” is just as quick if not quicker.

Second, it seemed to be a work of art more than a working drift boat. Once I floated it down the river it just felt right. It will be a working drift boat come what may, scratches, dings, scrapes, it will be a fisher.

Third, Rope Seats? The rope seats look real cool, but what would they feel like, Uncomfortable? Pinching your rear? Well, definitely not your padded plastic seat. They felt fine. I wore lightweight shorts and was comfortable. The ropes will need to be tightened until they stretch out properly, but other than that definitely a passing grade.

The first float came with a sense of pride. Every piece of wood, every screw, every coat of epoxy and varnish was placed with care and thought. There is a sense of pride that is sort of like catching a fish on a fly rod you’ve built with the fly you tied. Now I can add “the boat I built”. I’ve always been a craftsman and this is just another extension of that. I take pride in what I do, I do was I say, I keep my word and promises. My Mom and Dad raised me that way. This is just another mission accomplished, a plan come to fruition. I thank my Mom, Geri, for encouraging me to pursue my passions. This is is just who I am.

I am looking forward to many years of fishing in this new boat and coaxing many fish to the net. More stories, more time with good friends and family on the rivers of the west. It was worth all the time and effort! No regrets!

Photos from Launch Day


  • The Kingfisher’s First FloatReady to Head Down the River
  • The Kingfisher’s First Float1st Ferry Across the Riffle
  • The Kingfisher’s First FloatZack the Photographer
  • The Kingfisher’s First FloatMy lovely wife – Laura, Enjoying the Inaugural Float
  • The Kingfisher’s First FloatRunning a Chute
  • The Kingfisher’s First FloatZack Getting Ready to Take the Plunge
  • The Kingfisher’s First FloatTaking Our Time Down the River
  • The Kingfisher’s First FloatZack, Thanks for Your Help and Encouragement Along the Way!
  • The Kingfisher’s First FloatMade it to the takeout with nothing but smiles!

Kingfisher Drift Boat Build: I’m Done

I started the “Kingfisher” build in September of 2014. Today is April 20th, 2015. It’s been quite a journey. I purchased the plans from Jason Cajune and they were worth every cent! The varnish has been curing and hardening for about two weeks, The build has taken me about 7 1/2 months, not bad from what I’ve heard. This includes 3 weeks off to build a pole barn/garage, so the actual build time was a more like a strong six months. I have probably averaged about 40 hours a week, so I’ve got something like 1000 hours into it, but who’s really counting. My trailer should be arriving next week, so the trip to see if it floats is about a week away.

Photo Gallery of the Kingfisher


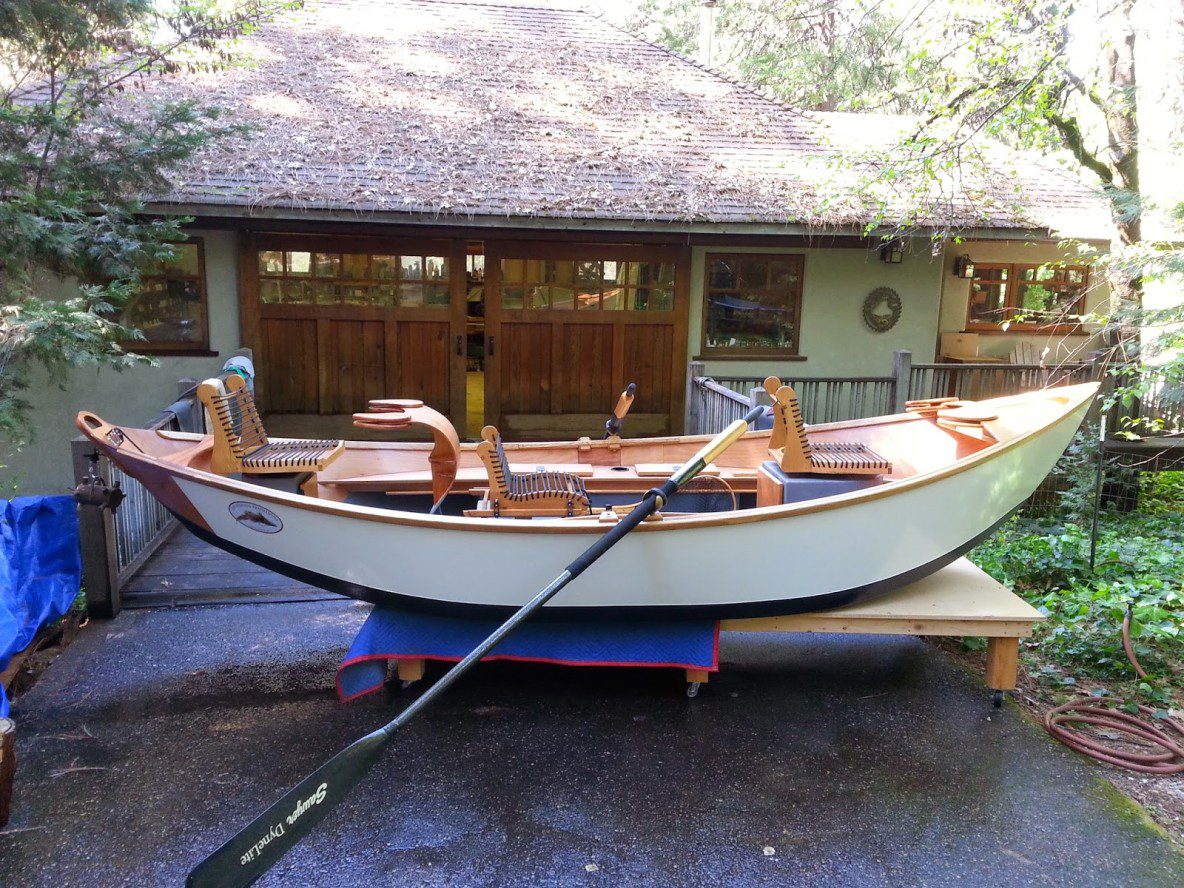
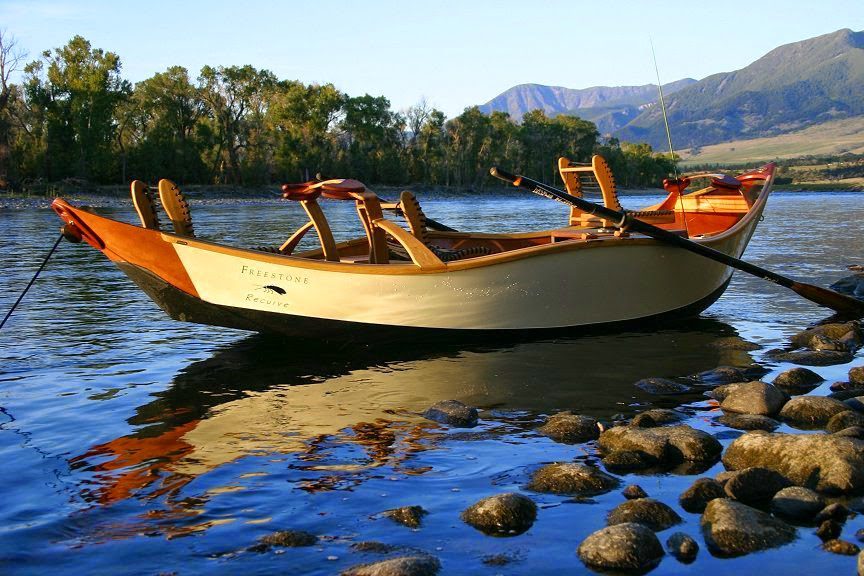
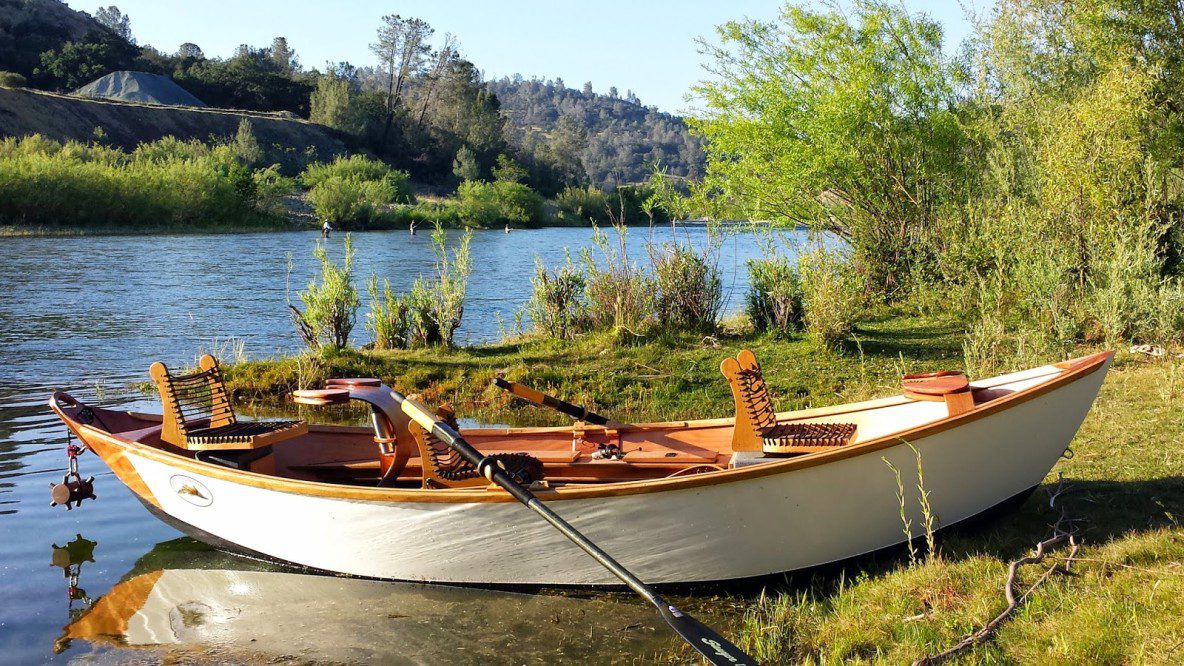
  • The Kingfisher’s First FloatThe finished boat is 17’0″ long. It has a beam of 6’6″. The width at the bottom is 4’10”. It should float high and dry and be real stable.
  • The Kingfisher’s First FloatI had a decal made with my “Fly Fishing Traditions” logo imprinted on it. The sides are 3/8″ Okoume plywood that have about 3 coats of epoxy and layers of fiberglass cloth. The main body of the boat is painted on the outside with “Blue Water Marine Paint”. It is a silicone copolymer topside enamel. The color is “Super White. The bottom and 4” up the sides at the chines are coated with “Linex” bedliner, smooth Black. The gunnels are black oak with 3 coats of epoxy and then 6 coats of flat “Last n Last” satin varnish.
  • The Kingfisher’s First FloatThe transom is “Rounded”. Constructing the rounded transom was the most intimidating part of the construction. My plans had a squared off transom so I had to figure this out myself. It was bent around a form using 3 layers of 1/8″ Okoume plywood. The rounded transom has 3 coats of epoxy and 6 coats of varnish. It turned out great!
  • The Kingfisher’s First FloatThe interior of the boat has decks and sides of Okoume mahogany plywood. The rowers seat and the fore and aft seats are made from white oak. The floors, dry boxes and the lower portion of the sides are coated with bed liner that was applied with a roller. The oars are Sawyer square topped counter balanced oars.
  • The Kingfisher’s First FloatThe fore and aft seats are made with white oak. The base of the seat was steam bent using 3/16″ x 2 1/2″ strips. The seats have 2 coats of epoxy and 6 coats of varnish. The rope for the seats are 3/8″ diameter double braided poly. The seats are mounted on “Springfield” swivel bases with a bracket that allows them to be removed.
  • The Kingfisher’s First FloatThe rowers seat slides in a track and can be adjusted forward and backward. Rubber retainers hold the rowers seat in position. The deck in the background has a dry storage box that is accessible by opening the hatch doors. There are dry boxes on each side.
  • The Kingfisher’s First FloatThe rear knee brace is made by laminating 3 layers of 1/8″ Okoume mahogany plywood. I constructed a steam box to steam the plywood and then placed them in a plywood form to conform to the desired shape. I call it a “George Jetson” knee brace. There are two cup holders integrated in the middle section.
  • The Kingfisher’s First FloatAt the rounded transom there is a wooden plate with a handle integrated into it that reinforces the transom and is where the anchor rope runs through the hull. There are two pulleys that are lined up with the hole that runs through the transom that guides the anchor rope.
  • The Kingfisher’s First FloatThere are 4 hatches that access the dry storage boxes. two at the starboard and two at the port side. The dry boxes ate about 5 feet long. The cup holders are sealed t keep the dry storage boxes dry. The foot rest for the rower is adjustable to 4 different positions. There are two positions for the oar locks.
  • The Kingfisher’s First FloatThe front seat has a large pedestal with storage underneath. You can see the circular lamination of the seats. There are two cup holders tucked up in the bow section. There is a triangular casting deck to catch your fly line when you are fishing.
  • The Kingfisher’s First FloatAn ice chest fits snugly into the pedestal under the front seat.
  • The Kingfisher’s First FloatThere are rod holders tucked under the main deck on each side, starboard and port side. You can store two rods on each side for a total of 4 rods. This is a spey rod broken down in half. The rod holders will take 10 foot rods fully assembled.
  • The Kingfisher’s First FloatAll I need is a trailer and it will be a fishing machine. Can’t wait!!!

Kingfisher Drift Boat Build: The Evolution of the Idea

Two years ago I walked into Dan Bailey’s Fly Shop in Livingston, Montana and saw a two person driftboat built by Jason Cajune. It was both a work of art and a well thought out working boat. The exterior looked like a gel coat boat but the interior was detailed in mahogany. Wow,  is what I said to myself. How cool.

As many of you know, I’m retired from a custom home building business “Clay Hash Handcrafted Homes”. I’ve been a woodworker since I was 18 years old. I’ve got a shop filled with tools that have been gathering dust for the last 3 years more or less. I’ve got a Delta Unisaw that I bought when I was 17. It was vintage then.

About 6 week ago I got a call from Joseph Podesta, who has built a wooden drift boat and wanted some help learning how to row. We spent a day on the river going over rowing techniques and rowing strategy and talked a lot about drift boat construction. Shortly after that, out of the blue the thought crystallized. “Build a Drift Boat, Build a Drift Boat”. I started surfing the net and low and behold I came across Cajune Boatbuilding – www.cajuneboats.com. The same guy that built the boat I saw at Dan Bailey’s.

He offers plans for a few drift boats designs or complete kits. Let’s see, woodworking skills, Check! Shop full of tools gathering dust, Check! Desire to build something, Check! Drift Boat rowing skills, Check! Love of floating rivers, Check. A dream was born. A project formulated.

I sent off $175 for the plans with a leap of faith, I received the plans and a complete manual for building a stitch and glue drift boat. I’ve spent many hours on Wooden Boat People, a forum of boat builders and read the manual from cover to cover. I’ve decided to build it from scratch without a kit. I’ve ordered marine plywood, Okoume, Epoxy and Fiberglass and made material lists for the solid wood stock, white oak, northern white ash and a little African mahogany.

I need to continue to organize my shop make more room, build construction tables, sharpen my chisels and hand planes, sharpen saw blades and get ready for the build. I’m on my way.

Photos – Getting Ready


Table BlocksBuilding a fiber-glassing table. Jason recommends building a temporary glassing table about 2 feet tall. I cut down some old shop sawhorses to 2 feet tall and added a new 2 x 4 x 5′ top rail. I made 3 of these.

The rails placed on top of the sawhorses are made with two 2×4’s assembled in a “T” shape. These span between the sawhorses.

Essentially making a support system for a table 5′ x 16′ x 2′ tall. All I have to do in screw down the sheets to hold them in place. I could take the whole thing down in about 20 minutes.

I also build 6 plywood boxes out of scrap material that I can place under each leg of the saw horses. the boxes are 8″ x 8″ x 20″. I can place one box under each end of the sawhorse legs (6) and raise the table to the same height as my other work tables in the shop. So in essence I can make either a table 5′ x16′ x 34″ tall or a single table 5′ x 8″ x 34″ tall using the same setup.

I may be over thinking, but I’ll have that option.


kingfisher-drift-boat-build-the-evolution-of-the-idea-03This photo shows the finished assembly table. I used 2 – sheets of 3/4″ x 4′ x 8′ plywood, screwed on top. 2 additional pieces of 3/4″ plywood, 12″ x 4′ x 8′, also get attached to make a table 5′ wide x 16′ log about 24″ off the floor. This table will be used to scarf two 3/8″ x 4′ x 8′ pieces of Okoume plywood together to make one sheet 4′ x 16′ long +/-. The sides will get cut to shape and then they will be glassed on the outside face.

This table will also be used to construct the bottom which will be made of a composite honeycomb core called “Plascore”. The sides and bottom will be “Stitched” together on the table. More on that as it happens.


kingfisher-drift-boat-build-the-evolution-of-the-idea-04The Okoume Plywood arrived today. Zack helped me unload it. It’s awesome stuff.

Guaranteed no voids in the core and marine glue. Certified material with a stamp on it.


kingfisher-drift-boat-build-the-evolution-of-the-idea-05Shortly afterwards the epoxy, fiberglass and Kevlar arrived.

So tomorrow I’ll head down to Sacramento on a quest for Rift Sawn White Oak and Northern White Ask.

Almost ready to make sawdust.

Kingfisher Drift Boat Build: Scarfing the Side Panels

The next step for the Kingfisher build is to make one 3/8″ x 4′ x 18′ long plywood panel out of 2 sheets of 3/8″ x 4′ x 8′ and one piece of 4′ wide x 2′ long. You do this by “Scarfing” the two panels together. It can be described simply as joining two pieces of plywood to make them longer. This is done by beveling two ends of the plywood in the 4′ dimension to roughly a 7 to 1 ratio. This means that the length of the bevel will be 7 times the thickness of the plywood. In my case the sides are constructed with 3/8″ Okoume Mahogany Plywood, so the length of the scarf will be 3″.

Getting Prepared

To do this I’ll need to gather up and prepare the following items:

  • Two sheets of 3/8″ x 4′ x 8′ Okoume Plywood. Check!
  • One sheet of 3/8″ x 4′ x 2′ Okoume Plywood. Check!
  • I’ll need to prepare a working surface/table to work on the scarfing and epoxying process. Check!
  • One sheet of 3/4″ x 4′ x 8′ plywood to use as a sacrificial sheet. Check!
  • Screw gun and some 1 1/4″ screws. Check!
  • 4 foot straight edge. Check!
  • I’ll need a sharp block plane or low angle jack plane. Got both and they’re sharp. Check!
  • 12″ straight edge. Check!
  • I’ll use my 4″ x 24″ belt sander to rough in the scarf joint. Check!
  • 80 grit and 100 grit sanding belts for the 4″ x 24″ belt sander! Final Check!

I’ve got everything I need.

Scarfing the Panels

Table BlocksI’m going to use the 5′ x 16′ table I assembled to do the scarfing procedure. I built the table to be 24″ tall and also built plywood blocks out of scrap so I can raise the table to 34″.

To do the scarfing I’m going to raise the table to 34″. I’ve raised it and it is solid as can be.


Preparing the Okoume Plywood to be Scarfed

Lining Up the Edge 2First I’ll place my sacrificial piece of 3/4″ plywood on my 34″ tall table.


1st Sheet Lined UpNext I’ll take one sheet of the 3/8″ Okoume plywood and lay it on top of the sacrificial sheet. I’ll make sure the long edges are aligned perfectly and I’ll match the end of the Okoume plywood exactly with the sacrificial sheet. The Okoume should be on top of the sacrificial sheet and aligned with one edge and one end.


Line MarkedMarking the scarf line. Next I’ll measure 3″ from the aligned 4 foot edge and mark it. I’ll draw a line across the sheet in the 4 foot axis.

Adding the second sheet. Next I’ll place the second sheet of 3/8″ of Okoume plywood on top of the first sheet. I’ll align the same edged as the previous sheet and line the 4′ axis up to the line I’ve drawn 3″ from the end of the 1st sheet.

As a note: The side that faces up will not be the side be up when you glue it up. This sheet will be flipped over. If you are grain matching the matching side will be facing down.

I’ll make sure everything is aligned properly and then place a couple of screws along the long edges of the sheets. These screws want to go though both 3/8″ Okoume plywood sheets and into the sacrificial sheet to hold everything flat.

Next I’ll mark and draw a line 3″ back from the 4′ axis of the second Okoume plywood sheet.


2nd LineNow I need to make sure the sheets are laying perfectly flat and are tight to each other. If not, I may need to clamp a scrap piece of wood across the sheets.
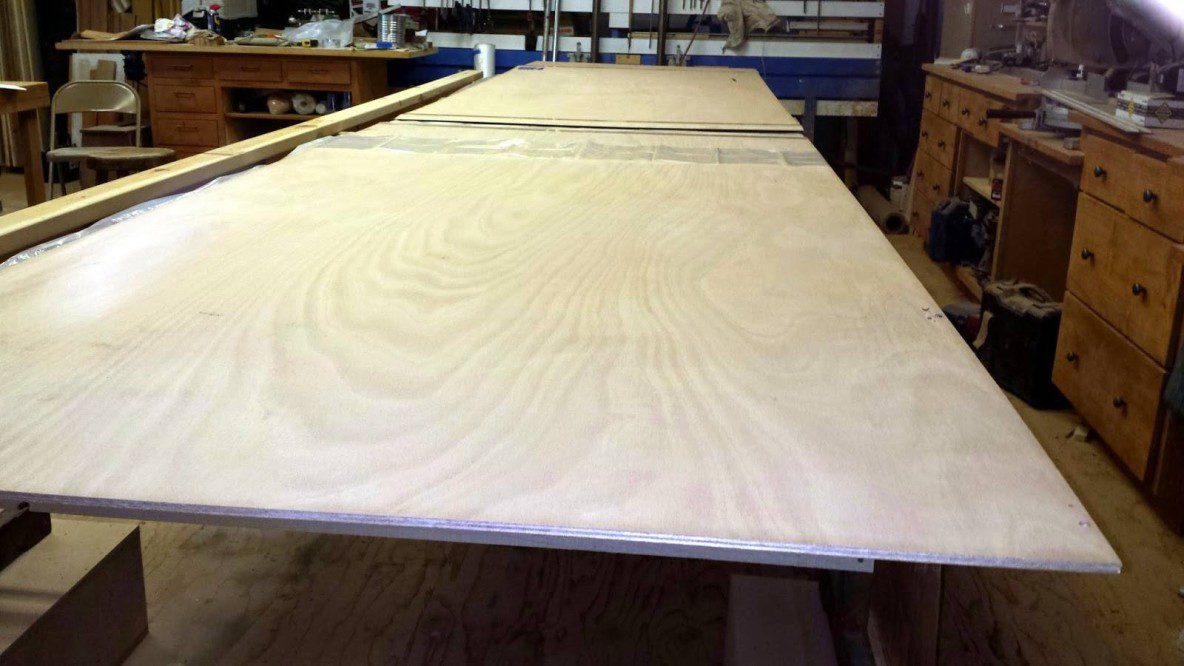
If necessary this wood piece must be held far enough back from the 3″ scarf line to work on the scarf. I’ll check it with the straight edge.

The second sheet piece will have to be screwed down through the two sheets of Okoume plywood and also into the sacrificial sheet to hold it in place during the scarfing procedure.

Scarfing the Panels

Sanding the ScarfNow it’s time to let the sawdust fly. Turn on the air filter. Turn on the fan. Put on the dust mask and get after it.

I’ll put on an 80 grit belt on my belt sander and start working across, back and forth to start taking off the wood between the pencil marks and the ends of the Okoume plywood. Creating the bevel.  The bevel will end up being about 6 inches long because I’m beveling two sheets at once.

As I work down through the layers the interior plies of the wood will start to reveal themselves in straight lines. I’ll use these lines as a reference to keep the bevels straight.

When I get close to the pencil lines I’ll have to slow down and start checking the bevel with a straight edge. The bevel needs to be straight and uniform.

As I get close I’ll transition to my block or jack plane to finish the bevel.

When the bevel gets close to “feathering out at the edge of the sheets I’ll switch to a flat block of wood with sandpaper to remove any final high spots. Do the final fine tuning by hand.

The scarf should look straight , be flat and when checking it with the straight edge it should be flat in all directions.

This needs to be as perfect as possible as the better the scarf the stronger the joint.

Adding 3mil PlasticDone with the scarfing. Here’s a photo of the sheets laid out on the table.

The sheet on the left will get flipped over and epoxied to the sheet on the right.