Drift Boat 101: Part Five – Common Rowing Situations

Situation #1

Entering the main current from an eddy or side channel

A situation that a rower must look out for, and then plan for, is when you have to enter a swift flowing current from a slower current, such as an eddy or other soft water.

When you encounter a situation similar to this, here are a few things you should take into consideration.

First, communicate with the anglers what you’re planning on doing and what you want them to do, which is to sit down, hold on, and in some case put on their PFDs.

When putting into strong currents, try to drop downstream a bit, if possible, away from the eddy zones where there are great contrasts of current speed. Keep a sharper ferry angle of 15 to 30 degrees when first entering the current so the swifter water slides under your stern. If you pull out into a powerful current from an eddy with your boat sideways, at an angle of 45 degrees or more, water will tend to heave up and possibly over the upstream side. In extreme cases this can shove your upstream side of your boat under water, flipping it. You need to be especially careful in a low sided boat, like the low-profile drift boats that are so popular these days.

I’ll tell you another rowing story. I just had purchased my Hyde low side drift boat and I was taking it out for the first time on the Lower Yuba River with my son Zack. Zack was 10 at the time. The put-in is just upstream of the Parks Bar Bridge. The put-in is a sheltered bay which is perfect for getting geared up and ready to go. The only problem is that it faces upstream and to get into the main flow of the river you have to enter the flow directly above the old bridge abutments which is a big pile of bouldered rip-rap. The river is channelized upstream of the abutments and wants to push you right into the rip-rap. The rip rap has a small to sometimes large standing wave. You have to enter the main flow and immediately ferry across the slot to get away from the rocks. If you don’t, you’re going to be into the rocks immediately. In the whole float below Parks Bar Bridge, the worst part of the whole float is in the first 40 feet. I pivoted and backrowed into the current at about a 30 degree angle and as soon as I hit the main flow the river pushed against my stern and some of the upstream side of the boat. This pushed the upstream side in down a little. This was no big deal but Zack for some reason moved to the upstream side of the boat at the same time and the boat keeled over more and shipped some water over the upstream side. I immediately pivoted the boat and got the stern pointed upstream and we were good to go. Nothing but a few shattered nerves by Zack. Zack is used to floating rivers in my large Fishcraft Raft, which is like a battleship, he can move around it and it has little to no effect on the raft. I made the mistake of not telling him to sit in the front seat, hold on and get ready. It was a good lesson for both of us. First I should have made sure Zack knew what to do and what to expect. And secondly, if a larger person would have done what Zack did we could have shipped a lot of water and in worst case flipped the boat. Lesson learned.

Situation #2 -Depth of Water When Ferrying

When rowing you need to be aware of the water depth and consider all contingencies, You need to consider things like

(a) What is the best route downstream?
(b) What is the best position for the boat to be in for the anglers best success?
(c) What is the water depth?

When ferrying across the river the depth of the river can create problems with your downstream oar. Your downstream oar blade can be facing directly downstream. If the water is shallow it is possible to stick an oar in the streambed. You need to take shallow oar strokes with the downstream oar as you ferry across shallower water because when ferrying you are somewhat sideways to the current. The downstream oar could potentially jamb a blade in the streambed. If the oar jambs you could

(a) Break an oar blade
(b) Bust the oar out of the oar locks
(c) Bust the oar out of the oar locks and lose the oar
(d) Jamb the oar in the oar lock and flip the boat, because the jambed our can lift the downstream side of the boat upward.and shipping water on the upstream side.

It is not uncommon to lose an oar this way. Some people install oar straps to prevent losing an oar.

Situation #3 – Wrapping a Boulder

When a boat slams into a large river washed boulder mid stream, a predicable sequence of events can follow. The greater the speed and force of the water, the more likely the boat is to flip in the case of a drift boat or wrap in the case of a raft. The impact can be more jarring than you’d expect. Gear and people can fly overboard. Water instantly begins heaving up and possibly over the upstream side. This tends to shove the upstream side under water and in the case of a drift boat, flips it and sinks it, or in a raft pins in to the rock. In most cases like this the bottom of the hull or raft will be pinned to the rock. If you’re in a drift boat and lucky, the boat will spin off the rock half full with water. As you may understand you don’t want to be in this position.

How to avoid flipping on a rock. Once you find yourself approaching or engaged with a large mid stream boulder, the rower should continue rowing as hard as possible to attempt spinning the boat off the rock. If the passengers lean away from the rock in fear or attempting to brace themselves for the collision it only increases the likelihood of flipping the boat. The passengers should be consciously acting as human ballast in an effort to keep the boat from flipping. Whatever side is going down the passengers should move to the opposite side. This movement can keep a boat from flipping although it doesn’t guarantee it. The boat may already be filling up with water and going down. If PFD’s are not on they should be put on ASAP.

By the way, good luck out there!
Drift Boat 101: Part Four – Putting In and Shoving Off

Driftboat_SunsetLets put some of our techniques into use and talk about the first maneuver you’ll have to learn which is how to put in and shove off into the current.
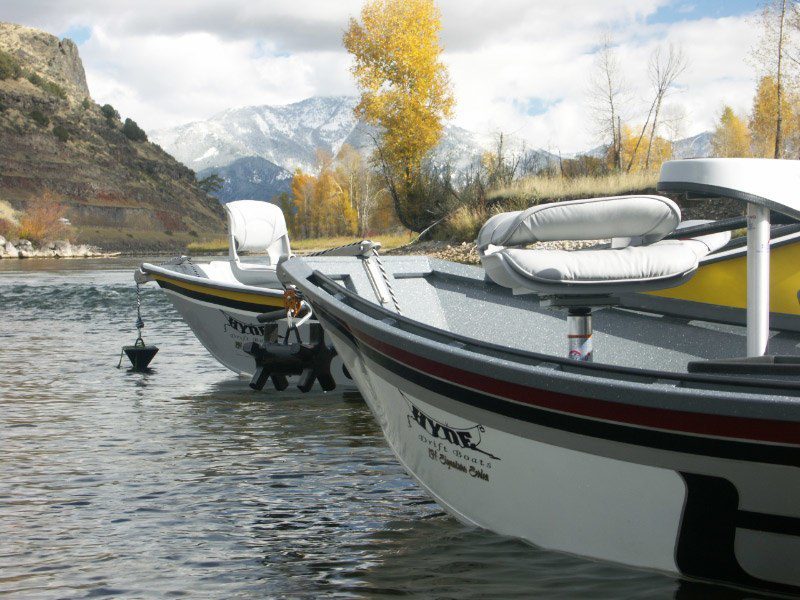
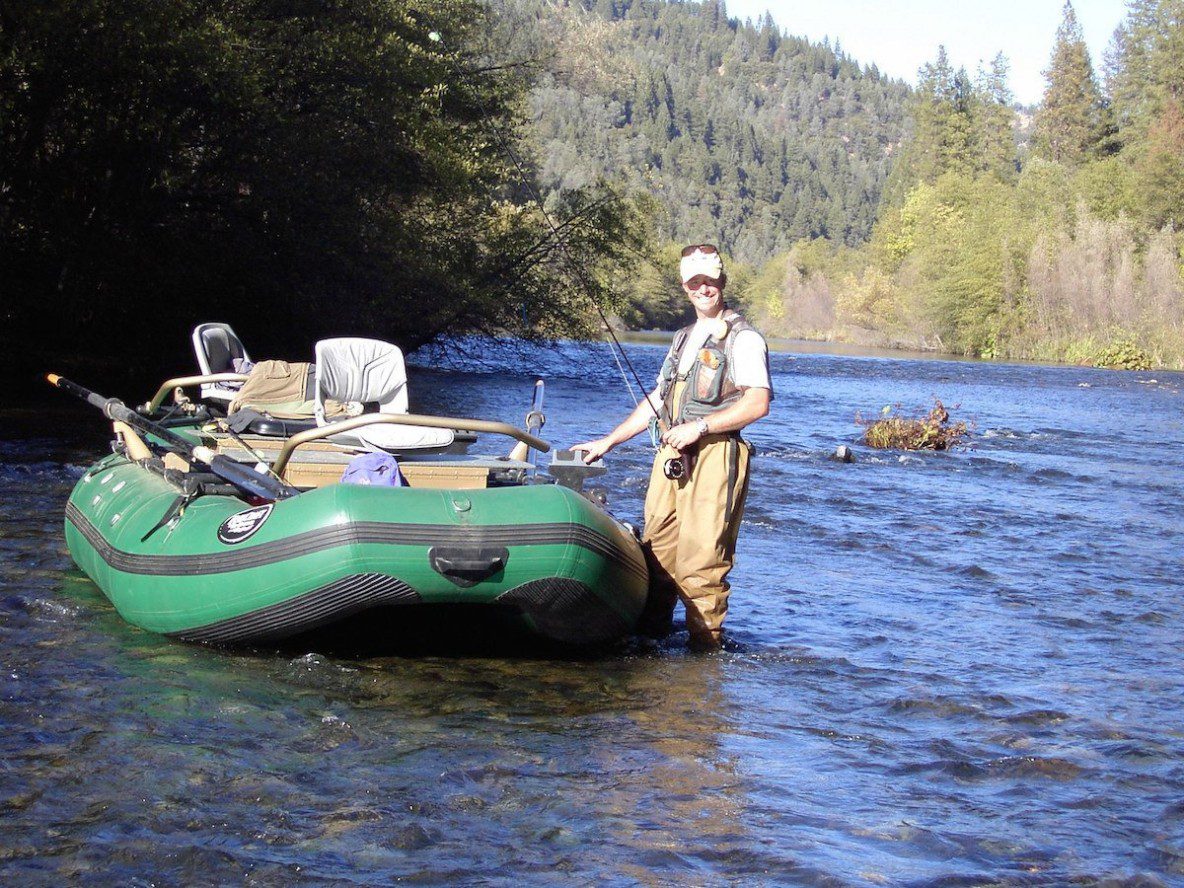
Whether you’re putting your boat in a river at a busy launch ramp, a primitive launch or in a portion of the river during your day, you need to know how to launch the boat properly. Most put-ins or launch sites won’t present many problems, but there are instances where immediate control needs to be executed. An example of this is where the boat stops to scout a log jamb, a big rapid or large boulder garden prior to running it. This is by the way, always a good idea. There may be only one good route and rapids and obstacles show no mercy.

Sometimes pushing off can be tricky, You may find yourself with the current trying to push you into a rock garden, stump or log jamb, This is no time to panic. If you’re floating down the river in a raft or drift boat, (although this first maneuver is much harder in a drift boat for the bow angler) with 2 fisherman and yourself rowing, the main focus of this method is to point the stern at a 30 to 45 degree angle to the current from the very start.

Here’s the way to do it.

Getting Ready
(1) Start with the raft parallel parked on the shore. We are presuming there are two anglers and the rower.
(2) The front and rear angler will hold the boat in place and make sure it is floating and not hung up on the shore or submerged boulders.
(3) The rower will get in the rowers seat with hands on the oars and ready to back row.

Shoving Off
The next steps require good timing by as members of the boat or the boat could potentially spin immediately out of control.

(1) The stern angler pushes the rear of the boat off the shore to about a 30 to 45 degree angle across the current. This puts the boat at the correct ferrying angle so the rowers oar on the bank side can dig into the water.
(2) The stern angler quickly jumps into the rear position and sits down.
(3) Just after the stern angler pushes the boat to the ferrying angle and jumps in, the bow angler pushes the boat straight back and jumps in.

The idea is to push straight back to maintain the 30 to 45 degree ferrying angle. If the bow angler waits too long to push off the stern will swing downstream. With a high sided drift boat with an uplifted bow, the bow angler must be agile enough to climb in the higher front sides.

Putting in When There Are Immediate Hazards
There are serious situations where not only does the boat need to get to the right place, but needs immediate inertia with speed built up by backrowing to miss a quickly upcoming obstacle or reach a necessary route. Establishing the correct;
(1) Entry position
(2) The correct set-up
(3) The right ferrying angle
(4) With enough momentum can be absolutely necessary

In these such serious situations such entries and maneuvers must be orchestrated with care and everyone needs to know their role and carry them out without error. As stated the putting in with the assistance of the two anglers is much easier when performing the angler assisted put-in with a raft. The anglers must be agile and quick to pull this off in critical situations when in a drift boat.

Option #2 – Putting In and Shoving Off by the Oarsman

In a drift boat it’s may be better for the two anglers to get in the boat and to be seated. This is especially true with older and less agile anglers. It will be the rowers responsibility to handle the put in un-assisted.

Getting Ready
(1) The anchor should be raised up by the rear angler prior to moving to the rear seat. The oarsman will be holding the boat stationary.
(2) The two anglers should be in their positions and seated.
(3) The oars should either be in the water facing downstream towards the bow, or facing forward in the boat on the gunwales.>br>

Shoving Off
(1) The rower pushes the boat off at the proper ferrying angle, about 30 degrees
(2) the rower immediately jumps into the boat.
(3) The rower takes his seat, grabs the oars and immediately starts ferrying the boat into the current.

The hardest part of this move is for the rower to jump in and maneuver around the oars and getting to the rowers seat. This is a move that should be practiced.

Putting In at a Crowded Launch or Primitive Put-In.

One suggestion for putting your boat in at a crowded launch ramp or put-in is to walk your boat downstream or in necessary upstream and get away from the crowd. This will allow you to get off in open water and not have to immediately maneuver around a crowd of boats. No one wants to have their boat rammed into at a put-in.

Drift Boat 101: Part Three – Maneuvering by Ferrying

Basic Maneuvering – “Ferrying” the Boat

In Part II we learned how to pivot the boat by using one oar as an anchor or to use both oars to pivot the boat. Here’s how pivoting comes into play when maneuvering the boat down a river and avoiding obstacles or just generally getting around.

All maneuvers of the boat involve ferrying or variations of ferrying the boat. To ferry the boat you point the stern (rear) of the boat right or left to an approximate 30 to 45 degree angle to the current and pull backwards on the oars.

The most important use of the ferrying maneuver is to avoid obstacles. When you ferry the boat you are maneuvering around an obstacle by pivoting and then pointing the bow of the boat at the obstacle and backrowing away from the obstacle.

Another time when ferrying is important is when moving from one side of a river to the other. To accomplish this maneuver you pivot and point the stern (rear) of the boat towards the side of the river you wish to move to at about a 30 to 45 degree angle, backrowing as you slowly move across stream. This will allow you to move to the other side of the river without losing much distance downstream as you cross.

Ferrying around Mid Stream Boulders

When you are floating down rivers you will often encounter mid stream boulders and will need to use the ferrying technique to move around them. This sometimes can be rapid fire and you may need to move left and them immediately right to avoid another one. Ferrying needs to become second nature.

Here is the basic ferrying technique.

(1) Pivot the rear of the boat until is is about at 30 to 45 degree angle to the current.
(2) Point the bow at the boulder or obstacle.
(3) Use backrowing strokes to move away from the boulder or obstacle.
(4) When clear of the boulder pivot the bow of the boat back pointing directly back downstream and make a straight path past the boulder.
(5) Use the same procedure but in the opposite direction, (1) pivot, (2) ferry, and (3) pivot back pointing straight downstream, if you want to move back in the eddy or slack water behind the boulder.

Work on using just enough movement to miss the obstacle by not more than necessary. Make sure you start your move with enough time to get out of harms way.

Here’s a story about how not to do it.

Let me share a story with you. I’ve got a friend, lets just call him Ray for this tale. We were fishing the Madison River in Montana, which is known for it’s riffles and bouldered runs. I was rowing my Fishcraft raft and Ray was rowing his Clackacraft drift boat which has the emblem on it, “Fear No Rock”. I guess that’s why Ray bought it. I was leading the way down the river and as we went down the river you could hear his boat, bang, bang, banging off the rocks. I thought what the heck is going on. Did they flip the boat? I pulled over and waited for him to catch up or pick up swimming anglers. He came down the river with everyone on board and then kept on going. I pulled back into the flow and followed him on down. Ray was rowing down the river and whenever he saw a boulder coming up he would start pushing forward on his oars and madly rowing to attempt to avoid them. As the river pushed him downstream and closer to the rock, he kept trying to get around it and bang, he’d hit the rock. He’d go another 1o0 yards and then all of a sudden, bang, he’d hit another on.

Moral of the story, you can’t outrun a rock, you’ve got to use your ferrying technique to maneuver around it by using your pivot, and backrow to slow down the boat and move laterally to avoid hitting them.

Keep on back backstroking.

Drift Boat 101: Part Two – The Basics

Rowing Technique

Let’s get started with the basic rowing technique. As kids we probably at one time or another found ourselves on a lake in a row bow. To get around you’d be facing the bow (front) and you’d reach forward with your hands as the oar blades went back, dip the oars, and then pull them backwards, which resulted in moving the boat backwards. This is the same technique that will be the basis of rowing either a drift boat, a raft with a rowing frame or a pontoon boat.

You will be pulling on the oars and not pushing forward on the oars. In essence when rowing you will never row with a forward motion with the oars. The only time where pushing forward on the oars (forward rowing) is useful, will be in a situation where you are in slack water or in a run and you want to accelerate the speed to move downstream to get downstream faster. That’s it. You should never row forward to maneuver the boat or to position the boat or to avoid obstacles.

Hand Positioning and Technique

When getting started with rowing a drift boat, having a pair of rowing gloves can come in handy. You will probably be rowing for a good part of the day. It’s not fun to be rowing the next day with blisters.

When you sit down in the rowers seat and grab the oars, your hands will be over the oars in a natural position and you will be looking at the backs of your hands.

You will want to rotate the oars so that the blades of the oars are roughly perpendicular to the waters surface. My Hyde oars have nifty little knobs on the ends to help you feel when they are in the right position.

The Basic Stroke

The basic backward rowing stroke consists of the following actions:

(1) Lift the oars out of the water
(2) Raise the oars a few inches out of the water or higher to clear obstacles or turbulent water.
(3) After lifting the oars out of the water move your hand forward while the oar blades move upstream (towards the stern) to set up the back rowing pull. Dip the oars in quietly. Don’t splash down the oars.
(4) Dip the oars barely under the water and immediately pull backwards and lean into the oars. Bend at your waist.

You want to achieve a shallow, smooth quiet stroke. The tempo should be easy and continuous. Your goal is to slow down the downward progression of the boat. You want to be constantly looking up and ahead for river hazards and obstacles while keeping the boat positioned correctly for the anglers. It is easier to take 3 shorter compact strokes than 2 longer stokes.

Back Rowing

The 1st rule of rowing is that all maneuvering shall be done with back strokes pulling on the oars and not pushing. When an obstacle is encountered and you row forward you only increase the speed and rate of approaching the obstacle. Back rowing must become a firm and good habit.

There are many times when the boat is positioned mid stream and the anglers will be casting towards the slower water along the bank. As the rower, your job is to slow down the progression of the boat downstream to enable the boat to keep pace with the slower water along shore. This requires a constant rhythm of back rowing. The rowing pace is about one stroke every three seconds. A good steady pace needs to become second nature.

Anticipation

When rowing a drift boat, a raft with a rowing frame or a pontoon boat it’s all in the planning. You must learn to anticipate your next move like;

  • Where should the boat be positioned to optimize the fishing conditions?
  • Are there boulders, rocks, snags, hazards or obstacles coming up?
  • How should I avoid them?
  • How much effort and speed will be required to avoid the hazard, obstacle or boulder?
  • When do I need to start my maneuver?
  • When encountering an island or side channel, which way should I go and where should I position the boat prior to heading that way?
  • Should I alert the people in the boat to put on their PDFs?

Pivoting

As we have discussed so far in Part II, all maneuvering of a drift boat, raft with a rowing frame or pontoon boat should be done with back strokes. The next habit to develop is that of pointing the stern (rear) of the boat in the direction that you want to go. This is done through oar manipulation. It is called “pivoting”. After the boat is pivoted, with the stern pointed in the direction that you want to go, pull back with both of the oars at the same time and move the boat at 45 degree angle to the current. Lets look at how you actually do the pivoting.

There are two ways to pivot a boat. The first way is performed by moving one oar while the other is stationary in the water as a brake. The brake side is the side that you want to pivot towards. You then take several backstrokes with other oar. This will swing the stern around in the direction that you want it to be pointed, which is the direction you want to go. It will just take a few strokes to change direction. You will want to start pivoting using this method and getting comfortable with it.

Once you’ve got the pivoting with one oar as a brake mastered, you will want to work on the second method which is done by pulling back with one oar and pushing forward with the other. This method speeds up the pivoting process. It becomes important when you have to make quick moves working your way through a bouldered run and maneuvering around them. These areas require quick decisions and instant action.

Pivoting moves need to become second nature and as a rower your job is to move the boat deliberately and smoothly. Making a quick pivot can result in an angler loosing balance even when standing in a knee brace. Anglers positioned in the rear of the boat have been know to be throw out of the boat by a quick pivot. It is the rowers job to make smooth pivots which enable the anglers to continue fishing without hardly realizing you have just pivoted the boat. If a hard pivot must be accomplished to avoid an obstacle in is the rowers job to tell the anglers to get ready for the move and to hold on or even sit down. Communication is key!

The best thing to do when first getting into a rowing seat is to find a calm stretch of water and practice the pivoting and ferrying moves. Visualize a boulder in the middle of the river and making a pivot to the left, back row away from it, pivot back straight, pivot back right, back row back behind the imaginary boulder and pivot back straight. Do this over and over again using the pivot with the brake and then with the pivot using both oars.

Practice makes perfect.

Drift Boat 101: Part One – Getting Started with Gear

As you may have heard we had a death on the Lower Yuba last month when an older gentleman was knocked out of a drift boat rowed by his son and did not recover. I discussed this with friends and have decided to post some articles about the art and safety regarding rowing a drift boat, raft or pontoon boat down a river. So with that premise here’s;

With more and more people floating our rivers in drift boats, rafts and pontoon boats it is important to emphasize the education and practice to row boats safely.

Safety and Gear

When getting together the gear to outfit a drift boat there is more to it than rods, reels and flies. Lets go over a list of safety gear.

Life Vests

MNS_Fishing_PDFThere should be life vests ready and available for all people in the boat.

I’ll put the life vests on the seats so they are accessible. When scouting a run and a difficult or technical run is anticipated.

Put them on! They will be of not much use if they’re stowed away or not on.

Here’s a PFD available from NRS, their Chinook Fishing PFD.

Chinook Fishing PFD

Throw Bag

NRS_throw_bagYou should have a throw bag which are available at NRS which can be used if you ever have someone overboard and then can throw a line to haul them to safety.

Essential on big water Class III and above. Not really necessary on class II or lower.

Here’s a NRS Throw bag.

NRS Throw Bag

First Aid Kit

NRS_Medical_KitAs with any outdoor activity having a well stocked first aid kit is a very good idea.

Here’s a link to a HRS first aid kit in a waterproof bag.

HRS First Aid Kit

Sunscreen

Simms_SunscreenI try to always have sunscreen available for myself for whoever else might need it.

Simms make a good one, but just about any good brand will work.


Rowers Gloves

MTS_rowers_glovesA good pair of rowers gloves comes in handy if you’re not on the river
rowing everyday and can prevent blisters and sores on your hands.

Here’s a link to NRS Paddlers Gloves.

NRS Paddlers Gloves

Sunglasses

Guides_ChoiceEveryone in the boat should have sunglasses. This is a safety issue as much as a tool to help spot fish. A hook in the eye is no one’s idea of a fun day.

I like the Action Optics Guides Choice. http://www.SmithOptics.com


Break Down Oar

Breakdown_OarCarlisle Oars sells a breakdown oar that can be strapped under a rowers seat in a drift boat or along the tube on a full sized raft or cat.

You don’t want to be halfway down a river and lose an oar.

Get One! You can purchase on at Hyde if need one.

Carlisle Spare 2pc Oar

The next article, Driftboat 101 – Basic Rowing Technique, will get started with the basic rowing technique and then on to making “Ferrying Maneuvers”.

Checking Water Temperatures to Locate Stillwater Trout

Checking Water Temperatures to Locate Stillwater Trout

Thermometer
I spend a lot of my fishing time out of a drift boat on a Northern California tailwater. I don’t really pay much attention to water temperatures. The water being released from a dam stays pretty consistent. It’s more about the flows. With stillwaters its a whole different story. It’s all about water temperatures

By checking water temperatures we can eliminate non productive water. All fish have a preferred temperature range where they are most active. For most lakes that have rainbow trout, it is recommended to use a scale of 55F to 65F. When temperatures are in this range the trout’s metabolism will be at its peak and it should be feeding. Keep in mind that as water temperature increase, the trout’s ability to hold oxygen decreases. As a result trout avoid high temperatures in excess of their comfort zone and will move to areas of the lake that have cooler temperatures, typically deeper or areas that have springs or inlet streams

With this information we may deduct that one of the most valuable tools in a stillwater kit bag is a thermometer. When this is attached to a cord you can probe and test water temperatures in different areas of a lake and different depths.This will help you locate trout.

You should start testing water temperatures in the shallow food rich areas around 10 feet deep. Lower the thermometer into the water and note the surface temperature. If it falls within the trout’s comfort zone chances are trout will be in the shallower littoral zone. Should the temperature exceed the range the shallow reaches will probably be avoided. Move out to deeper water between 10 and 20 feet and lower the thermometer into the depths. Allow it to adjust and then quickly raise it to determine the temperature. Continue eliminating high temperature water to find trout.

Rainbow Trout

Rainbow TroutRainbow Trout prefer temperatures in the range of 55 to 60 degrees F. Although they will tolerate temperatures as high as 65 degrees F.

Brown Trout

Brown TroutBrown Trout can be found in water with much warmer temperatures in the range of 60 to 70 degrees F.

Brook Trout

Brook TroutBrook Trout prefer cooler temperatures in the range of 52 to 56 degrees F.

Cutthroat Trout

Cutthroat TroutCutthroat Trout prefer temperatures in the range of 55 to 65 degrees F.


During the heat of summer the combination of bright light and high water temperatures usually drives trout into the deeper reaches, often over 15 feet deep.

When fishing in waters where the water temperatures are in the upper comfort zone zone for the trout species caught, be aware that if you hook up and play a trout hard it may be hard for it to recover as a result of lactic acid build up and the reduced dissolved oxygen. This may likely be a lethal for the trout.

When temperatures get this high it may be best to go fish a tailwater instead.

Indicator Options for Stillwaters

When fishing stillwaters either in the shallows or weed pockets, in depths over 10 feet and up to 25 feet integrating indicator tactics can pay big dividends. Phil Rowley showed me the many benefits of using indicators at his Stillwater School. Here’s some Stillwater Indicator tips.

By integrating Indicators into your stillwater strategy you will be able to:

Avoids snags and fouling
Work shallow water depths
Work weed pockets and above debris and weeds
Give you the ability to surgically control depth and retrieve speed

Indicator Versatility

Using indicators for fishing stillwaters is not just for chironomid fishing. Of course one of the best uses for “Slip Indicators” is for presenting chironomid larva and pupa patterns near the bottom. It is probably the most effective method.

But you can also use indicators for;

Water boatman, scuds, leeches and smolts

When are he best times to to use indicators

For Fishing on the bottom – For presenting Chironomid patterns close to the bottom

When Fish are holding at a certain level – Use when fish are sensitive to depth and holding at a particular level.

In the shallows – Ideal for fishing shallow water depths above or between the weeds.

Fishing Deep – You can use “Slip” or “Quick Release” indicators to fish to depths of 20 feet.

Above the Weeds – Allows you to surgically fish right above weed beds and into weed pockets.

For Kids – Great for kids or inexperienced anglers.

Fishing with 2 Rods – Good for fishing alone and using two rods when legal.

Types and Uses of Different Types of Indicators for Stillwaters

Yarn Indicators

yarn_indicatorYarn indicators are best when the indicator is set at 12’ or less. A yarn indicator is set in a fixed position, so the 12 foot depth is based upon how far you can reach to land the fish in your landing net standing in a boat, probably not more than 12 feet. If fishing from a pontoon boat or a float tube you must set your yarn indicator shorter. They are good for crystal clear water. In crystal clear water use a white indicator.

Dry Fly as Indicator

Dry_dropper_riggIf you’re a stream fisherman you’re probably well aware of using Dry Dropper techniques. This can also pay off when fishing stillwaters. You can imitate two stages of an insect. Using a dry fly as an indicator is excellent when trout are in the top third of the water column. In the wind the larger the waves the larger the fly. You’ll want to keep the fly spacing in stillwaters 3’ to 5’ apart depending where the fish are feeding.

As a note, I was fishing a crystal clear lake in Montana a few weeks ago and I was sight fishing to big cruising rainbows. They were not interested in my sinking line presentations. I rigged up with a size 16 Parachute Adams and trailed a black and red Chironomid pupa 4 feet below it. I was able to fool a number of finicky rainbows with the dry dropper rigg. It works!

To rigg a Dry Dropper leader, use a 9’ to 12’ tapered leader with an added 2’ to 3’ of tippet. Keep your tippet a minimum of 2’ long. If it get’s shorter clip it off and tie another 3’ tippet on.

Corkies

Corkies are available in solid or bi-color and are typically held in place by toothpicks. The Bi-color ones are great for signaling tangles. They are an old standard but still effective.

Quick Release Indicators or Slip Indicators

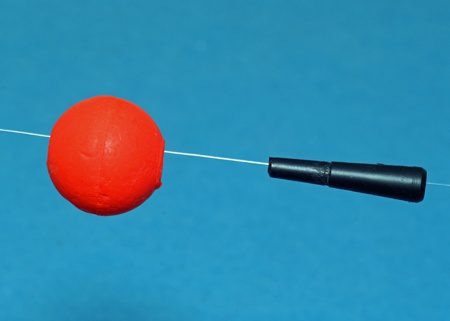
Slip_IndicatorProbably the most versatile and popular indicators for stillwaters are “Slip” or “Quick Release” indicators. They allows the stillwater angler to probe deep water up to 20 and even 25 feet deep. The indicators are available in many sizes and shapes. They use a peg that releases when you have a fish on and when the indicator reaches your rod tip the peg pops loose and the indicator and peg slides towards the fish. You’ll want to use a swivel or tippet ring to make sure you don’t lose the peg if the fly breaks off. A swivel will hold everything safely in place.
Indicator Leaders

indicator_leader_RIO

Hybrid Leader – Use a standard tapered monofilament leader.

Rio Indicator Leaders – Try a tapered “Rio Indicator Leader”. This is an excellent leader for chironomid fishing or whenever you need the flies to sink fast. The 10 ft tapered leader has a short orange butt section for fishing “Naked”. It’s Level tippet does not slow down the sink rate. The heavy butt section makes casting the indicator easy

How to Rigg an Indicator Leader

(a) Add a 24″ butt section to your fly line using .025 or .030 material with a nail knit. Use a Fast-Tie Tool.

(b) Add a 10 foot Rio tapered Indicator leader using a blood knot, 3x or 4x

(c) Add Fluorocarbon tippet to complete leader with a Triple Surgeon’s knot

General Indicator Notes

Carry all Types – Carry all types in your “Stillwater Kit Bag”.

Carry different colors – People see colors differently

Fish may be sensitive to Color – The mood of the fish may dictate size, type and color

When fish are being sensitive – use a tapered or a small round indicator

Rio Indicator Lines – Use a fly line like a Rio Indicator Line or a WF Rio Grande Line

Summary

Add a collection of indicators to your stillwater kit bag and you will take your stillwater game to another level

Slip or Quick Release Indicators

One of the preferred tactics of many stillwater experts is the use of a slow almost painful retrieve especially when using chironomid patterns. This technique is often done “Naked”, which is without and indicator. In order to fool the largest and most challenging fish you must sometimes retrieve the fly at a maddening creeping pace. This pace is often referred to as static. Sort of like watching paint dry.

When targeting greater depths, 10′ to 20′ many of these anglers have used indicators. The technique evolved using corkie indicators set to depth and fixed in place with a toothpick to enable the angler to present flies right on the bottom where they need to be. In the past toothpicks have been the most popular method of pegging the indicator to the appropriate depth. The only problem was that when a fish was hooked, the anglers risked loosing the fish by having to grab the line during the battle, using their teeth to remove the toothpick. The indicator slid free for the balance of the fight. With the newer evolution of “Slip” or “Quick Release” indicators, the battle of removing the toothpick is now over.

What has come to be the technique of choice for fishing water over 10 feet and up to 20 feet is the use of “Slip” or “Quick Release” Indicators. The Slip Indicator uses a concept so simple it makes you wonder “What took so long”. The system uses an over sized peg that the leader is fed through and then pegged to the “Corkie” style indicator. The Slip Indicator system allows a fly fisher to fish deeper waters with confidence.

In actual practice, to rigg the indicator you thread the indicator and peg onto your leader, gather and pinch the leader and then push the leader against itself to create a loop of approximately 1″ in diameter, just slightly shorter than the peg sticking out of the indicator. The peg wants to be pointed to the fly not the fly line. Push the peg with firmly but not too tight into the indicator.

When the strike comes, lift the rod and the tension between the angler and fish releases the loop and the indicator is free to slide. The cumbersome method of removing a tooth pick is gone.

Slip Indicator Tips

  • When fishing with slip indicators the technique is almost static. It is primarily “Heave it and Leave It”.
  • If the choice is to move the indicator at all, use a pinch strip, holding your hands together and moving the indicator an inch at a time, very slowly.
  • You can use use a 6″ to 12″ strip with a steady and very slow motion.
  • OK, how slow is slow? When fishing indicators, imagine you are sitting on a keg of dynamite. When retrieving, if you see any ripple of water moving at the indicator or from the floating line, you blow yourself up. That slow!
  • When fishing leeches under indicator, try casting straight up wind and hand twist retrieve it as the wind pushes it back towards you. You are really just gathering line not trying to move the flies.
  • Use wind drifting to fish the indicator rigg.

(a) Anchor with fore and aft anchors parallel to the wind.
(b) Cast across wind at a 90 degree angle to your anchored position
(c) Let the wind move your indicator along with the wind

  • Remember insects can’t swim against the wind they drift with the current.
  • Start with your flies 1′ to 2′ off the bottom. Then work up the water column until you find willing fish. 6″ can make a difference especially with rainbow trout.
  • Focus on water that is less than 20′ deep

How do you Determine Depth

How do you determine the depth of the water you’re fishing in. You can get a rough idea from using your electronics, fish finder with a depth sounder, to get a ball park. But to get it right, you need to test the depth. Anchor your boat fore and aft and test the depth where you plan to fish.

(a) Set your indicator to the approximate depth as determined by your depth finder
(b) Attach weight to your point fly (bottom fly).
(c) You can attach your hemostats to the fly or a weighted sinker
(d) Lower the fly with the weight slowly until it gently hits the bottom.
(e) Check to see how far the indicator is under the surface of the water.
(f) This will be the depth of your point fly off the bottom when you remove the hemostats or weight.
(g) Adjust the indicator accordingly to the desired depth to be fished. You want to start at 1′ to 2′ off the bottom or the weeds.

Use “Balanced Flies”

Balanced_LeechesTry using balanced flies. Tie up some balanced flies, like a “Balanced Leech”. This style of tying incorporates a tungsten bead mounted on a common straight pin that extends from the hook shank in front of the eye. The tungsten beads work best as their dense mass maintains an overall compact fly.
The horizontal balanced flies take on the natural path and profile of most aquatic food sources. Their pitching and jigging action is tough for fish to resist. Try tying up a balanced leech or scud and see how they work.

You can get tying instructions for “Balanced Leeches” at Phil Rowley’s – www.flycraftangling.com. His site is full of stillwater fishing tips and techniques. Check it out!

The “Balanced Leech” photo is courtesy of Fly Craft Angling.

How do you Rigg your Leader for Slip Indicators

  • Start with tying a stiff piece of 24″ monofilament to the fly line with a nail knot.
  • Tie on a tapered leader, 9′ to 15′, 3x or 4x with a blood knot. If the budget allows fluorocarbon leaders are ideal. Especially when targeting water about 10′ deep.
  • With the butt section and leader in place simply add fluorocarbon tippet to reach the overall finished leader length.
  • Add a swivel or tippet ring at the end of your extended tippet to insure you won’t lose the peg from your indicator in the case of a break off.
  • Install the swivel 18″ to 24″ above the 1st fly.
  • You can tie a dropper right off the swivel or tippet ring.

How do you determine the length of the tippet?

A simple rule of thumb to follow is the overall leader length should be 25% longer than the water is deep. For example, working a chironomid pupa in 15 feet of water would require a 19-foot leader.

How to you Rigg the actual Slip Indicator

  • Slip indicators come in various sizes, colors and shapes. Carry many options.
  • The common denominator is that they all have a peg to fix the indicator in place.
  • This peg comes loose when a fish takes your fly and tightens the line. The peg and the indicator drops to a swivel or tippet ring placed above your flies.
  • Carry swivels and/or tippet rings to keep from losing your indicator and mainly the peg. The indicator would float to the surface if you broke off, the peg won’t
  • When installing the indicator the peg faces the flies.
  • You can tie a dropper off the swivel or the tippet ring as an option.
  • Use a dropper tags to attach the droppers. Keep them shorter than 10″.
  • Maintain a spacing of about 3 feet between your flies.

Casting Indicators

  • Keep casts short, 30′ to 35′ is ideal
  • Use a roll cast combined with roll cast pickup to recast your rigg.
  • Use small indicators to keep yourself honest and keep the indicators close enough (30′ to 35″.
  • When casting, open up your loops, break your wrist slightly. Apply smooth power. Don’t punch your casts.
  • Make sure your backcasts lay out behind your completely.
  • Try integrating a “Belgian Cast”.
  • Shoot your line to the target.
  • Watch for distinct plops of your indicator and the flies laying out to make sure you’re not tangled.

Summary

Add “Slip” or “Quick Release” Indicators to your stillwater strategies and you will take your stillwater game to a new level.

You can purchase Phil Rowley’s Slip Indicators at his website – www.flycraftangling.com

Double Anchoring a Pontoon Boat

Scotty_Anchor_CleatI had the unfortunate experience of fishing an Idaho Lake a few weeks ago when the wind started blowing and gusting like crazy. I was fishing in my pontoon boat and I was soon swinging and swaying with the wind. Trying to cast and present my flies where I wanted to was downright impossible. I essentially gave up. There were some other people fishing out of double anchored boats and they were fishing comfortably and having no problem at all. They were catching fish and I was trying to just stay in one place. Luckily the wind died down and I was able to continue fishing. I’ve learned my lesson.
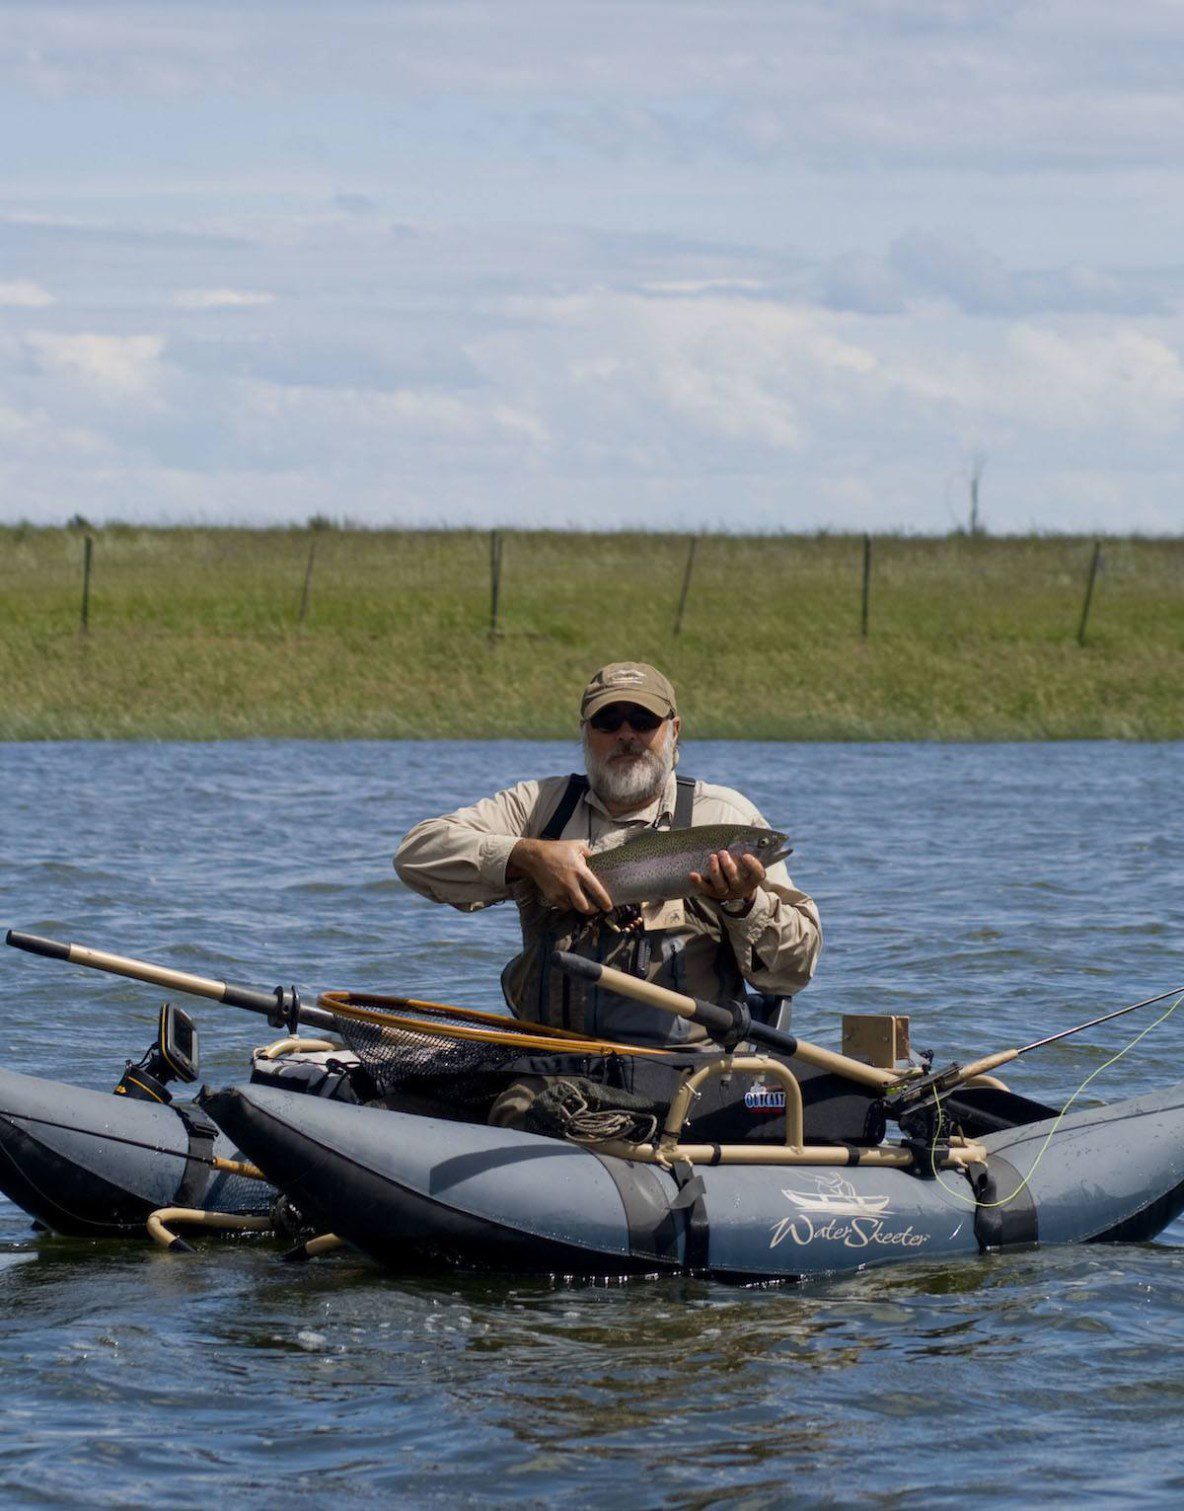
My older “Water Skeeter” pontoon boat and most other pontoon boats come with a rear anchor system which is helpful with controlling stillwater presentations. Until the wind really starts blowing that is! I’ve found that whether you are fishing out of a pontoon boat, float tube or boat, line control during the retrieve is critical. When the wind starts blowing rear anchored pontoon boats spin and sway around the rear anchor, which really challenge your presentation control and for me, my patience.

To solve this problem I purchased a “Scotty” Anchor cleat with an additional rail mount accessory. By adding a second anchor cleat to the front frame of my pontoon boat, it has really helped the spinning and and swaying when the wind comes up. I had to fuzz with my rail mount a bit, but it works really well. I mounted my forward anchor on the left frame rail, just before the right angle turn for the foot peg. My theory was that as a right handed caster this placement keeps my fly line away from the anchor cleat. So far this has worked out well.
I am using a 5 lb. pyramid anchor that I had laying around and it seems to hold well enough. It definitely has kept the swaying around down. I’ve found that if I first set rear anchor I can then lower the front anchor and I’m good to go. My frustration with the wind has literally blown away. I can now concentrate on the fishing.

The sad part is that I’d already purchased the “Scotty” Anchor cleat before I’d gone fishing on that lake in Idaho, I just hadn’t mounted it yet.

Lesson Learned!

Stillwater Kit Bag

When fly fishing there are some things we can control and some things we can not. We have no control over our weather or our physical environment such as water temperature, barometric pressure and wind. Our fly fishing equipment is controllable. If we as fly fishers focus on what can be controlled, we will be better prepared for what we cannot. If our equipment is in order and we have everything we need, we will be consistently more successful.

On any given day it’s what you have in your arsenal as opposed to what you left at home that can make a big difference. A well stocked and organized kit bag can make this difference. A kit bag is your stillwater nerve center that should be ready to go at a moments notice.

The Stillwater Kit Bag

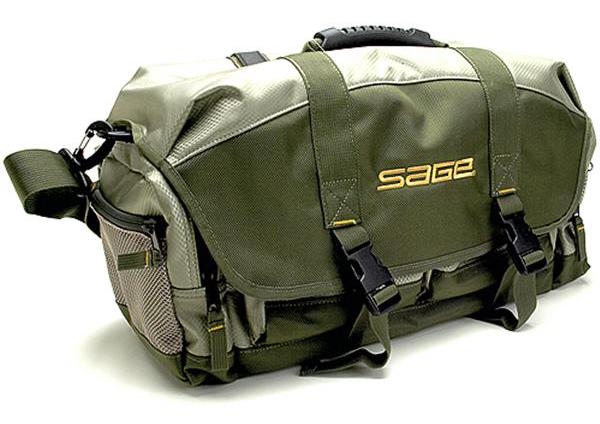
sage-dxl-bagThe Sage DXL Bag
Let’s take a look at the kit bag itself and what you should consider when getting one. It must be portable and have enough compartments, pockets and sections to house a wide array of gear. This allows you to sort and store equipment in a logical and easy to find fashion. You must develop a system and have discipline to make sure items are put back in their place. Take the time to put everything back in its place after each day of fishing. This is not always easy. I’m often tired at the end of a day’s fishing and just want to get on the road and home as soon as possible. Its a case of “just do it”.

Look for a bag with good strong zipper systems. Be wary of bags that have pockets that zip around 90 degree corners. Look for weatherproof kit bags with lots of compartments. A shoulder strap is another handy feature. Water resistance is paramount, especially if the kit bag is also home to camera equipment. Most quality gear bags are waterproof or some come with waterproof covers in the event of a damp day.

A very good bag is the Sage DXL. It is large enough to contain most everything that a stillwater angler should carry. This is especially true if you are fishing out of a boat or pram. Fishpond also makes some great bags as well as Cabelas.

Pocket Bags For Pontoon Boats

XL Splashproof pocketThe Outcast XL Splashproof Pocket Bag
I have a pontoon boat that I fish from. If you are a pontoon boat guy or gal, Outcast makes large pontoon boat pocket bags that can hold most if not everything you will need on a day’s outing. You may need to be a little more selective with the amount of extra spools and lines you carry, but you can usually rig a storage box on the rack behind the seat to carry extra items.

The Items you Need to Carry

There are six main categories to consider when outfitting a gear bag:

(1) Reel Spools & Lines
(2) Leaders and Tippet
(3) Accessories
(4) Fly Boxes
(5) Safety and Comfort
(6) Miscellaneous Items.

Category #1 – Fly Rods, Reels, and Lines

444-clearcamoIt is recommended to carry a minimum of two fly rods, so you will need at least two good quality reels that will be rigged and ready to go.

I usually have one rigged with a floating line and one with a clear camo.

The number of extra spools and lines you need to carry in your kit bag depends upon time of the year, the physical make up of the lake, and the number of fly rods you intend to carry. In a boat you can carry more. In a float tube or pontoon boat typically two.

The lines you should carry or have available are:

(1) A Weight Forward Floating Line
(2) A Clear Camo Intermediate Line
(3) An Additional WF Floating Line – A second floating line can be particularly handy during a chironomid emergence. Where regulations allow, an angler can work two floating lines, one with and indicator and one without.
(4) A Traditional Intermediate Line – Depending upon the manufacture these sink slower than most clear intermediates which tend to sink at a type 2 rate. Intermediates are the perfect choice for creeping scuds, leeches or damsel nymphs over shoals or along shorelines.
(5) A Clear Tip Line – The Clear Tip Line is also an excellent addition. This line is ideal for deep, long leader nymphing, as well as working flies through the shallows. Clear tip lines offer a different retrieve angle that can sometimes make all the difference.
(6) A Type 3 Full Sinking Line – The Type III line will cover most of your deeper presentations
(7) A Type 6 Full Sinking Line – The type 6 line is ideal for working deep reaches, stripping leeches and dragon patterns over the shoals or crawling buoyant flies over sunken weeds and debris.

Category #2 – Leaders and Tippet

trout-7-ft-ldrNever leave home without a good selection of leaders and tippet. Leaders and tippet are the critical connection between the fly and the angler and are sometimes overlooked. Depending upon leader set up preference, carry butt material for long leader setups or braided loops.

You will use both types of leader connections depending on the line and presentation. For example, for a floating line, long leader system begin with 2-3 feet of .025″to .030″ butt section and add a tapered leader and tippet for length.

Always keep your kit bag stocked with a good selection of tapered leaders from 9 to 15 feet. These are items that can get overlooked. Who wants to get to the lake and then find out they forgot to restock their leaders. Make it a habit to restock.

Tippet sizes should vary from 3X down through 6X depending upon conditions. As a general rule the clearer the water the finer the leader and tippet. Stock your kit bag with tippet spools that match leader strength in both fluorocarbon and co-polymer. Use fluorocarbon for clear conditions and sunk flies. Co-polymer tippet is fine for stained waters and dry fly presentations as it does not drag flies beneath the surface. Fluorocarbon will sink which is not a good idea for dry fly presentations.

Category #3 – Accessories

accessories-stillwaterThere are many accessories that a well stocked kit bag should have inside.

  • Thermometers – Are a critical tool as water temperature dictates fish activity and feeding as well as insect emergence’s. Knowing the preferred temperature range of rainbow trout (55F-65F) allows fly fishers to eliminate non productive water. Using a traditional thermometer on a string, anglers can vertically probe the water and locate fish.
  • Nippers – When it comes to nippers have good pair or even better two. Purchase a key floaty and attach your nippers to it. This helps when they accidentally flip over the side in the water. It’s also a good idea to place your nippers on a retractor and attaching them on the shirt or jacket.
  • Hemostats or forceps are necessary to crimp barbs, remove hooks from fish and friends, or even set indicator depth. If possible look for a pair with cutters.
  • Bell Sinker – A bell sinker works for fine tuning indicator depth. Attach a beg sinker to your deepest fly, attach your slip indicator to the approximate depth and slowly lower the bell sinker until it hits bottom. Check the depth of the slip indicator under the surface which will tell you how deep your flies will be floating and adjust accordingly.
  • Clothes Peg/Clip – To transfer a fly line using a clothes peg, reel the leader back to the reel. Clamp on the forceps between the stripping guide and the reel preventing the leader from snaking back through the guides. Cut the leader and replace the spool. Reattach the leader to the new line and you are ready to go. No more adventures standing in a boat feeding line through rod guides.
  • Knot Tying Tool – Knot tyers for forming nail knots are handy if attaching leaders or butt sections to a fly line is a preferred set up.
  • Indictors – Carry a good selection of sizes, types and colors. It is recommended to carry, slip Indicators, corkies and yarn indictors. Yarn indicators cast easily and work well in shallow clear waters where the splat and look of a corky may spook wary trout.
  • Shot – When using floating lines in windy conditions weight is often needed to aid presentation. Include a selection of split shot or non-toxic putty.
  • Swivels – Barrel swivels are another option. A small bag of #12-#16 swivels should suffice.
  • Floatant, Sinkant, Line Cleaner – Include floatant, leader sinkant and line cleaner. Use both paste and powder floatant. Apply paste floatant prior to casting. Dry fly powders are a desiccant that quickly dry sunk or trout slobbered flies. Sinkant degreases leaders and tippet, a necessary step when fishing dry flies on calm clear days.
  • Throat Pump – Throat pumps are a valuable accessory but should only be used on fish larger than 14 inches and if the angler is comfortable doing so.
  • Vials or White tray – This allows for clear inspection of the contents guiding fly selection and determining feeding depth. Bottom dwelling contents would suggest presenting patterns just above the weeds. Conversely, emergers and adults would indicate fish are cruising near the surface.

Category #4 – Fly Boxes

flyboxes-stillwaterAfter years of experimenting I prefer smaller fly boxes that store easily in the kit bag. Use a label maker to identify the contents so time isn’t wasted looking for a favorite pattern. Clear compartmentalized boxes are ideal for dry flies as they tend not to squash hackle.

Choose a sorting system that makes sense, group them by food type; chironomids, caddis and mayflies, leeches, dragons and damsels, scuds, boatman and backswimmers and dry flies.


Category #5 – Safety and Comfort Items

sunglasses-stillwaterSafety and comfort items typically have nothing directly to do with fishing but everything with an enjoyable day on the water.

  • Sunglasses – In addition to providing eye protection from errant flies polarized sunglasses are critical to penetrating the sun’s glare and seeing into the water. Underwater obstructions, weed beds, drop offs, migrating invertebrates and cruising fish are easily seen. Keep the glasses in a protective case when not in use and make a regular habit of cleaning the lens.
  • Sunscreen and lip balm are recommended kit bag additions, especially for the fair skinned.
  • Band-Aids manage small nicks and cuts as well as providing fore finger relief from line burns caused by fleeing trout.
  • A small bottle of Aspirin, Advil or Tylenol handles any dehydration headaches that pop up.
  • A roll of toilet paper in a Ziploc bag is a welcome sight for obvious reasons.
  • Keep a small towel in the bag for wiping wet hands. On cool days letting hands dry through evaporation leads to frigid digits in short order.

Category #6 – Miscellaneous Items

camera-stillwater

  • Camera – Never leave the shore without a camera. A DSLR or small point and shoot system adds to the experience providing lasting memories.
  • Include a pen and note pad in a plastic bag to record detailed notes of the day’s experiences and observations. This habit reduces the learning curve as important items are not forgotten. Keep track of everything, including weather patterns, diet analysis, hatches, successful patterns, structure types, leader set ups, presentation techniques and any general observations. This information is key to a fly fishers growth and development.
  • Fishing license.

Summary

Having confidence that you have everything you need when your are going fishing is very important especially when a fly shop is hours away. having what you need lets you concentrate on what you’ve journeyed for, fishing..

A well thought out and stocked kit bag plays a pivotal role in becoming a successful stillwater angler. This often goes as an unrecognized role fly fishing stillwaters. Knowing your kit bag it is complete and stocked allows you to focus on the other variables on the stillwaters. There are enough uncontrollable aspects to a day’s fishing. Get organized, and get out there ad have some fun!