Casting Tip: Water Load & Cast to the Bank

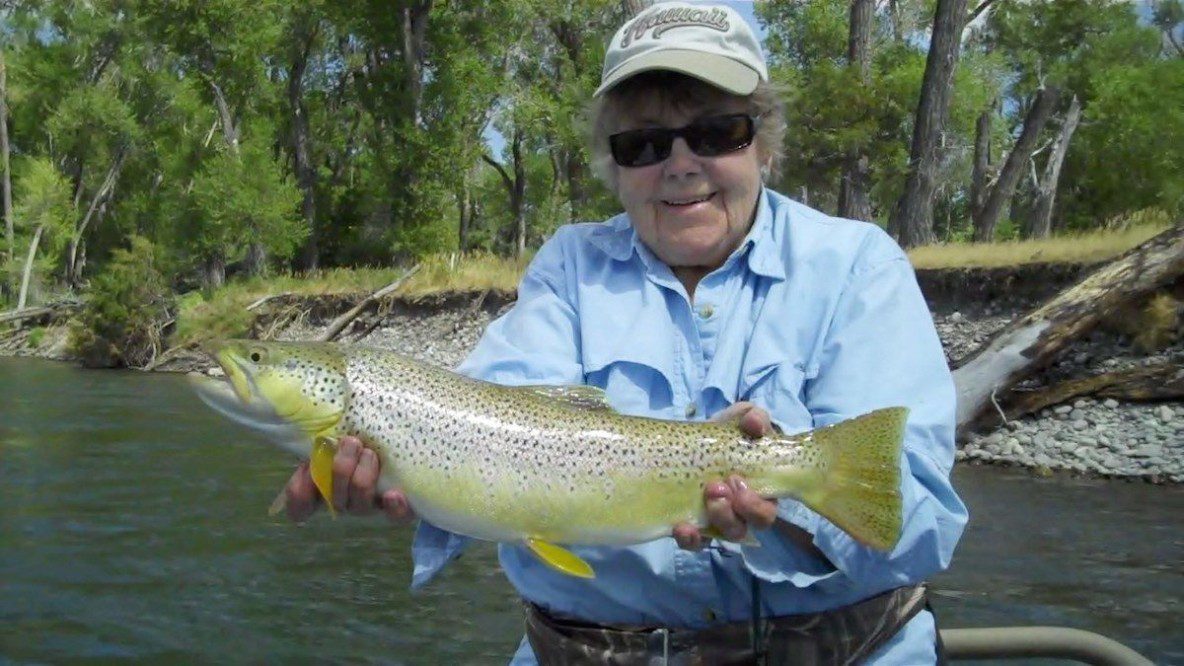
This summer I spent quite a few days on the Yellowstone River in Montana rowing my Fishcraft raft and helping my family to learn the technique of casting streamers and dry flies to the bank, looking for the brown trout or the occasional rainbow that hang right next to shore, tight to the bank hoping to get a grab on the fly. As much as I tried to get my son Zack and my Mom and Dad to get the flies right on the bank, their flies would mostly come up short. When they got it to the bank, hold on!

Typically, 6 inches from the bank would get a strike when 24″ from the bank was mostly unproductive . Reach the bank and success would follow. When casting to the bank you just can’t worry about hanging up and loosing flies, you’ve just got to go for it. If you take the risk you may end up with a trophy in your hands.

Here’s a tip to help overcome this problem when you’re drifting down the river in a drift boat and pounding the banks.

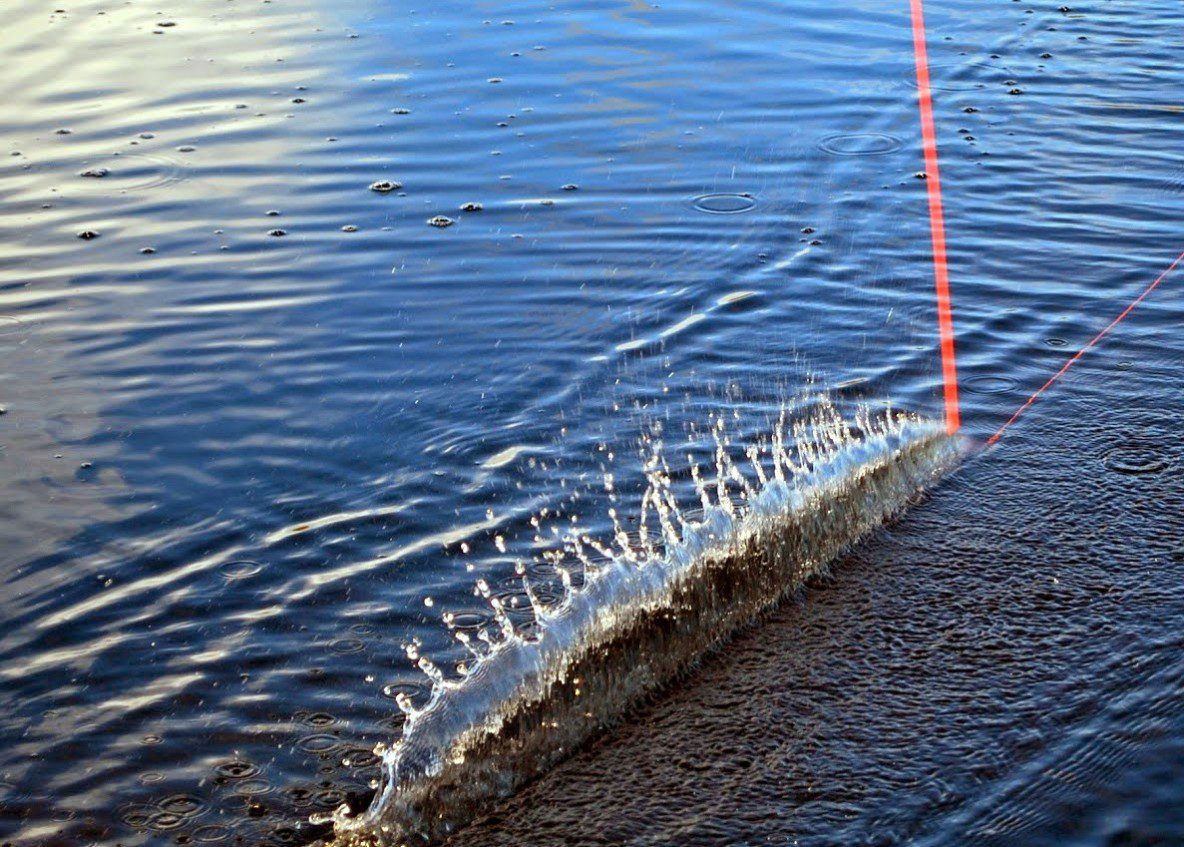
(1)Start your cast with a tight line with the rod tip pointed low towards the river surface. Use the waters surface tension and frictional forces to load the rod.

(2) Smoothly accelerate the backcast and stop your rod at the 11:00 position.

(3) Load the rod on the backcast and apply smooth power forward to a stop, looking at the target on the bank through your thumb.

(4) Drift through and deliver the fly bank to the bank.

If you make the mistake of starting the cast with your rod tip high and straight in the air, there less loading, no initial rod flex, which ultimately shortens the cast stroke and usually requires unnecessary false casting.

When you load the rod from the waters surface, you give your cast a head start.Point to Remember, Start it low, and let it go!

That’s it!

The Double Spey Cast – Spey Casting 101

The “Double Spey” is a two directional cast. One in which the fly will anchor on the downstream side of the caster. Therefore this cast provides a level of safety when you encounter an downstream wind. This will prevent you from wearing an “Streamer” as an earring. This is one of the easier spey cast to master. It can be done at a very slow pace. With that said , the cast must maintain a tempo that progressively accelerates into the forward stop position. 


The ability to form the “Double Spey” at a slower pace makes this cast ideal for sink tips. It is just a good overall cast.


For a right handed caster the “Double Spey” is one of the primary “River Right” casts.


For a right handed caster the “Reverse Double Spey” can be utilized from “River Left” and is thrown over your left, off shoulder or “Cack-handed”.


Here’s a You Tube video of the late and great casting instructor extraordinaire, Bill Lowe, as to how to make a “Double Spey Cast”. 


When and why to consider using the “Double Spey” 

  • Downstream Wind – D for Downstream remember “Double Spey”
  • When you are fishing “River Right”
  • When using heavy sink tips 
  • When using bulky flies
  • Makes little disturbance on the water
  • Minimizes line positioning and maximizes fishing time

Situations when to use a Double Spey Cast for a Right Handed Caster

  • Double Spey From “River Right” with an downstream wind over your strong shoulder (Right Handed)


  • Reverse Double Spey from “River Left” with an downstream wind over your off-shoulder (Kackhanded)

Fundamentals of the Double Spey Cast


The “Double Spey” is broken down into two phases which makes it a two-dimensional cast. The first portion is a line re-positioning move from the dangle straight downstream followed by a “Switch Cast” to cast the line in an across the river direction. 


How to perform the Double Spey Cast

  • For a right handed caster the cast starts with the angler on “River Right”.
  • The line on the dangle directly downstream.
  • Face your shoulders in the direction of the forward cast and to the target area.
  • Start the cast with the rod tip at low to the waters surface With the right hand in the top position on the rod.
  • The cast stars with a “lift and sweep” movement. This is a mild version of the “Shotgun Lift” as described in the “Single Spey”. cast. The lift is done by raising the rod tip vertically from near the surface of the water to about chest high.
  • As the rod rises to the top of the lift in a continuous motion, sweep the rod with a low rotating swing from downstream to upstream, driving the loop of line upstream.
  • Use the rod but to drive the line positions to attain a smooth thrust.
  • The beginning of the sweep is where the maximum effort or thrust is applied to lift the line from the water. The amount of effort and/or height of the lift may vary with the length and type of line being cast.
  • The sweep is done with the rod held at a low angle with the tip about shoulder height, driving the belly of the line upstream.
  • The task is to sweep the line upstream far enough so the fly anchors just below the path of the intended final forward “Switch Cast”.
  • The end of the fly line should be about one rod length downriver and slightly forward of the casters position.
  • As the fly sets to the anchor point from the initial “lift an sweep” move, the rod is redirected in a smooth transition downstream, folding the line over itself.
  • The rod returning downstream drives the line to the point where it crosses the path of the forward cast. In a smooth continuous motion the rod rotates to a new oath, in an inclining plane drawing back behind to 180 degrees from the direction of the forward cast and the target area.
  • It is very important that the “D”loop is in straight alignment to the forward cast.
  • The rod “Circles Up” forming an aerial oval which brings the rod to the “Key” position for the forward cast.
  • From the “Key” position accelerate smoothly forward as the passes vertical and thrust a flick into the stop. 
  • The loop forms and zips out well above the water, just as in “Switch Cast”

Summary

The “Double Spey” is one of the basic casts that you need in your arsenal of casts and you will find uses for it in many fishing situations.

The Switch Cast – Spey Casting 101

The “Switch Cast” is also referred to as the “Forward Spey Cast” is is like an energized Roll Cast.

Unlike the Roll Cast, the line never stops moving and is in constant tension. Like a Roll Cast, a “D” loop of line forms behind the rod tip, and the forward loop rolls out above the surface of the water.

This is a single directional cast which is also a non-change of direction cast just like the “Roll Cast”, but is much more dynamic. It may have limited use in actual fishing situations, but as an instructional cast it is very important. The “Switch Cast” is the essence of a Spey Cast. It has the basic elements of a cast.

  • The Lift
  • The Anchor
  • The “D” loop
  • And The Forward Cast.

After learning the “Switch Cast” the final delivery of any spey-type cast is mastered. Once you have mastered the “Switch Cast”, when learning a new cast the line positioning moves can be the sole focus. All spey casts end with the elements of the “Switch Cast”.

Anchor Types and Positioning

The Switch Cast positions or anchors the fly to the side of the caster to form an elongated “D” or “V” shaped back loop. The size, shape or depth of the back loop may change depending on;

  •  Choice of the style of casting, Skagit, Traditional, or Underhand
  • The type of cast you select to throw
  • Situation, lots of room, moderate room or little room behind you to set up the cast.

The Switch cast is valuable to practice mastering the various “D” and “V” loop sizes and shapes. Practice them all.

The Fundamentals of the Switch Cast – Three Steps


The Lift and Sweep

  • The “Switch Cast” starts with the rod pointed at the line on the water and then continues with a lift with thrust that smoothly and  progressively builds to the top of the lift which is to nose height or about to the 9:30 or 10:00 position.
  • The thrust becomes stronger as the rod smoothly swings into the dip at the start of the sweep, think of a shallow dish.
  • At the start of the lift, the rise of the rod and the dip that follows work together to enhance the strength of the lifting thrust.
  • The rise of the rod followed by the dip work as opposing forces.
  • The lift and dip must be smoothly coordinated and regulated so as not to disrupt the cast.
  • An efficient cast will minimize the height of the lift and flatten the dip into a streamlined movement.
  • The dip or start of the sweep is directed and directs the momentum to the desired anchor point.
  • During a spey cast it is critical not to misdirect the path of the dip. The path needs to be controlled. Smooth movements are best.
  • Developing and regulating the amount of power or effort applied is very important.
  • The correct applied power and tempo allows the “D” loop to be placed properly and in the desired position.

.

Placing the Anchor Point

  • As a general rule the anchor point will be off to the side and slightly ahead of your position at about a rod’s length away.
  • Place the rod in your right hand (for right handers) and extend and point the rod ahead, then tilt the rod tip about six to eight feet to the side. This is the target for your anchor.
  • The goal is to have the anchor point closely aligned with and parallel to the target line of the forward cast.
  • When setting up the anchor placement if it is skewed or misaligned the line will not clear smooth;y and may cause many errors.
  • Work on getting the “Lift and Set” formed properly and you will then have better control of your anchor placement.

Developing a Proper “D” Loop

  • The “D” Loop is an aerial loop of line that forms behind the rod tip.
  • The “D” Loop, with the grip of the line anchored to the water surface is the resistance that loads the rod to propel the cast.
  • It is desired to have an oval “D” Loop or a “V” loop that is energized and maintains constant tension.
  • A “D” Loop forms with an incline sweep of the rod that drives the back loop well above the water and will help increase the dynamics of the cast.
  • The “D” Loop should be positioned 180 degrees from the target
  • When transitioning from the “lift and set” the rod drives and sweeps back and “Circles Up” to form the oval shaped “D” loop behind the rod tip.
  • The “Circle Up” is an upward circular rotation of the rod to redirect the line to a new path to travel.
  • The “Circle Up” motion is vital to keeping constant tension in the cast.
  • The rod “Circles Up” to the “Key Position” where the rod accelerates smoothly forward towards the target

The Forward Cast

  • From the “Key Position” the forward cast starts
  • The lower driving hand pulls inwards towards the waist.
  • The upper hand extends forward as the elbow lowers and bends open
  • Stop the top hand at the 10:30 position
  • Use the upper hand a the “pivot” to become the “fulcrum”
  • This will “Flip the Tip” to allow the cast to fly to the target

Fly Casting Tip: Hit the Wall

Hit the Wall

This one’s for me, being a carpenter for most of my life.

Think about a hammer and a nail when loading and unloading your rod. Imagine yourself between two walls, with nails on both. Using a two headed hammer, pretend to smack the nails, first on the back cast, and again when the hand comes forward. Each time you hit the wall the hammer stops cold. This is the stop motion that in fly casting causes the rod to unload briskly.

If you stop cold, the line will shoot forward powerfully, with a tight loop. If you don’t stop hard and slush your rod through the stop, the line loses speed and distance and the loop will open up, making it susceptible to wind. To get full power from your rod, hit the nail on the head.

So, I’ve got a new mantra. “Nail on head, nail on head. . .”

Fly Casting Tip: Don’t Get Cocky

Don’t get Cocky

Your Wrist is what we’re talking about!

If you’re casting and you hear the noise of your line slapping the water behind you, it is often because your wrist is cocking too far back. As it relates to fly casting, the wrist versus arm equation is a difficult balance to master, let alone explain. Remember the arm is the engine, the wrist is the steering wheel. This pertains to aiming the cast, not powering the cast. Continuing the comparison to driving, if you let your wrist power your cast you will crash.

A few simple fixes to help capture the right feel are;

(a) Get a large rubber band, wrap it around your casting wrist, and then insert the rod butt inside that rubber band when you practice on the lawn. If you find that the rubber band is flexing too much, odds are you are breaking your wrist too far.

(b) If you are wearing a long sleeve shirt, tuck the reel butt inside your cuff.

This can really sharpen up and help you regain your stroke.

Swinging Flies with a Trout Rod

When trout fishing, the environment is an ever-changing world and versatility in fishing methods is advantageous to the success of an angler.

What the Heck are Salmon Redds, Anyway?

I think it’s probably a good idea to attempt to clear up what are redds and what is really going on in our rivers with the salmon, steelhead and trout. What should we be looking out for and what should we be aware of? Let’s talk about what we should be looking out for and how best to approach the river when fishing.

What can we do to help educate the general fly fishing populous?

What is a redd?

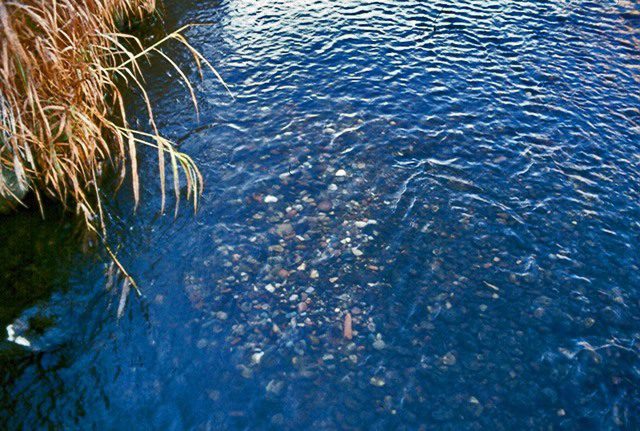
salmoneggsWhen we think of redds we usually think, “salmon redd”. A salmon redd is a depression created by the upstroke of the female salmon’s body and tail, sucking up the river bottom gravel and using the river current to drift it downstream. The female salmon digs a number of redds, depositing a few hundred eggs in each during the one or two days she is spawning. Each redd is located immediately upstream from the last to allow the current to deposit drifting gravel on top of and covering the previous redd. Redds are very obvious in the stream, visible by clean exposed white gravel. Salmon spawn between 2000 and 6000 eggs, depending upon species. Different sized gravel is used as redd locations by each species. Steelhead and rainbow trout often use the salmon redds to spawn in the spring.

When Wading the River

Concentrate angling activity in areas of the river where spawning salmon, steelhead and trout may be less prevalent. Avoid areas of shallow water where you observe concentrations of spawning salmon and their redds (gravel “nests”). Salmon redds are generally between 1-2 square meters in size and may be recognized by the appearance of clean looking gravel which is loose and soft underfoot, as opposed to firmer and darker gravel nearby. Steelhead and trout will often use the same areas as the salmon to spawn. When newly formed, redds will appear to be a depression with a mound of gravel on the downstream side. Eggs will be buried in the mound of gravel and for several meters downstream. Walking on the redds may kill buried eggs, so please avoid them entirely.

Fact or Fiction

Does wading in and around the redds impact egg mortality?

Fact – A study done in Montana (published 1993 edition of Trout Unlimited)on the effects of wading around on trout spawning nests, indicated that just one step on a nest of eggs could immediately cause up to 47% mortality on the eggs. As the eggs that were smashed decay, the spores from the decaying eggs colonize on the good eggs and kill them as well. This is like having a rotten apple in the barrel where eventually all of the apples in the barrel will also rot.

Are boats are harmful to redds.

Fact – Fishermen who drag their anchor at times to slow a drifting boat will destroy any egg nest the anchor is dragged through. Engaging in such activities is like planting a vegetable garden and then walking on and driving tractors all over the planted ground.

Fact – The passage of drift boats, rafts and canoes, even sliding over the redds, is unlikely to be harmful.

It’s OK to wade out in the river on the ridges in the Redd areas.

Fiction – If you attempt wading into an area where the redds are located, walking on top the ridges can damage sensitive eggs. Walking on the top of the redds compresses the gravel and cuts off availability of enough oxygen . This could unwittingly kill thousands of eggs.

What can we do about it?

alevin_small1As anglers we can educate friends and family, we can work on ways to educate anglers we meet on the stream when fishing. With kind words and not an attitude.
We see on catch basin drains where it says something to the effect of “Warning, Drains To Fish Habitats.” Why not put signs at trail heads or on the local maps to warn of potential damage, something like “Sensitive Habitat Areas – Salmon Redds” or whatever, to start getting the point across.

It would be a good idea to make up a few laminated sheets and stick them on small sign posts at popular get on locations describing the sensitive locations on that particular river.

How about putting together an informational pamphlet?

How about having a talk at local fly fishing clubs?

I believe it will take a grass roots effort to make a difference.

Any one interested in helping out or have any other ideas?
Fishing Edges

Here in Northern California, usually in January and February, is when we get the bulk of our rain.